
An Ever-Shifting Landscape
It was midday and 95 degrees with scattered thunderstorms forecasted throughout the afternoon. The conditions were perfect for a lot to go wrong.

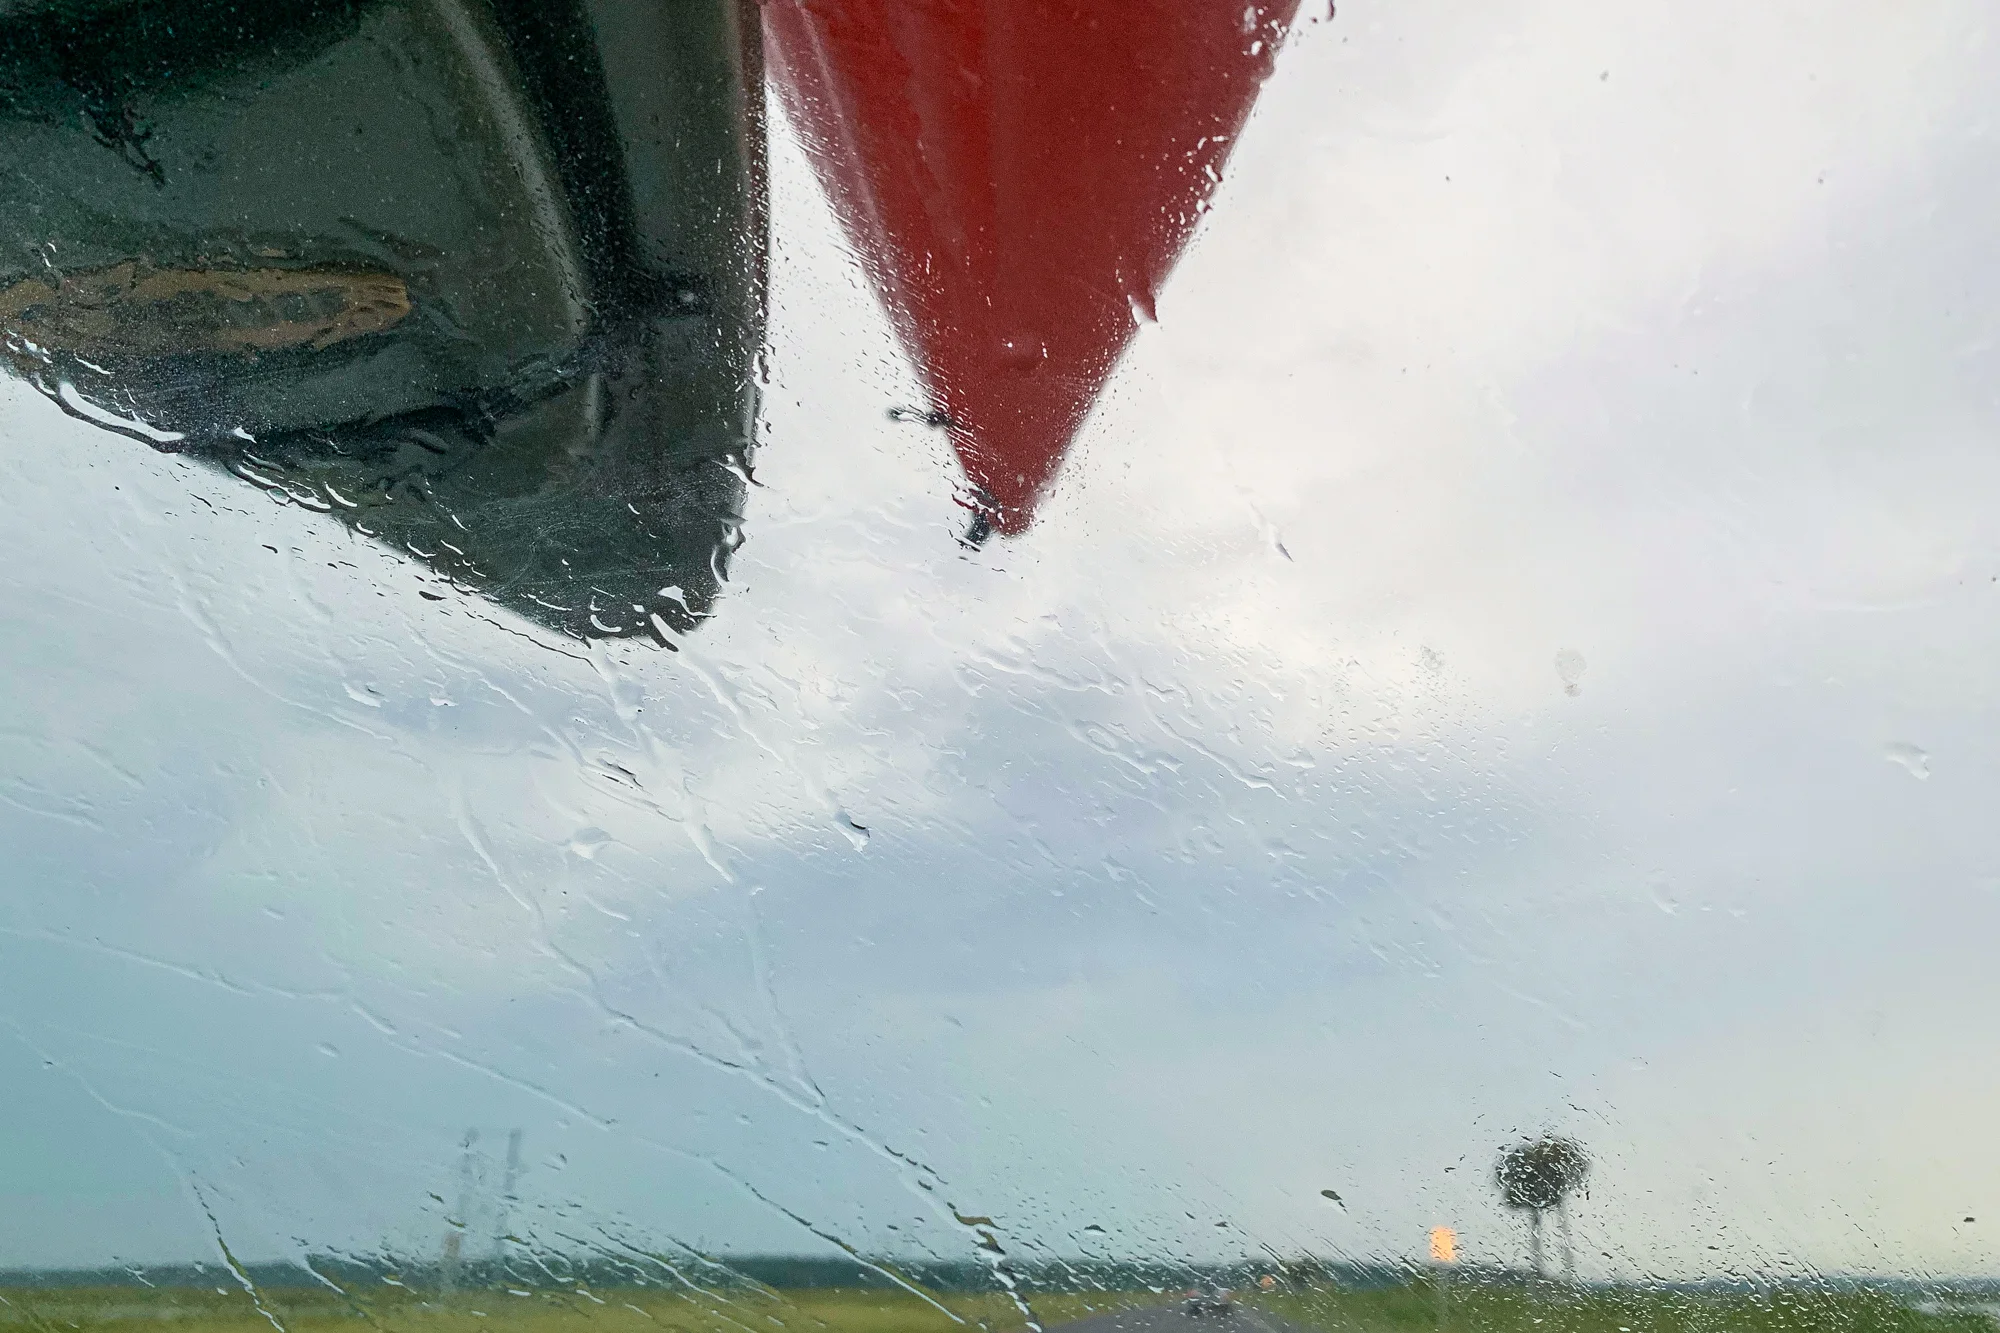
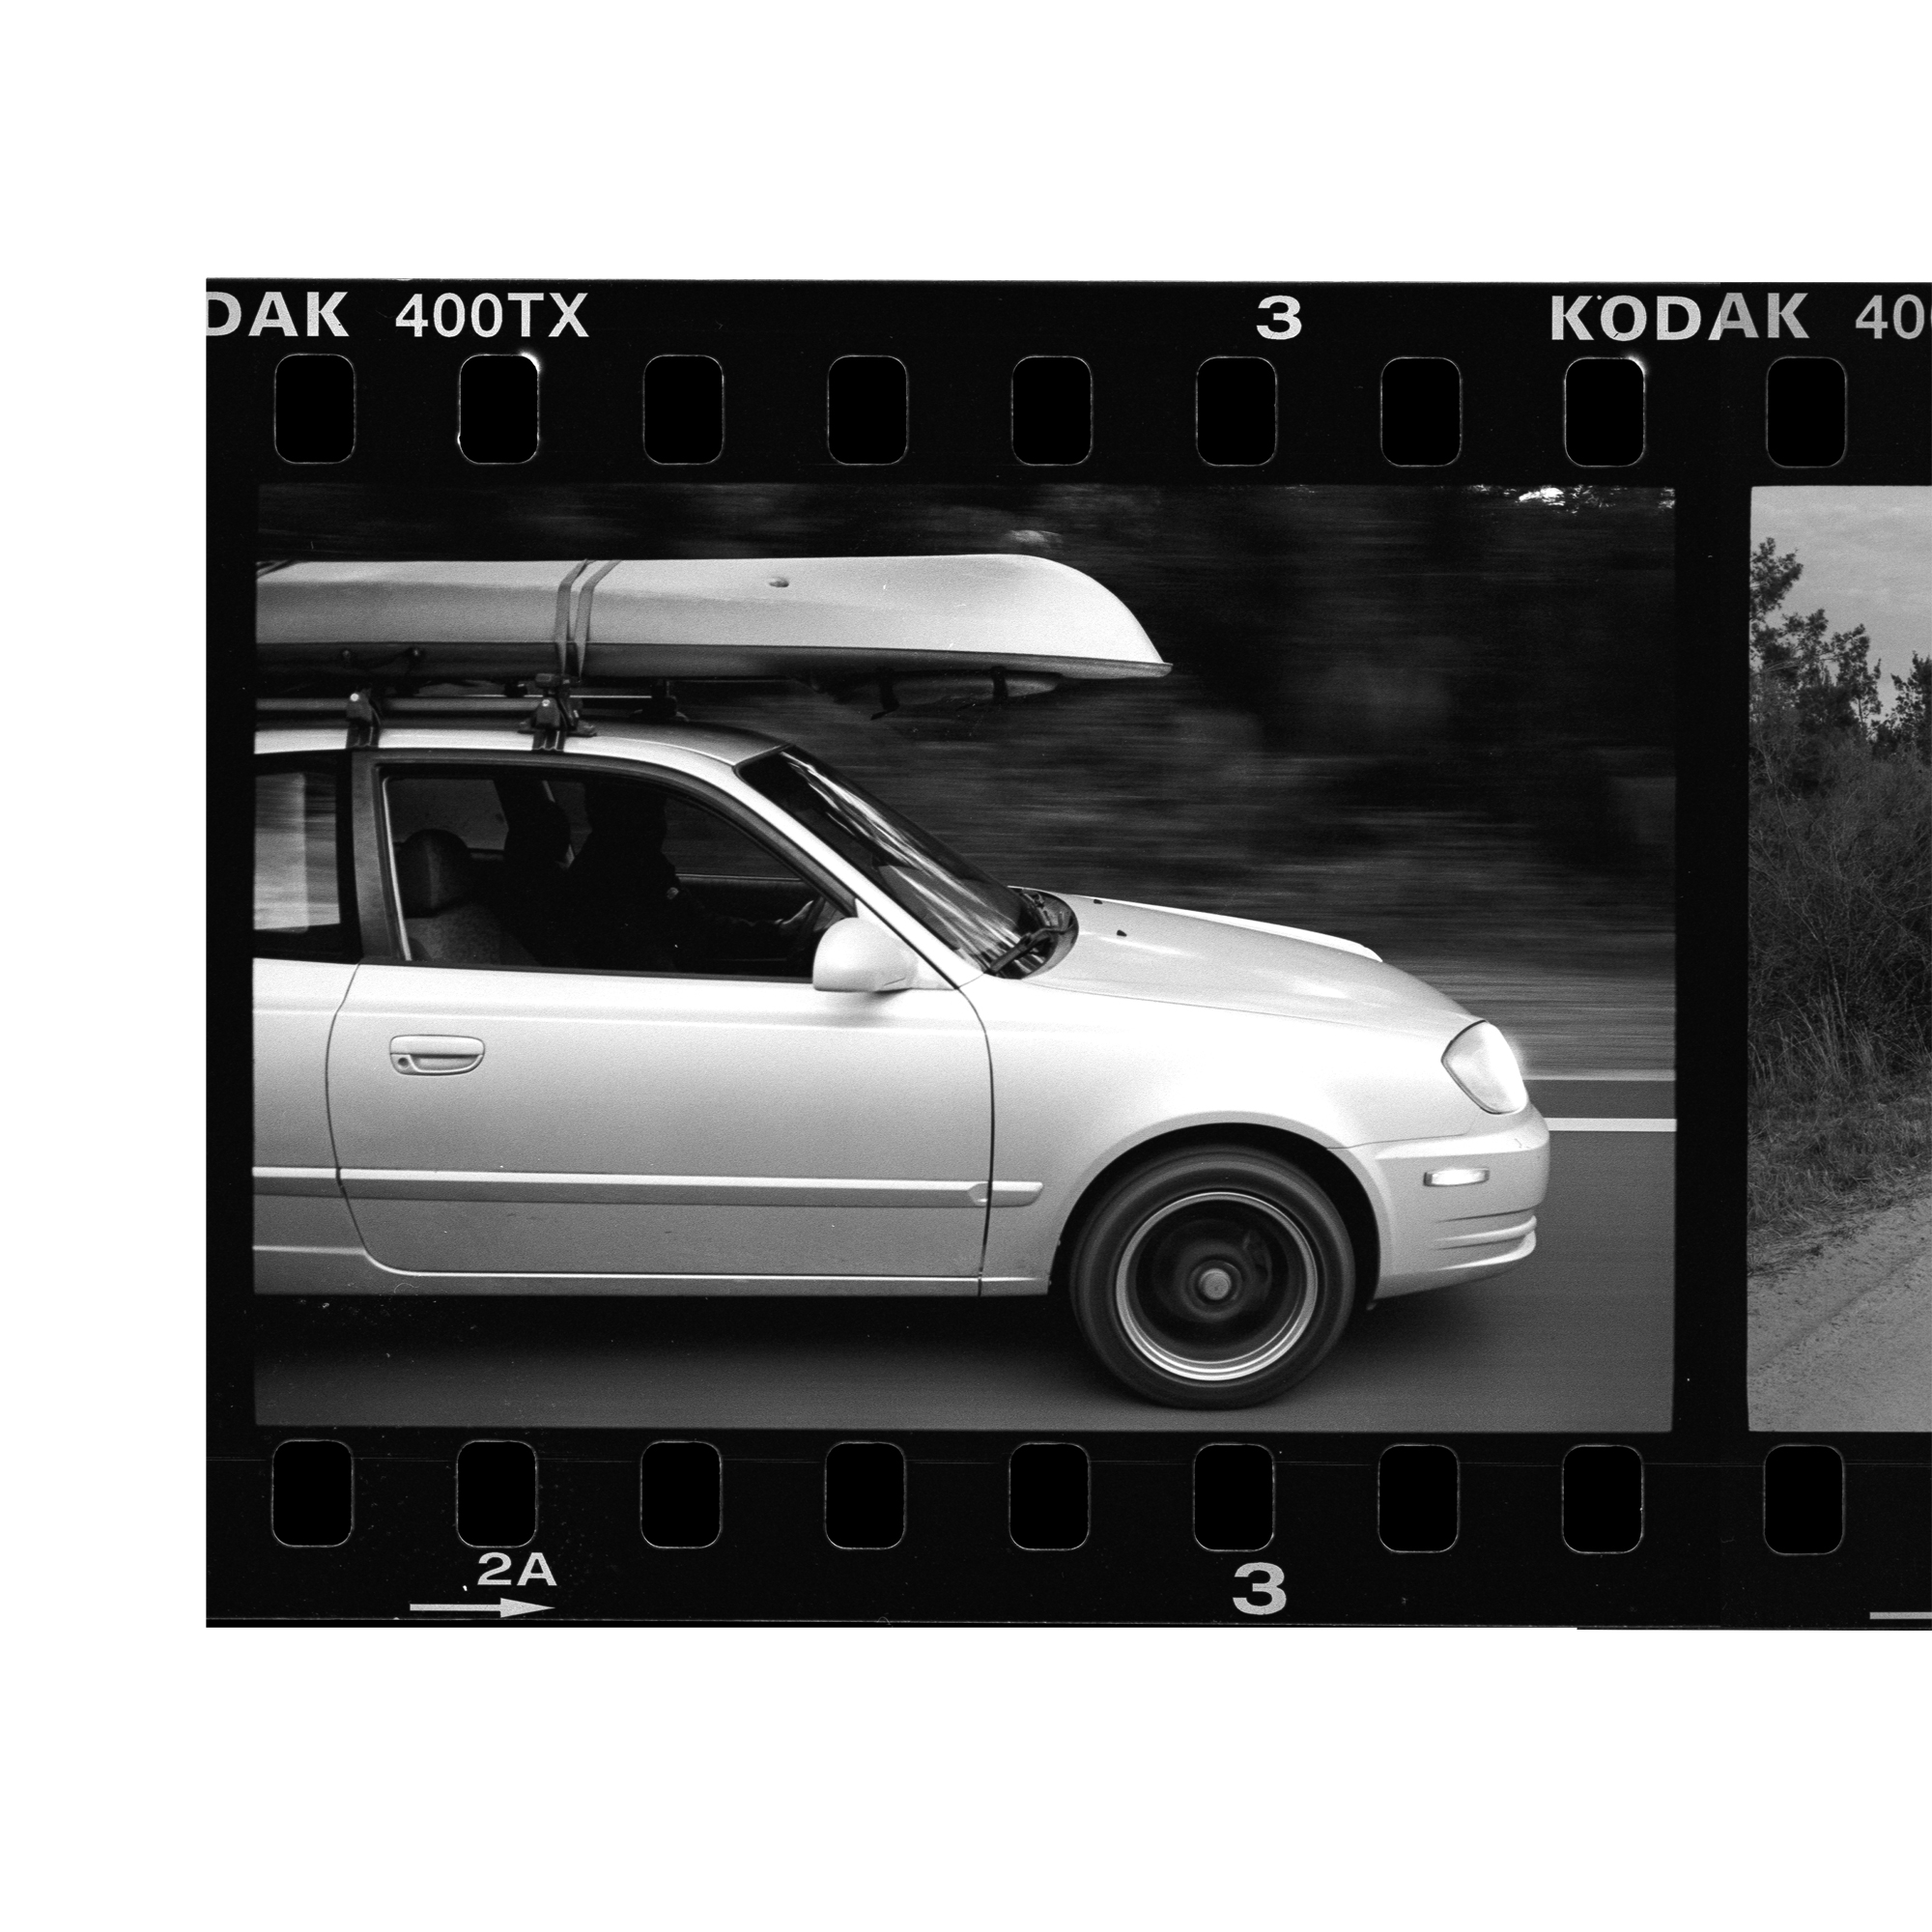
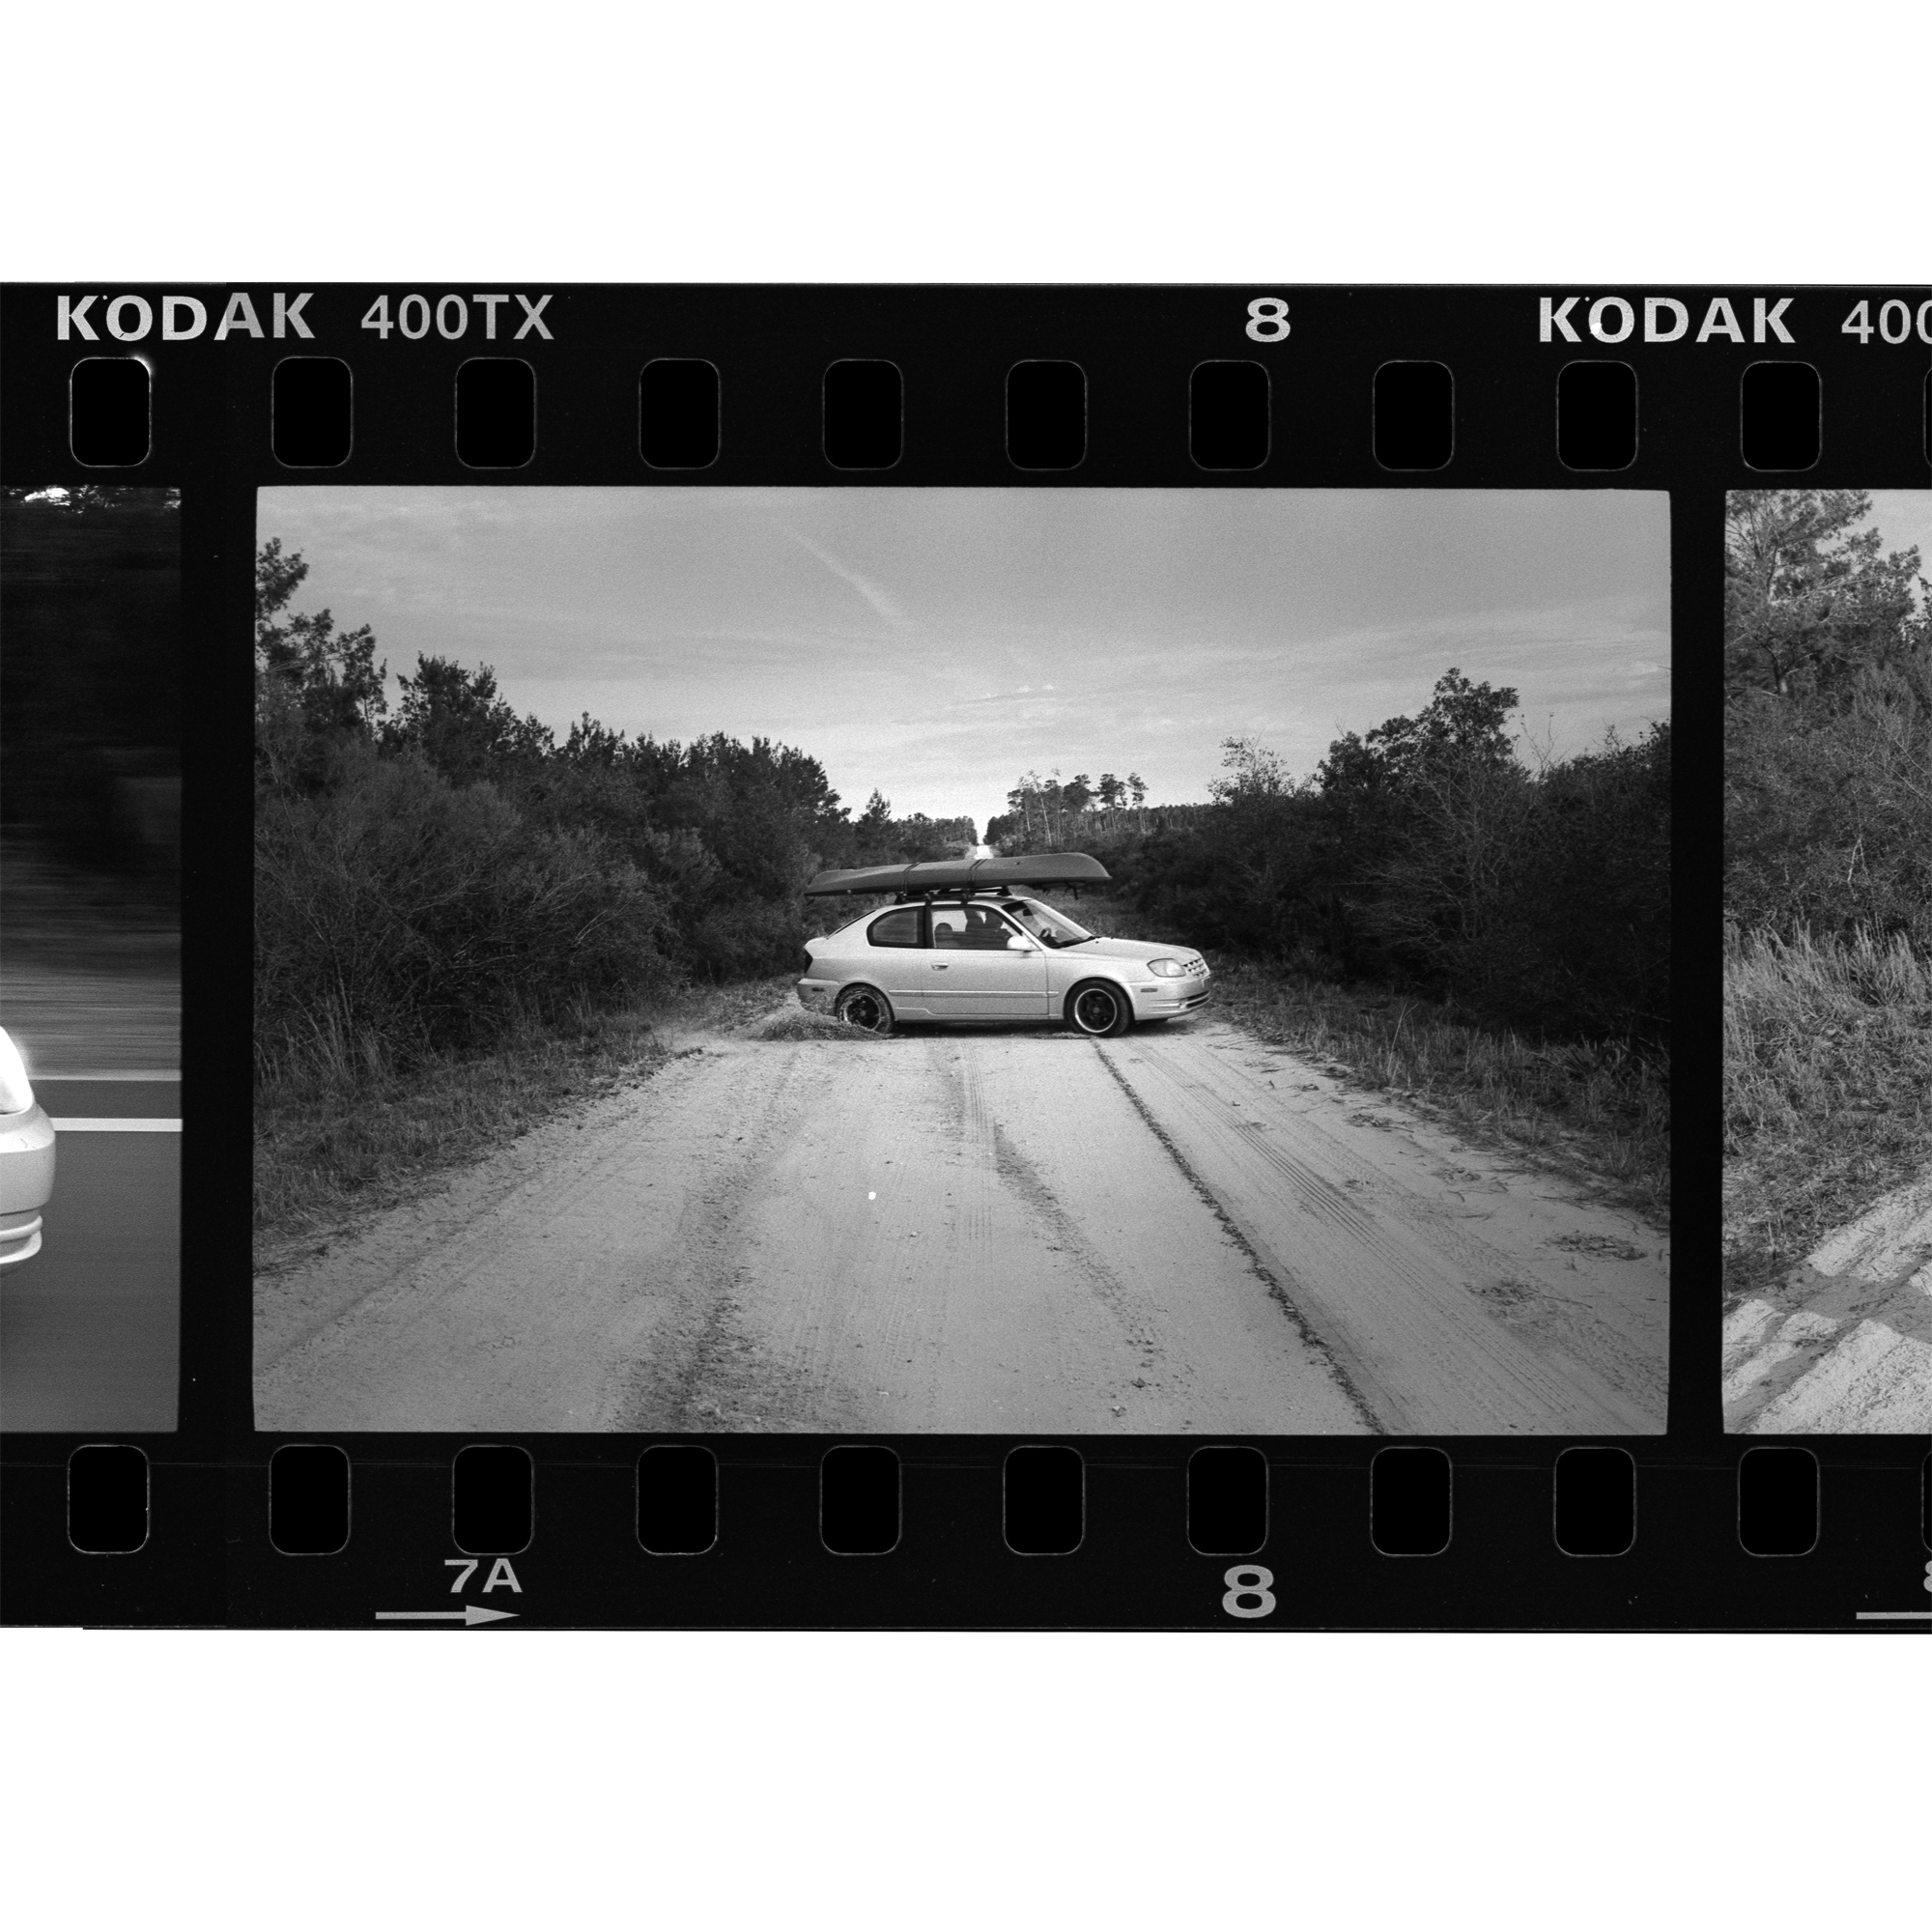
Our kayaks sit on the roof as we drive home in the rain
The conditions were perfect for a lot to go wrong.
It was midday and 95 degrees with scattered thunderstorms forecasted throughout the afternoon. Without much of a plan, Alex and I loaded our kayaks onto his Hyundai Accent and headed south on US 441 to the Paynes Prairie scenic overlook, a long boardwalk nestled between Gainesville to the north and Micanopy to the south.
To provide a little context for this story, Paynes Prairie Preserve, a 21,000-acre karst depression located on the edge of Gainesville, has been flooded since Hurricane Irma back in 2017. Paynes Prairie connects to the Floridan aquifer via Alachua Sink, a sink hole that essentially functions as a drain. Every once in a while debris plugs the sink hole, and Paynes Prairie turns into Alachua Lake.
Currently, Alachua Lake engulfs the entire northern end of the prairie, and an observation platform at La Chua Trail is inaccessible by anything but boat. Alex and I have consequently been crafting a plan to kayak to the platform and camp overnight. However, we wanted to first ensure we could reach the platform before attempting it in the dark. The trip I’m describing in this post was our test run.
Partly because we’re hard-headed and partly because we have a subconscious fetish for pain, we chose the hottest part of one of the hottest days of the year to make our run. With my iPhone in my pocket and my Mamiya 7ii packed away in a waterproof bag, we drove to the 441 overlook completely oblivious to the bizarre things we’d experience that day.

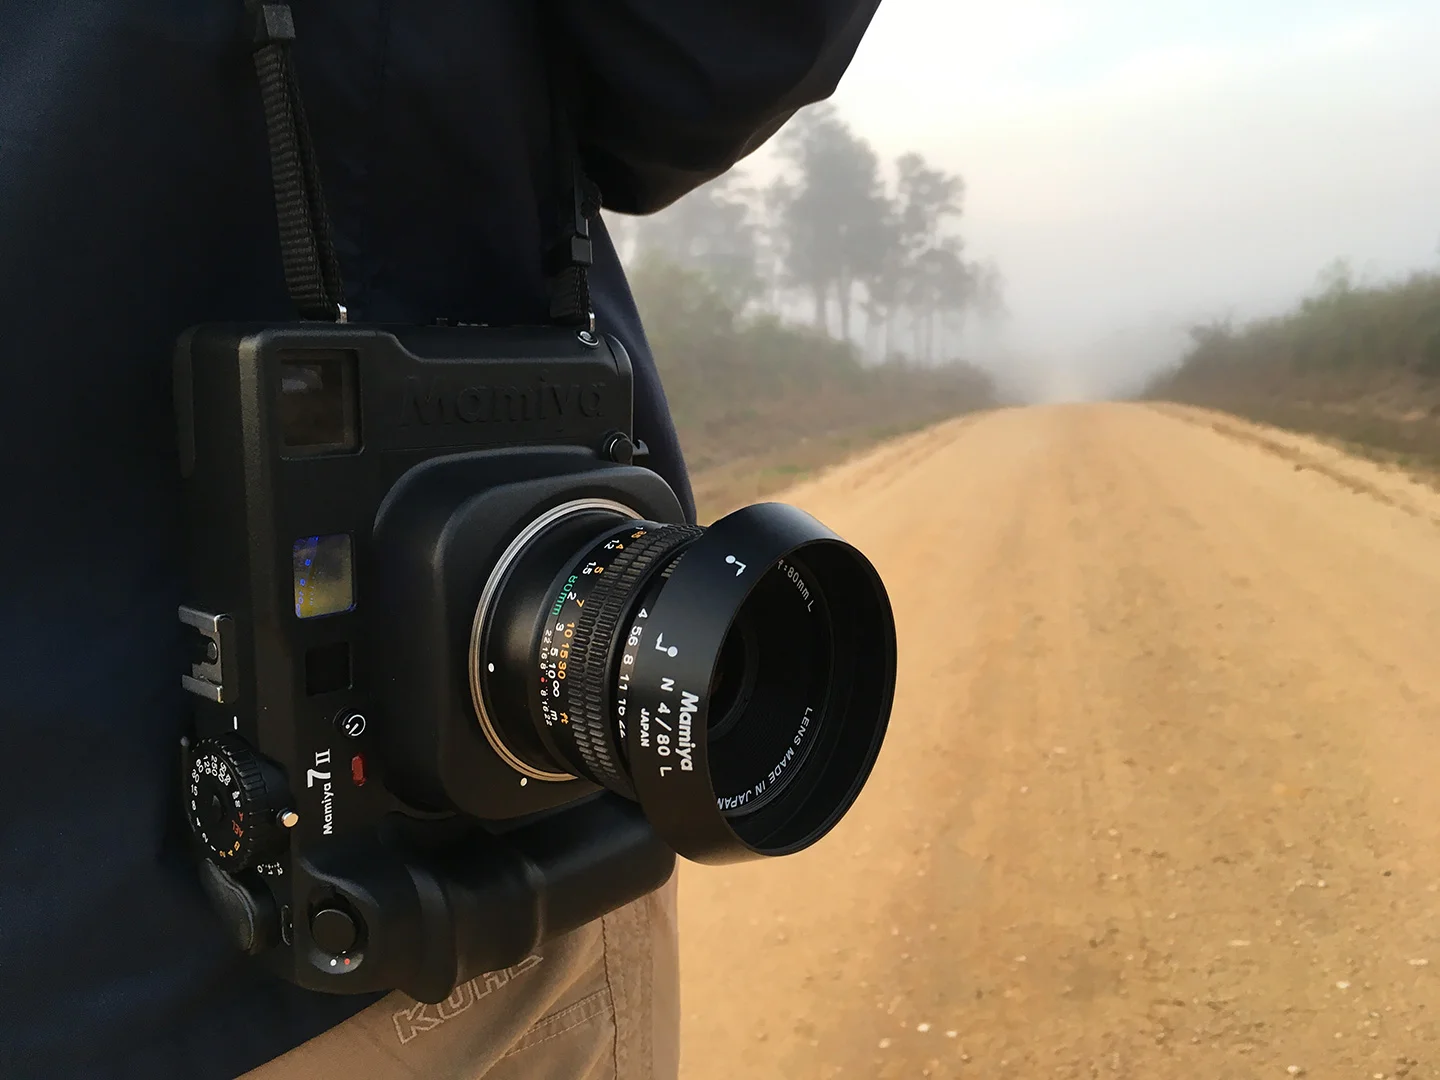
A snapshot of my gear packed and ready to go.

Our kayaks loaded on the roof of Alex’s Hyundai Accent.
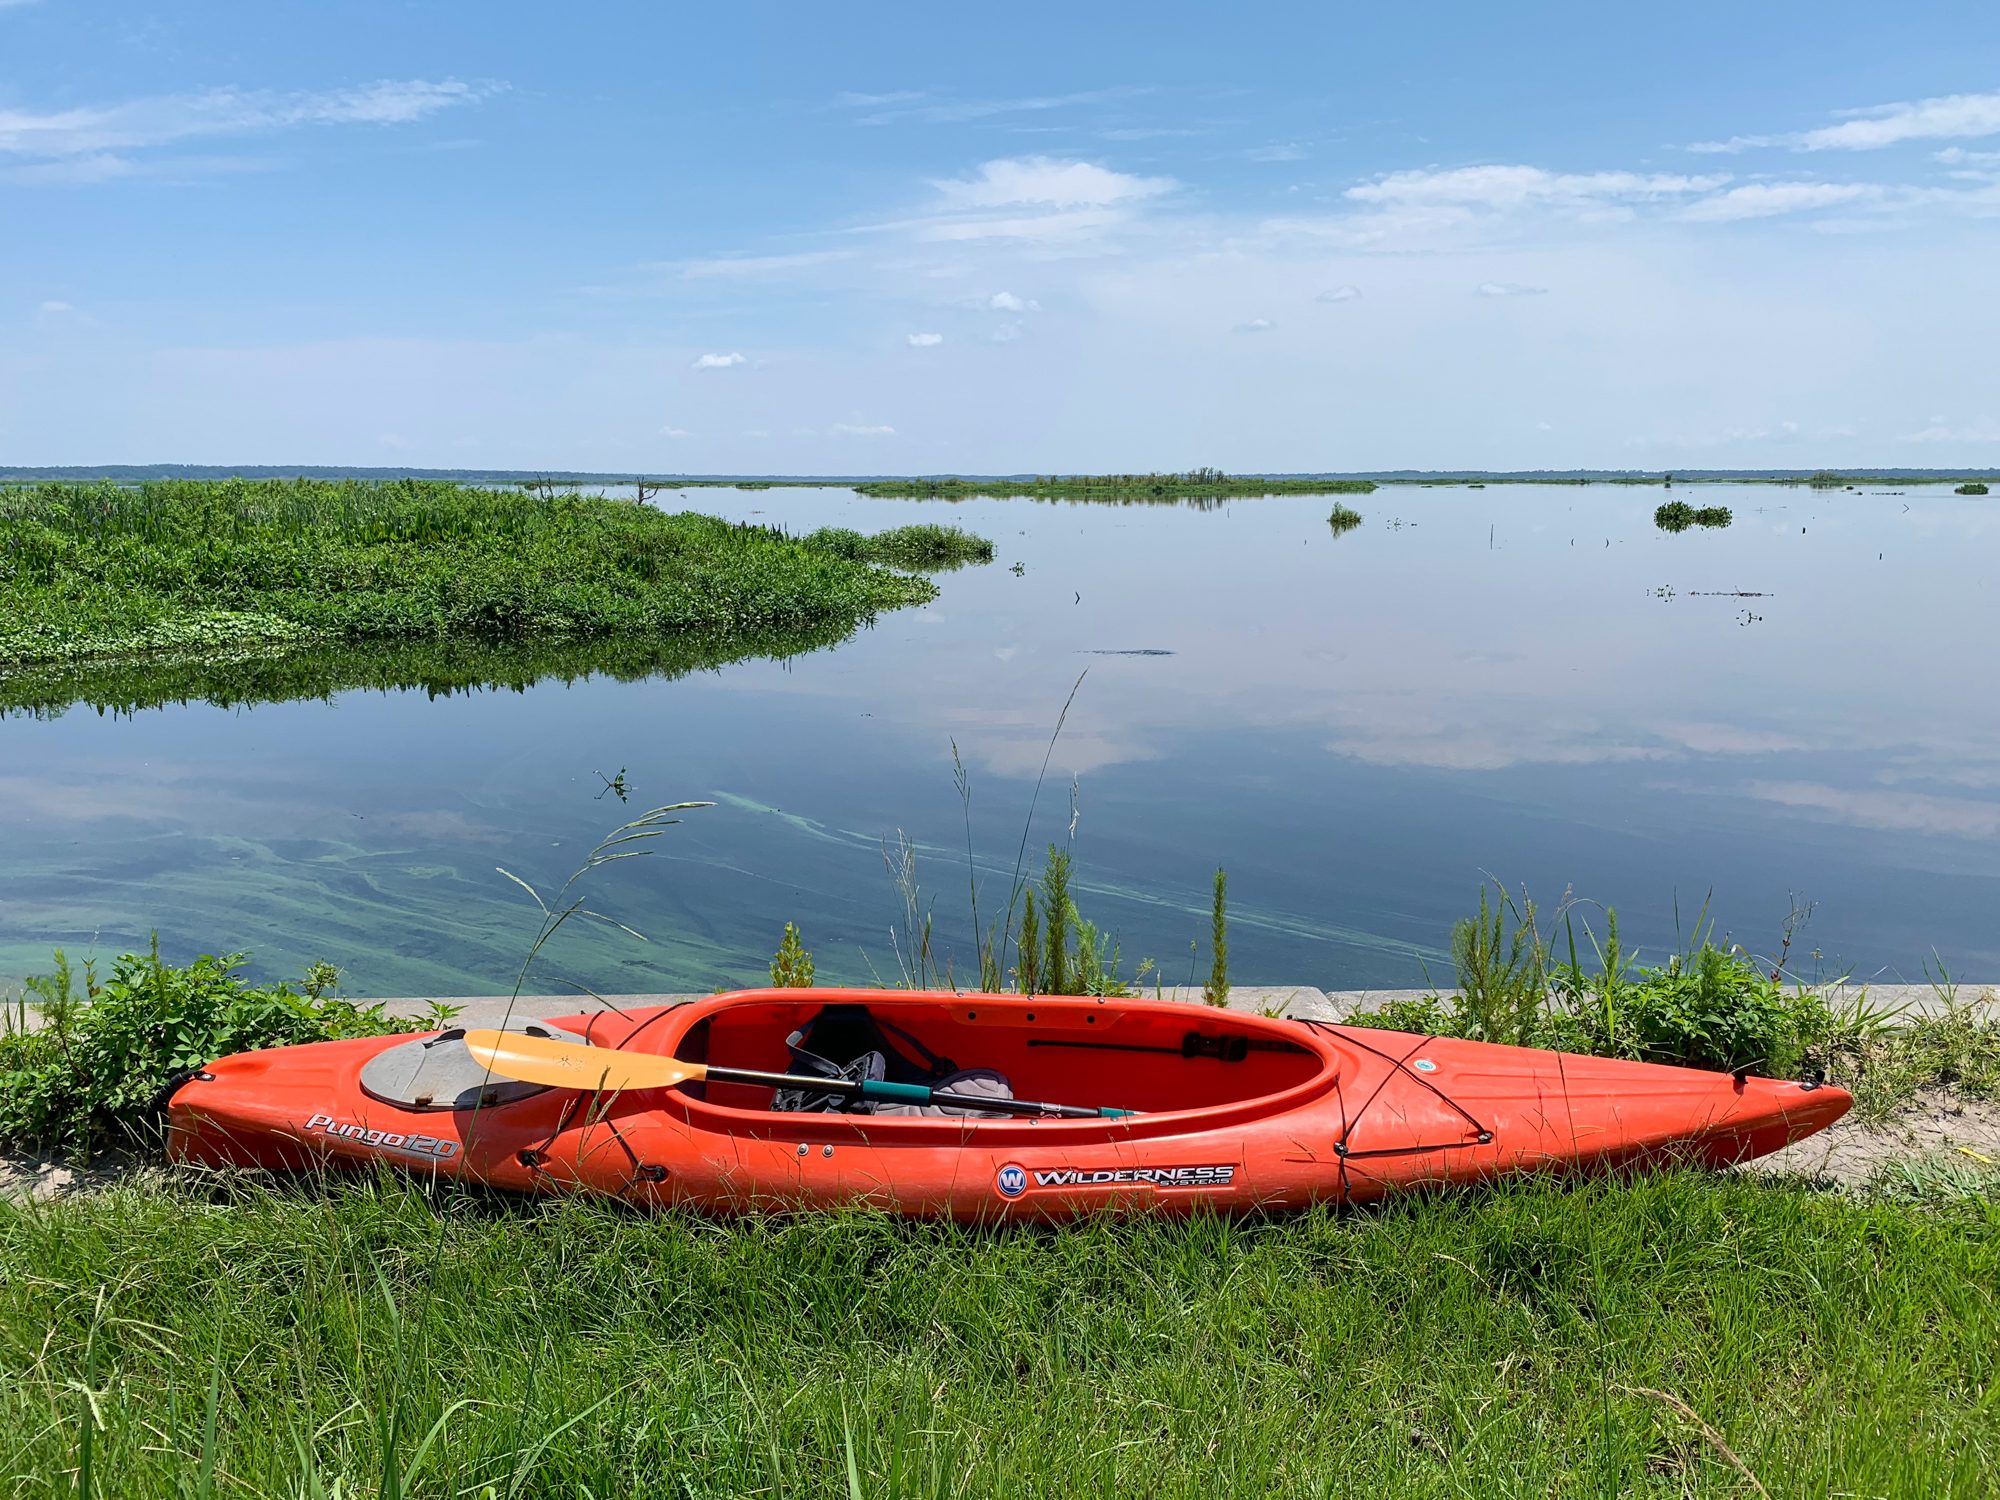
My kayak sits on the edge of Paynes Prairie Preserve prior to launching from US 441.

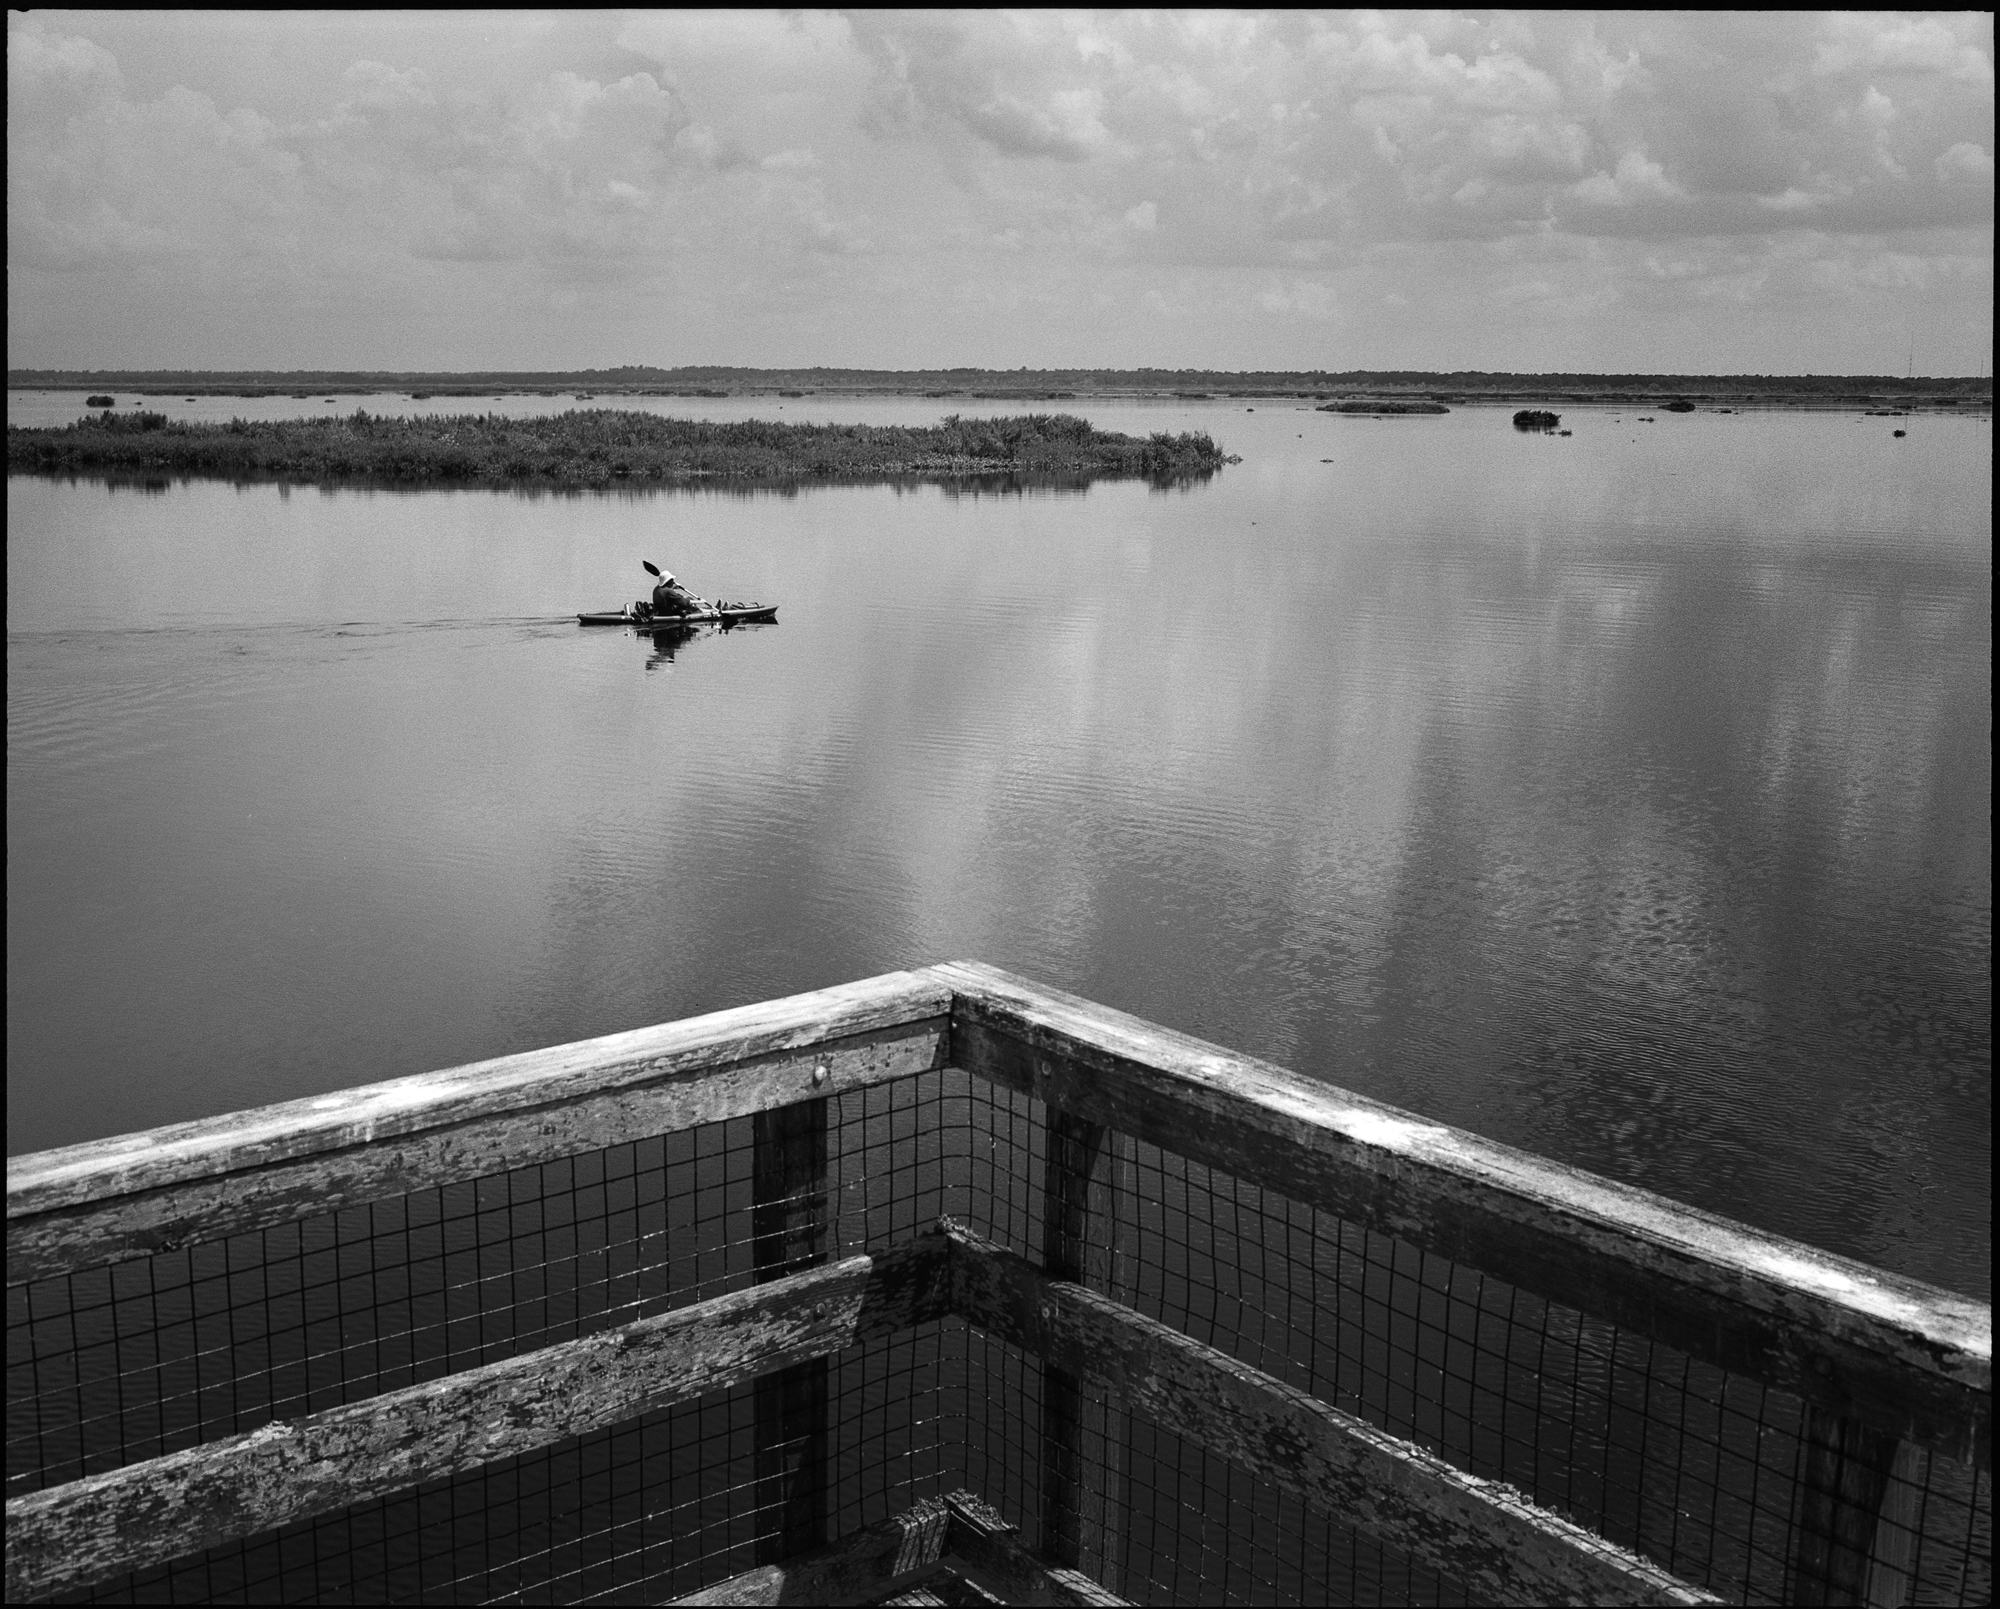
A view of the Paynes Prairie Preserve scenic overlook on US 441 shot with the Mamiya 7ii.

A large storm looms in the distance during our paddle out to the La Chua Trail observation platform in Paynes Prairie Preserve.
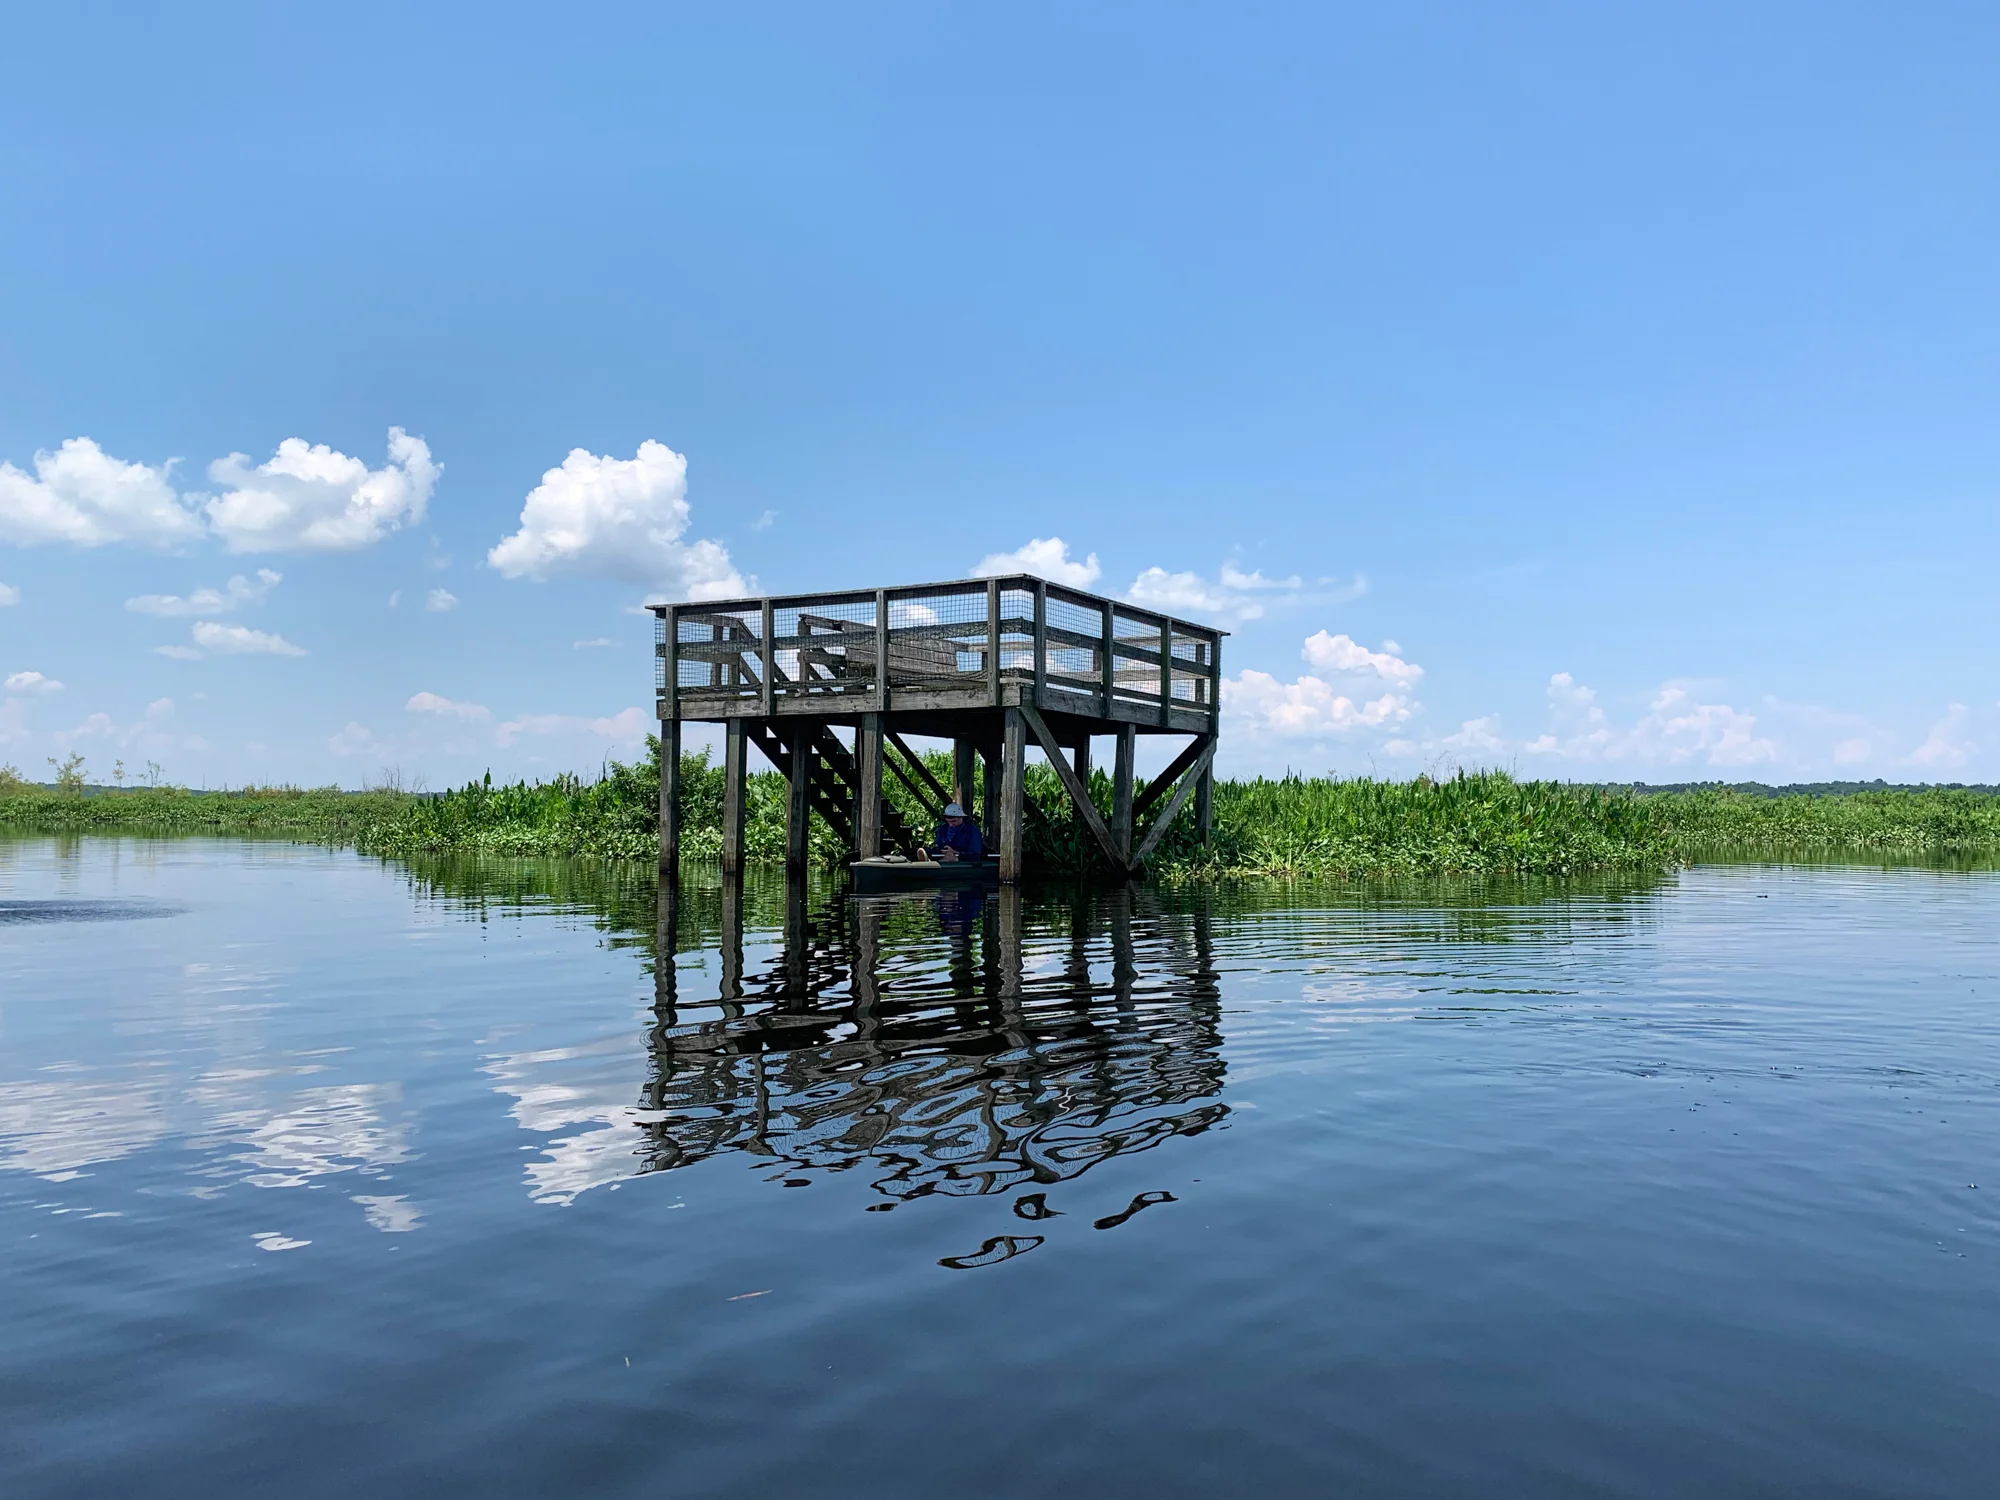
The La Chua Trail observation platform rises from a flooded Paynes Prairie.
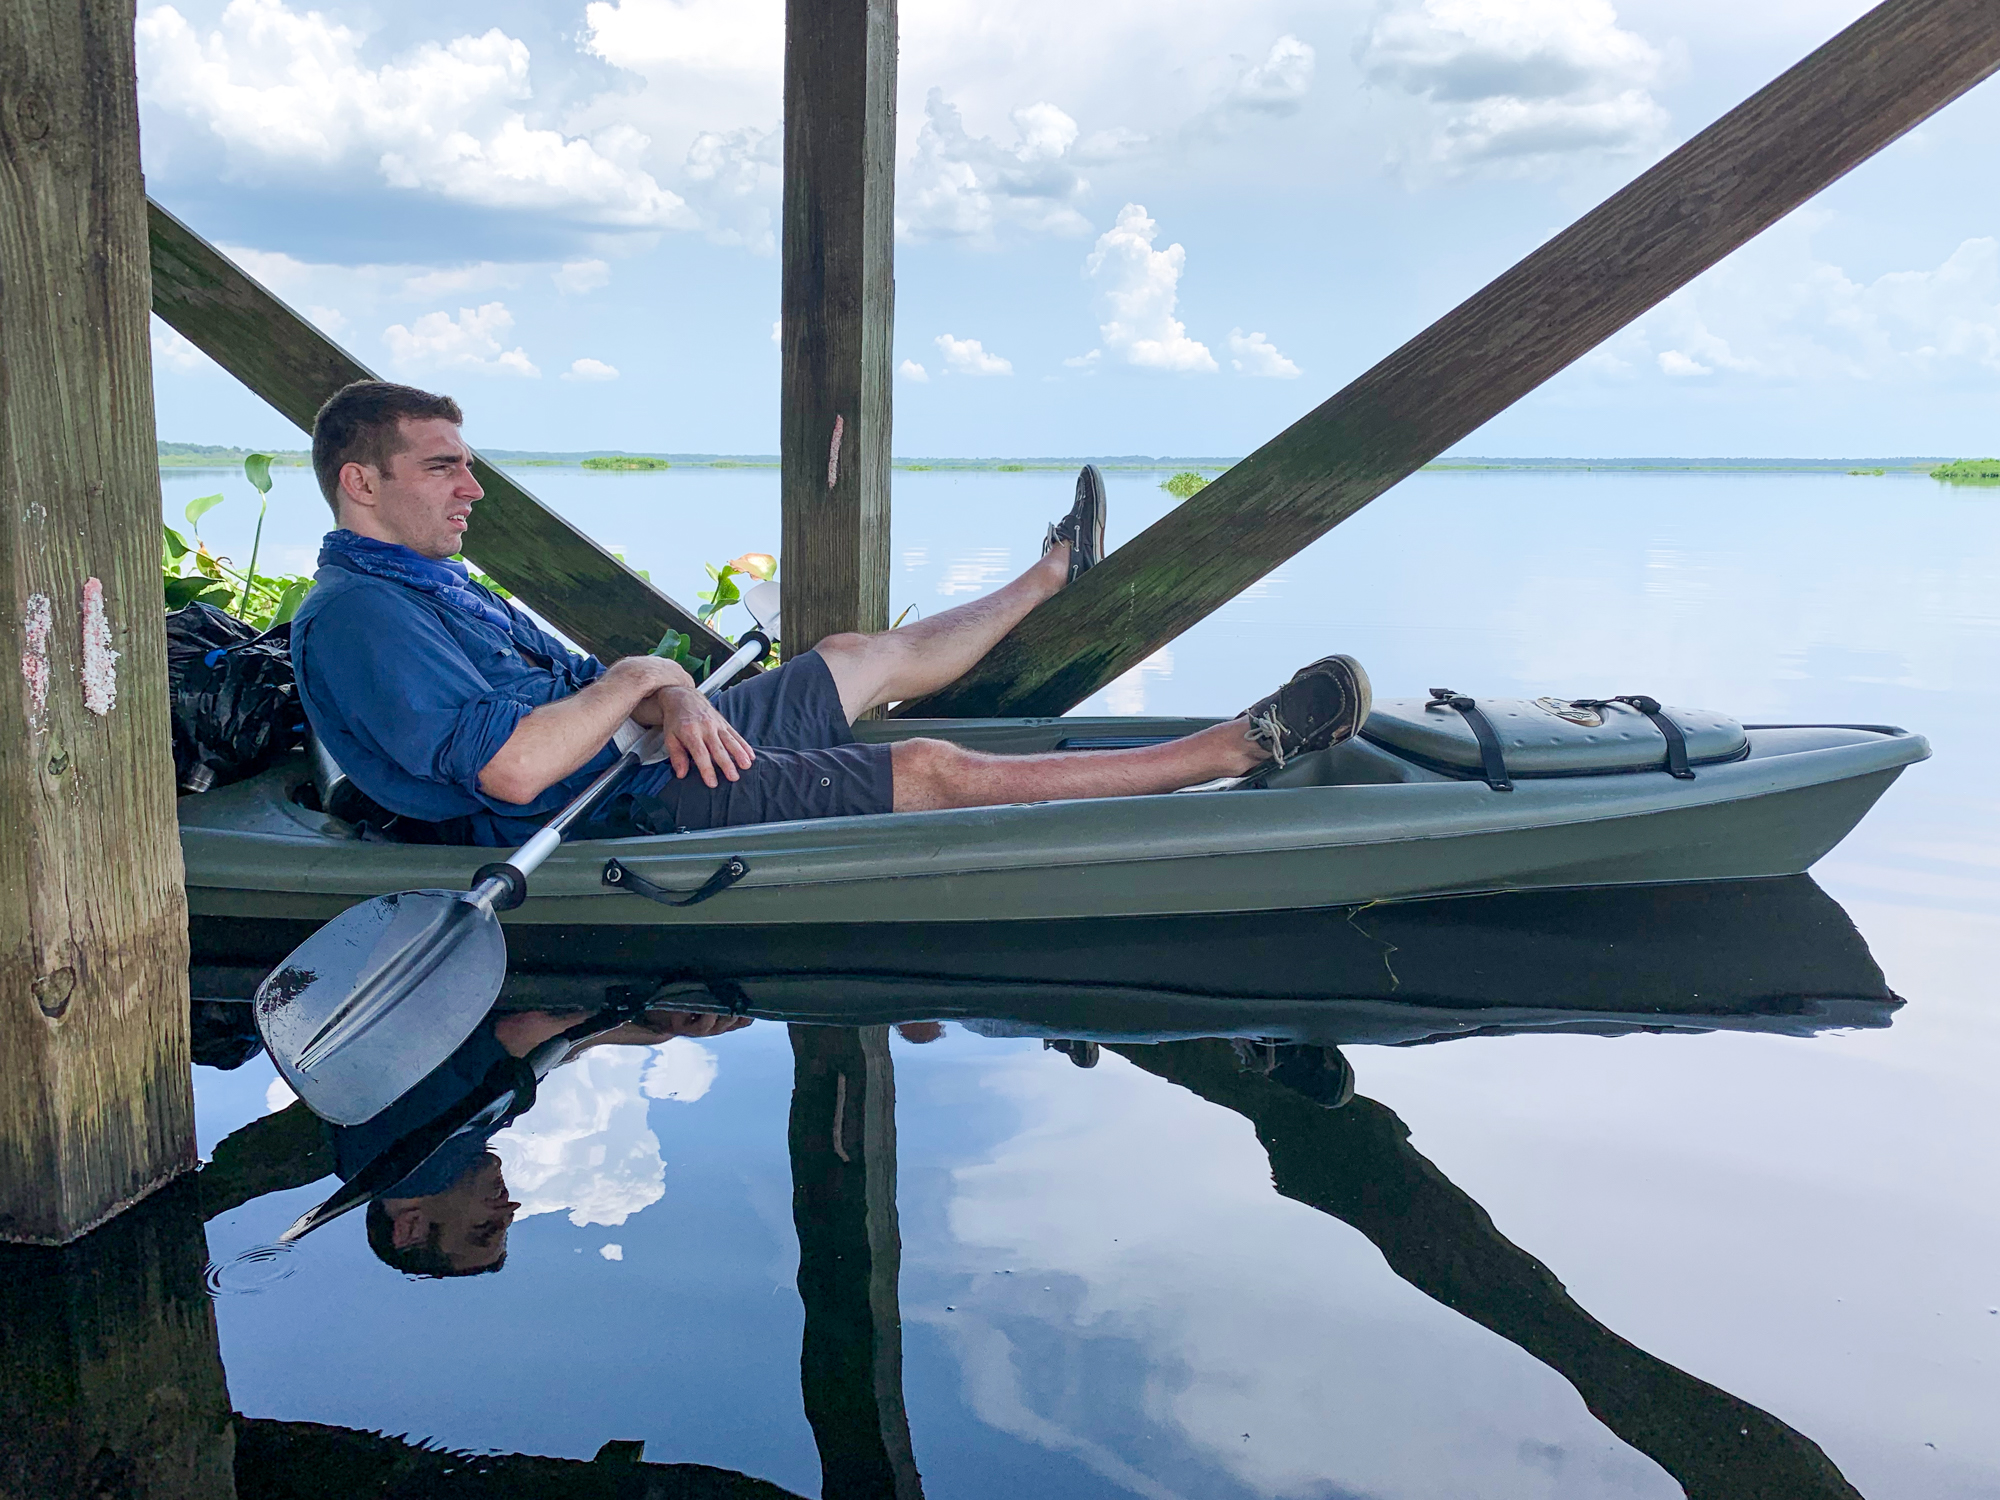
Alex rests under the platform, the only protection from the intense sun.

A first person view of my kayak parked under the La Chua Trail overlook. It was like having a personal two-kayak garage in the middle of the prairie.
I can’t overstate how hot that day was. Despite sunscreen, protective clothing and plenty of water, I felt like I was on the verge of a heatstroke by the time we reached the platform. I spent the better part of an hour cooling in the shade before taking pictures.
The storms were coming. They were moving faster than I had anticipated, but I wasn’t quite ready to paddle back out into the sun. We decided the smartest plan was to wait out the storm under the cover of the platform and then make a run for it once a window opened.
Alex paddles by the La Chua Trail observation deck in Paynes Prairie Preserve. Shot with the Mamiya 7ii.

A large storm forms over Paynes Prairie Preserve State Park. Shot with the Mamiya 7ii.

Alex sits in his kayak as a massive thunderstorm sweeps across Paynes Prairie Preserve.
As the wind picked up, we noticed the most peculiar thing: little pods of plants and animals that appeared rooted in the ground began to move around the prairie. The entire landscape was shifting like a kaleidoscope!
It started as small pods. But as the storm grew closer, entire masses hundreds of feet across began to move. One of them crashed right into the front of the observation platform, closing us off from the outside world. (See video below)

Alex investigates the giant mass of plants from atop the observation deck.

Our kayaks enclosed beneath the La Chua Trail observation platform.
Surrounded by plants on all sides, our little nook became a refuge safe from the wind and waves of the storm. Fortunately, there was a small opening at the northeast corner we were able to slip through. We waited until most of the storm had passed and then made our move. Lightning continued to crash in the distance, so we paddled swiftly.
While we knew the direction we were heading, the wind had shifted the entire landscape. The route on the way back to the car was completely different than on the way in. Nevertheless, we navigated correctly and made it to the car safe and sound.

Alex and I paddle back toward the car. The storm made the water feel more like an ocean than a lake.

Alex gestures toward the US 441 overlook while tying down the kayaks.

With the kayaks strapped to the roof, we made our way home through the rain.
What began as a simple scouting mission turned into quite the adventure. I spend most of my time exploring the Juniper Prairie Wilderness, but this little adventure opened my eyes to the possibilities all around.
Stay tuned for part two when we paddle out to camp on the La Chua Trail platform, and be sure to check out Alex’s blog post here, which features a beautiful video of Paynes Prairie.

The Blue Square
I have a love-hate relationship with light painting. It never goes as planned, and although my ideas are tactful, the execution is consistently inadequate. This past weekend I took to the woods to explore the role the physical process plays in art and how that affects our perception of it.

Introduction
You’ve seen it before: names haphazardly scribbled in the air with a flashlight; newlyweds kissing under a fiery circle of sparks; glowing orbs like giant out-of-place yarn balls in a landscape. Light painting isn’t new. It’s an exhausted practice, and I always joke it’s the first thing a new photographer explores when learning how to manipulate their shutter speed.
I have a love-hate relationship with light painting. Despite its seemingly infinite potential, most of the light painting I experience is a little on the amateur side — an issue that points more toward a lack of restraint than sloppy execution. Alex and I have been attempting to incorporate precise light painting to an environment using a drone, but while I feel our ideas are consistently tactful, the results are consistently amateurish.
For our most recent trip to the Juniper Prairie Wilderness, I wanted to do an experiment comparing an image made entirely in camera using light painting techniques to an image created entirely in Photoshop using graphic design techniques. We chose to create a blue square for its simplicity and nod to technology. It wasn’t until after the fact that I realized the blue square is ironically similar to the Photoshop logo, further emphasizing the contrast between the natural and the manipulated environment.

A rough draft I sketched on Alex’s whiteboard during our Thursday meeting illustrates the goal: a single blue square emanating from the middle of a dense pine forest.

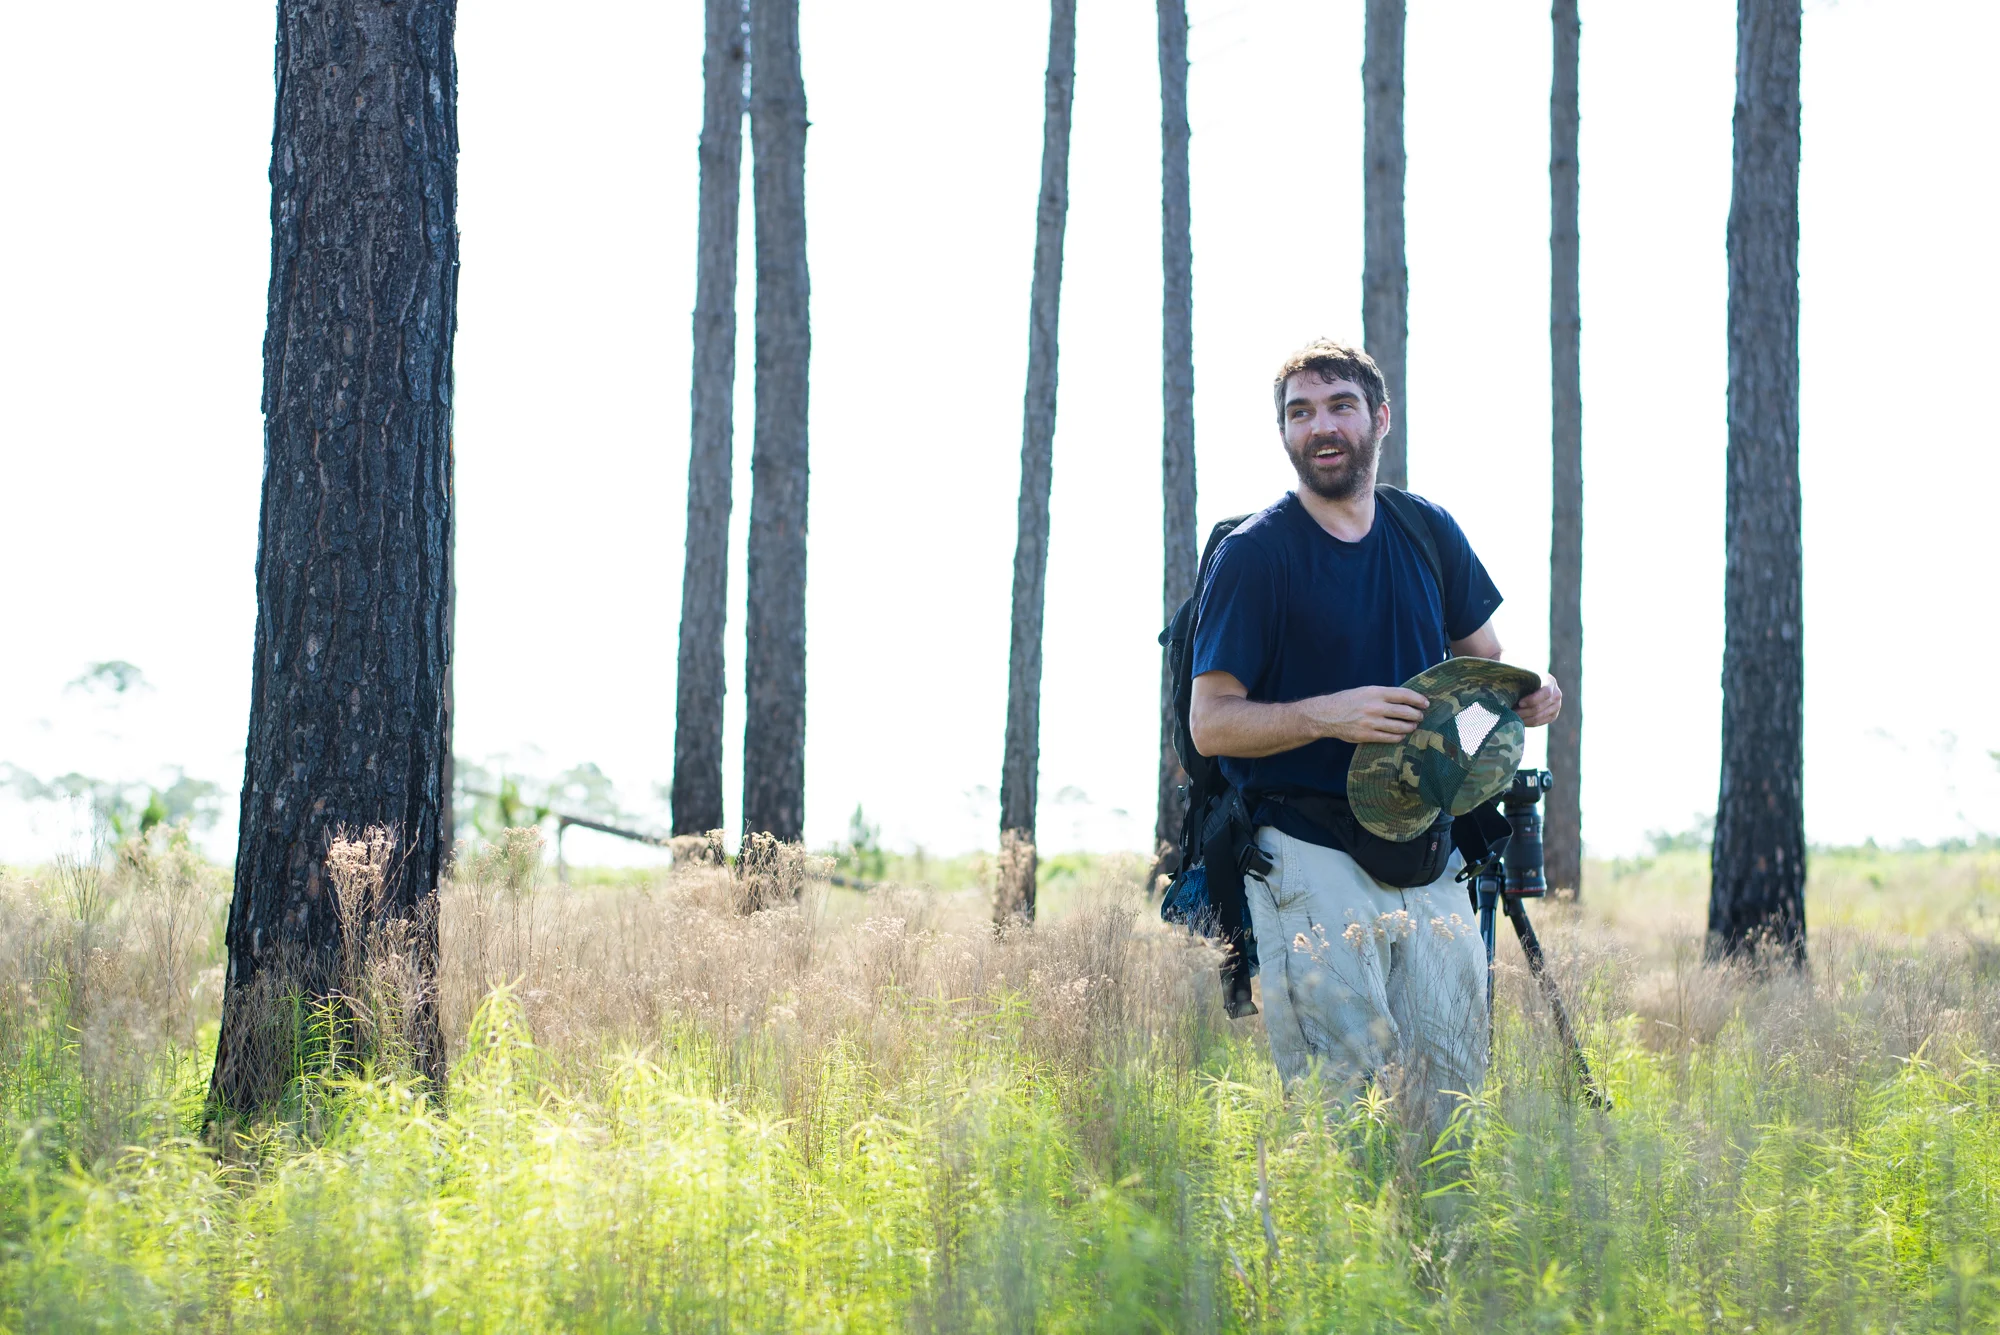
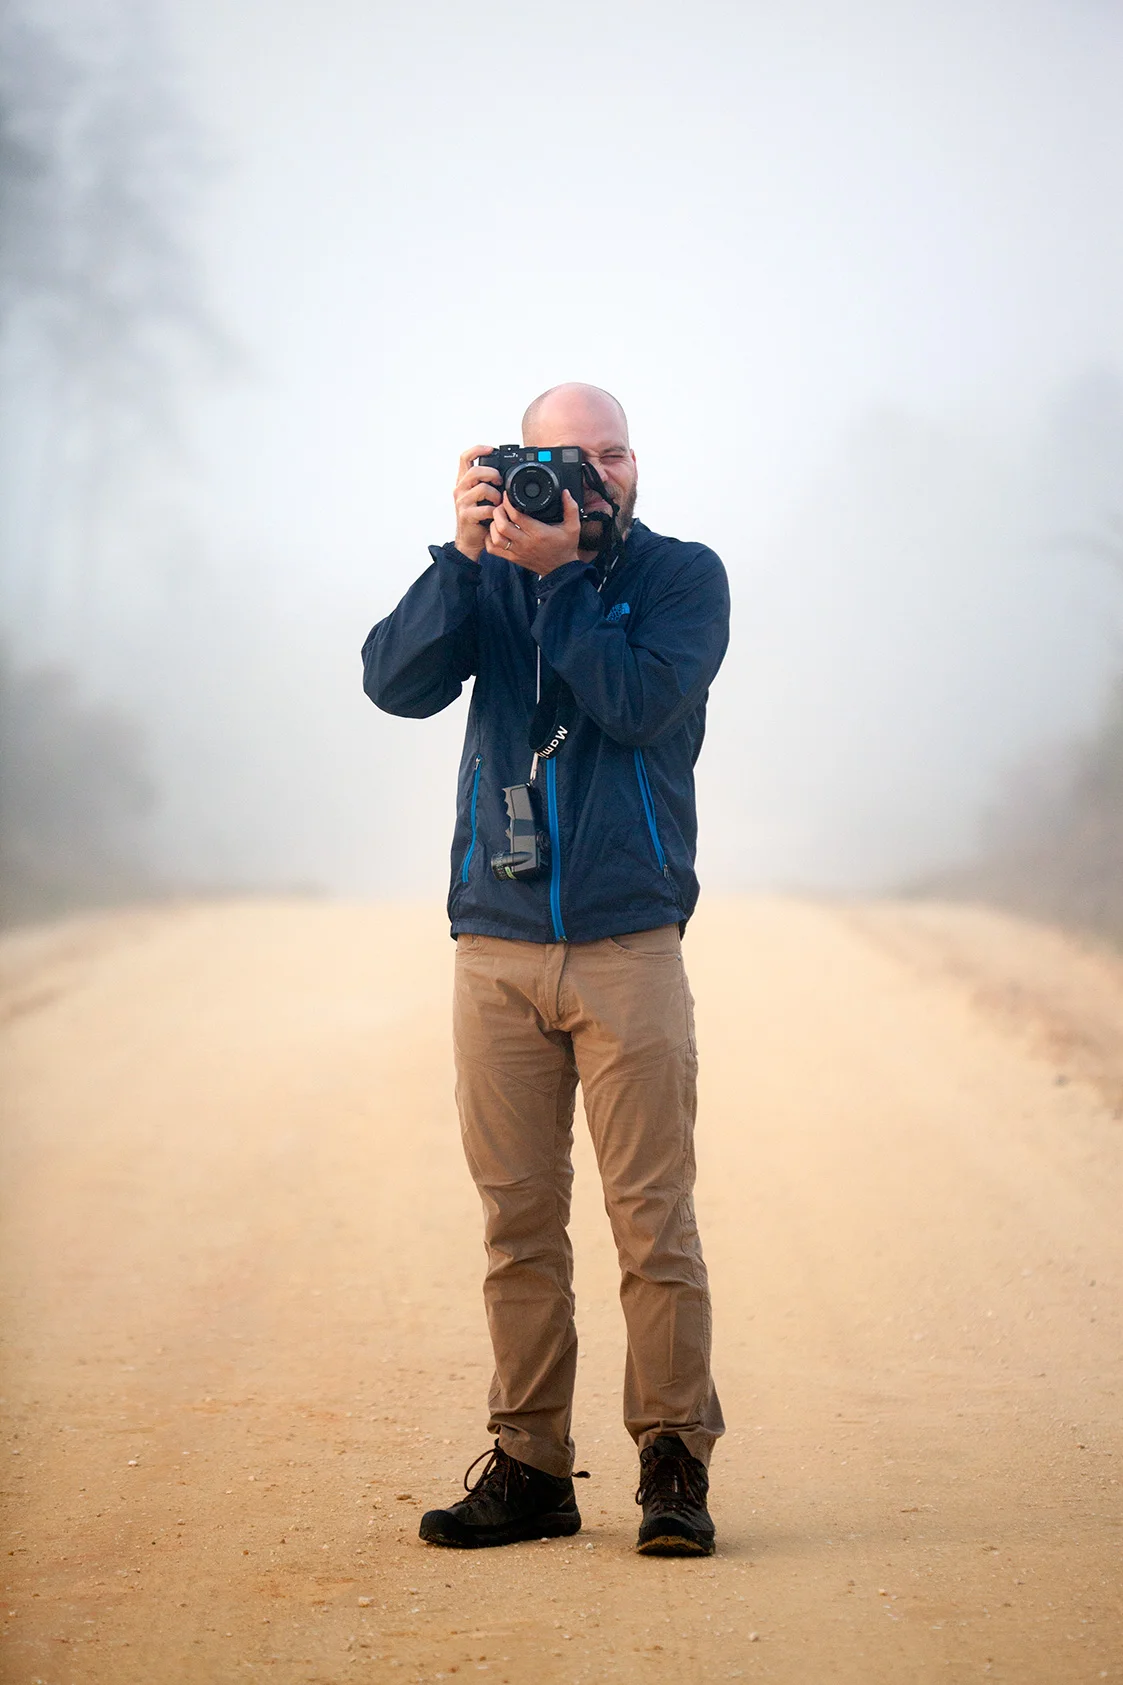
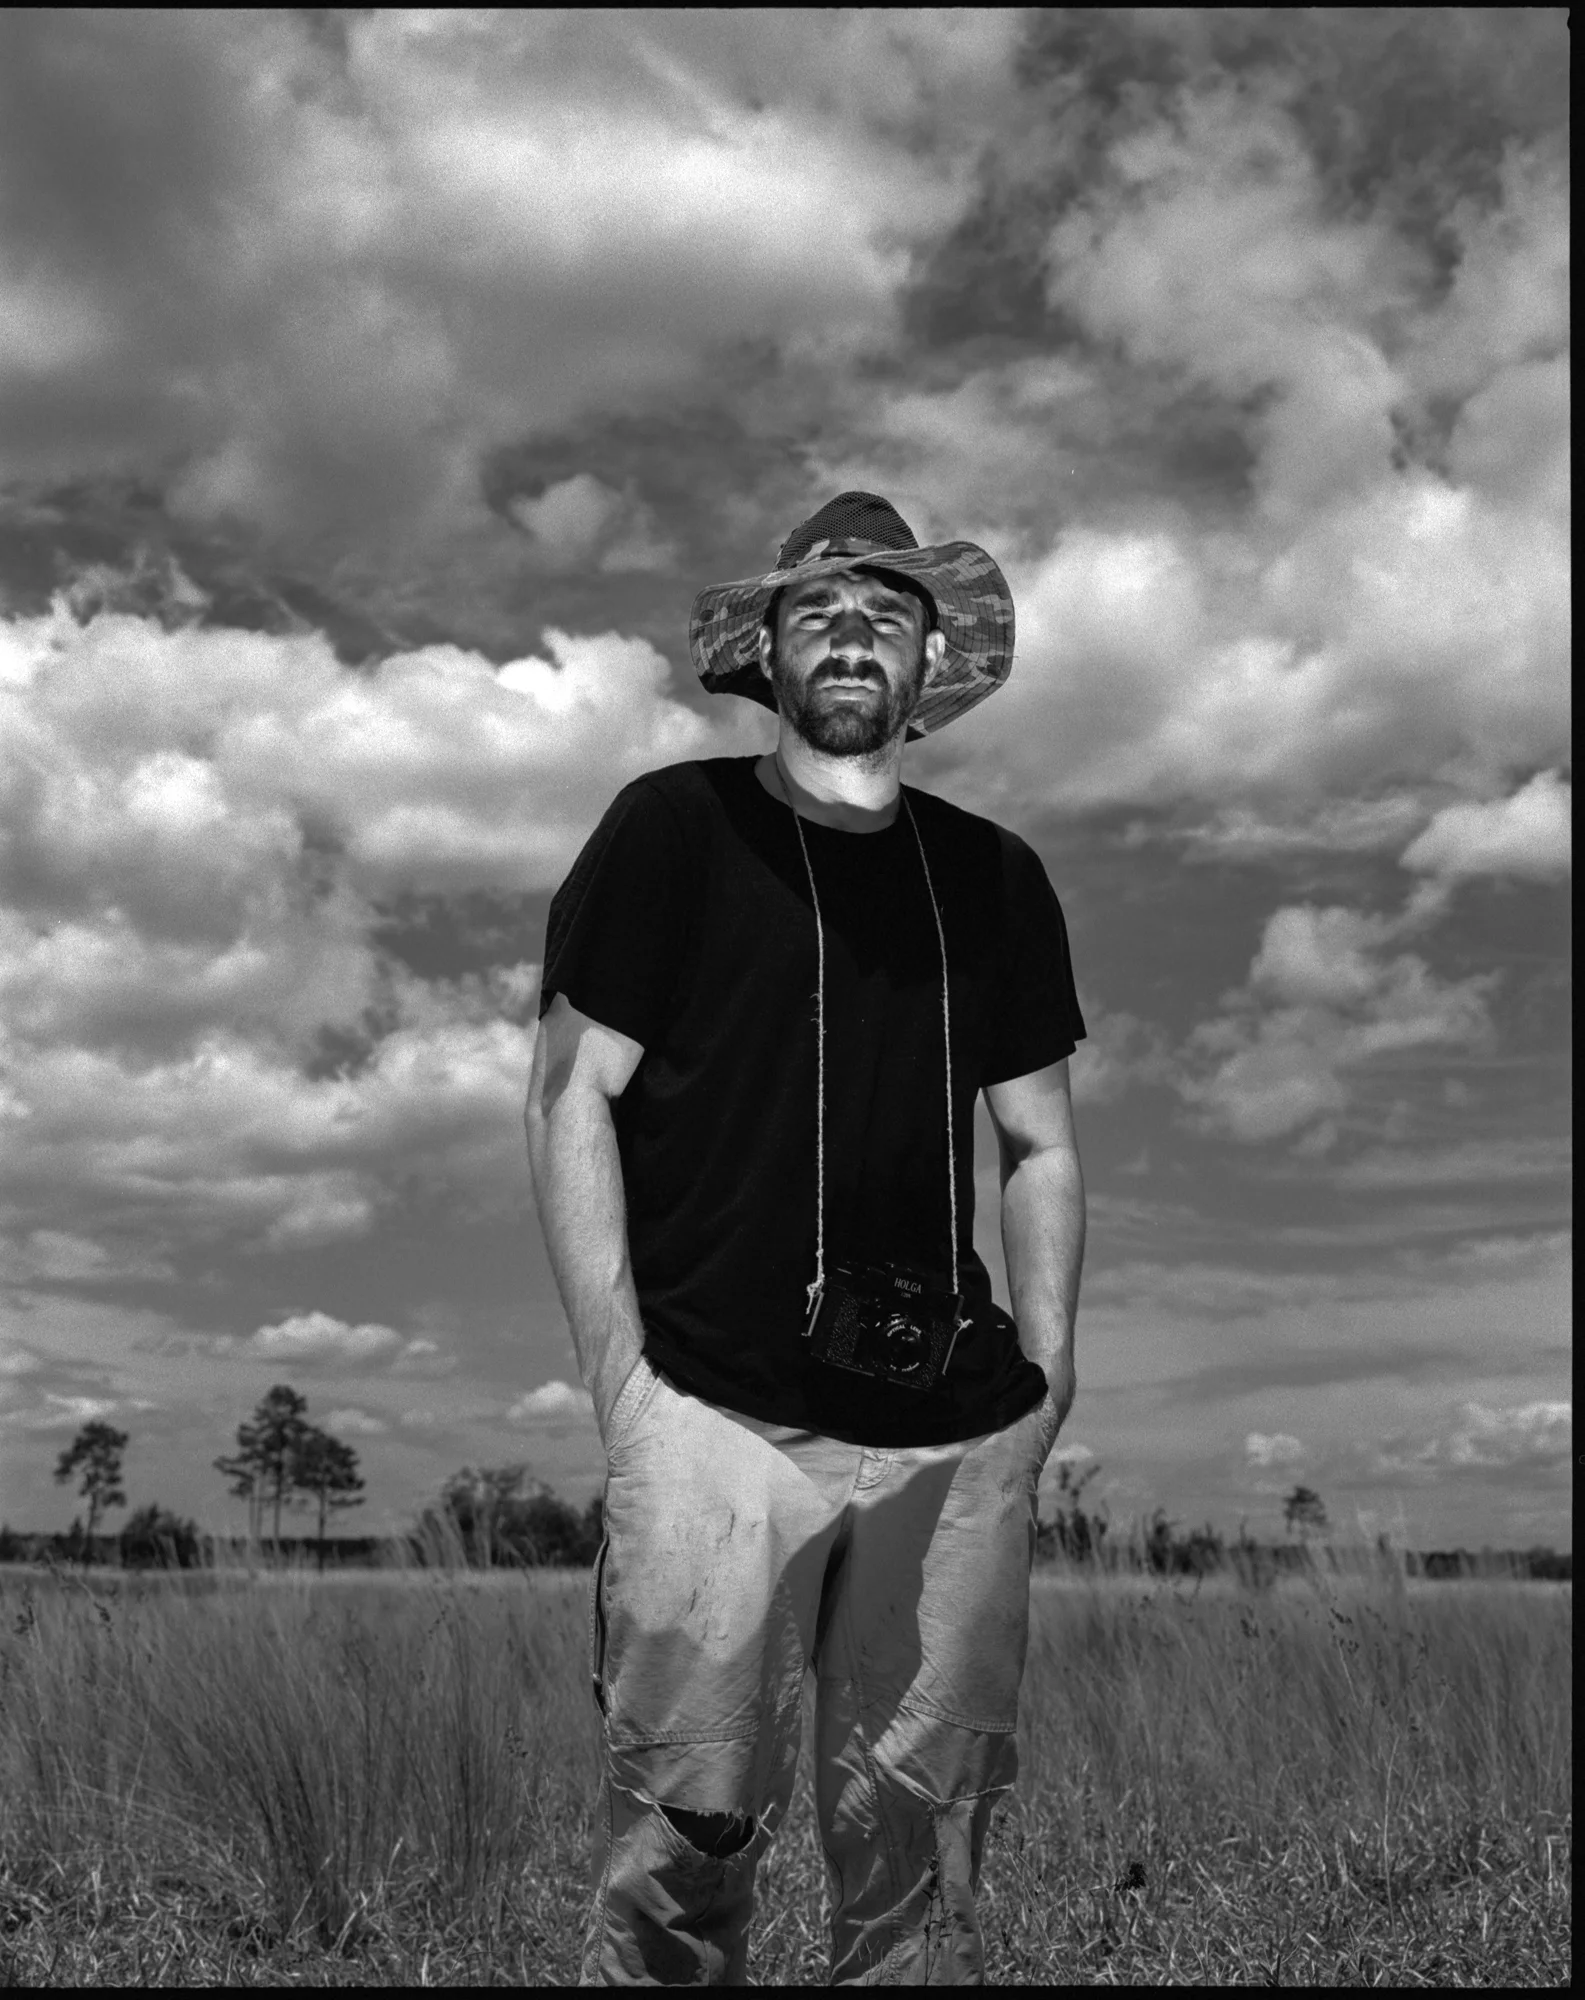
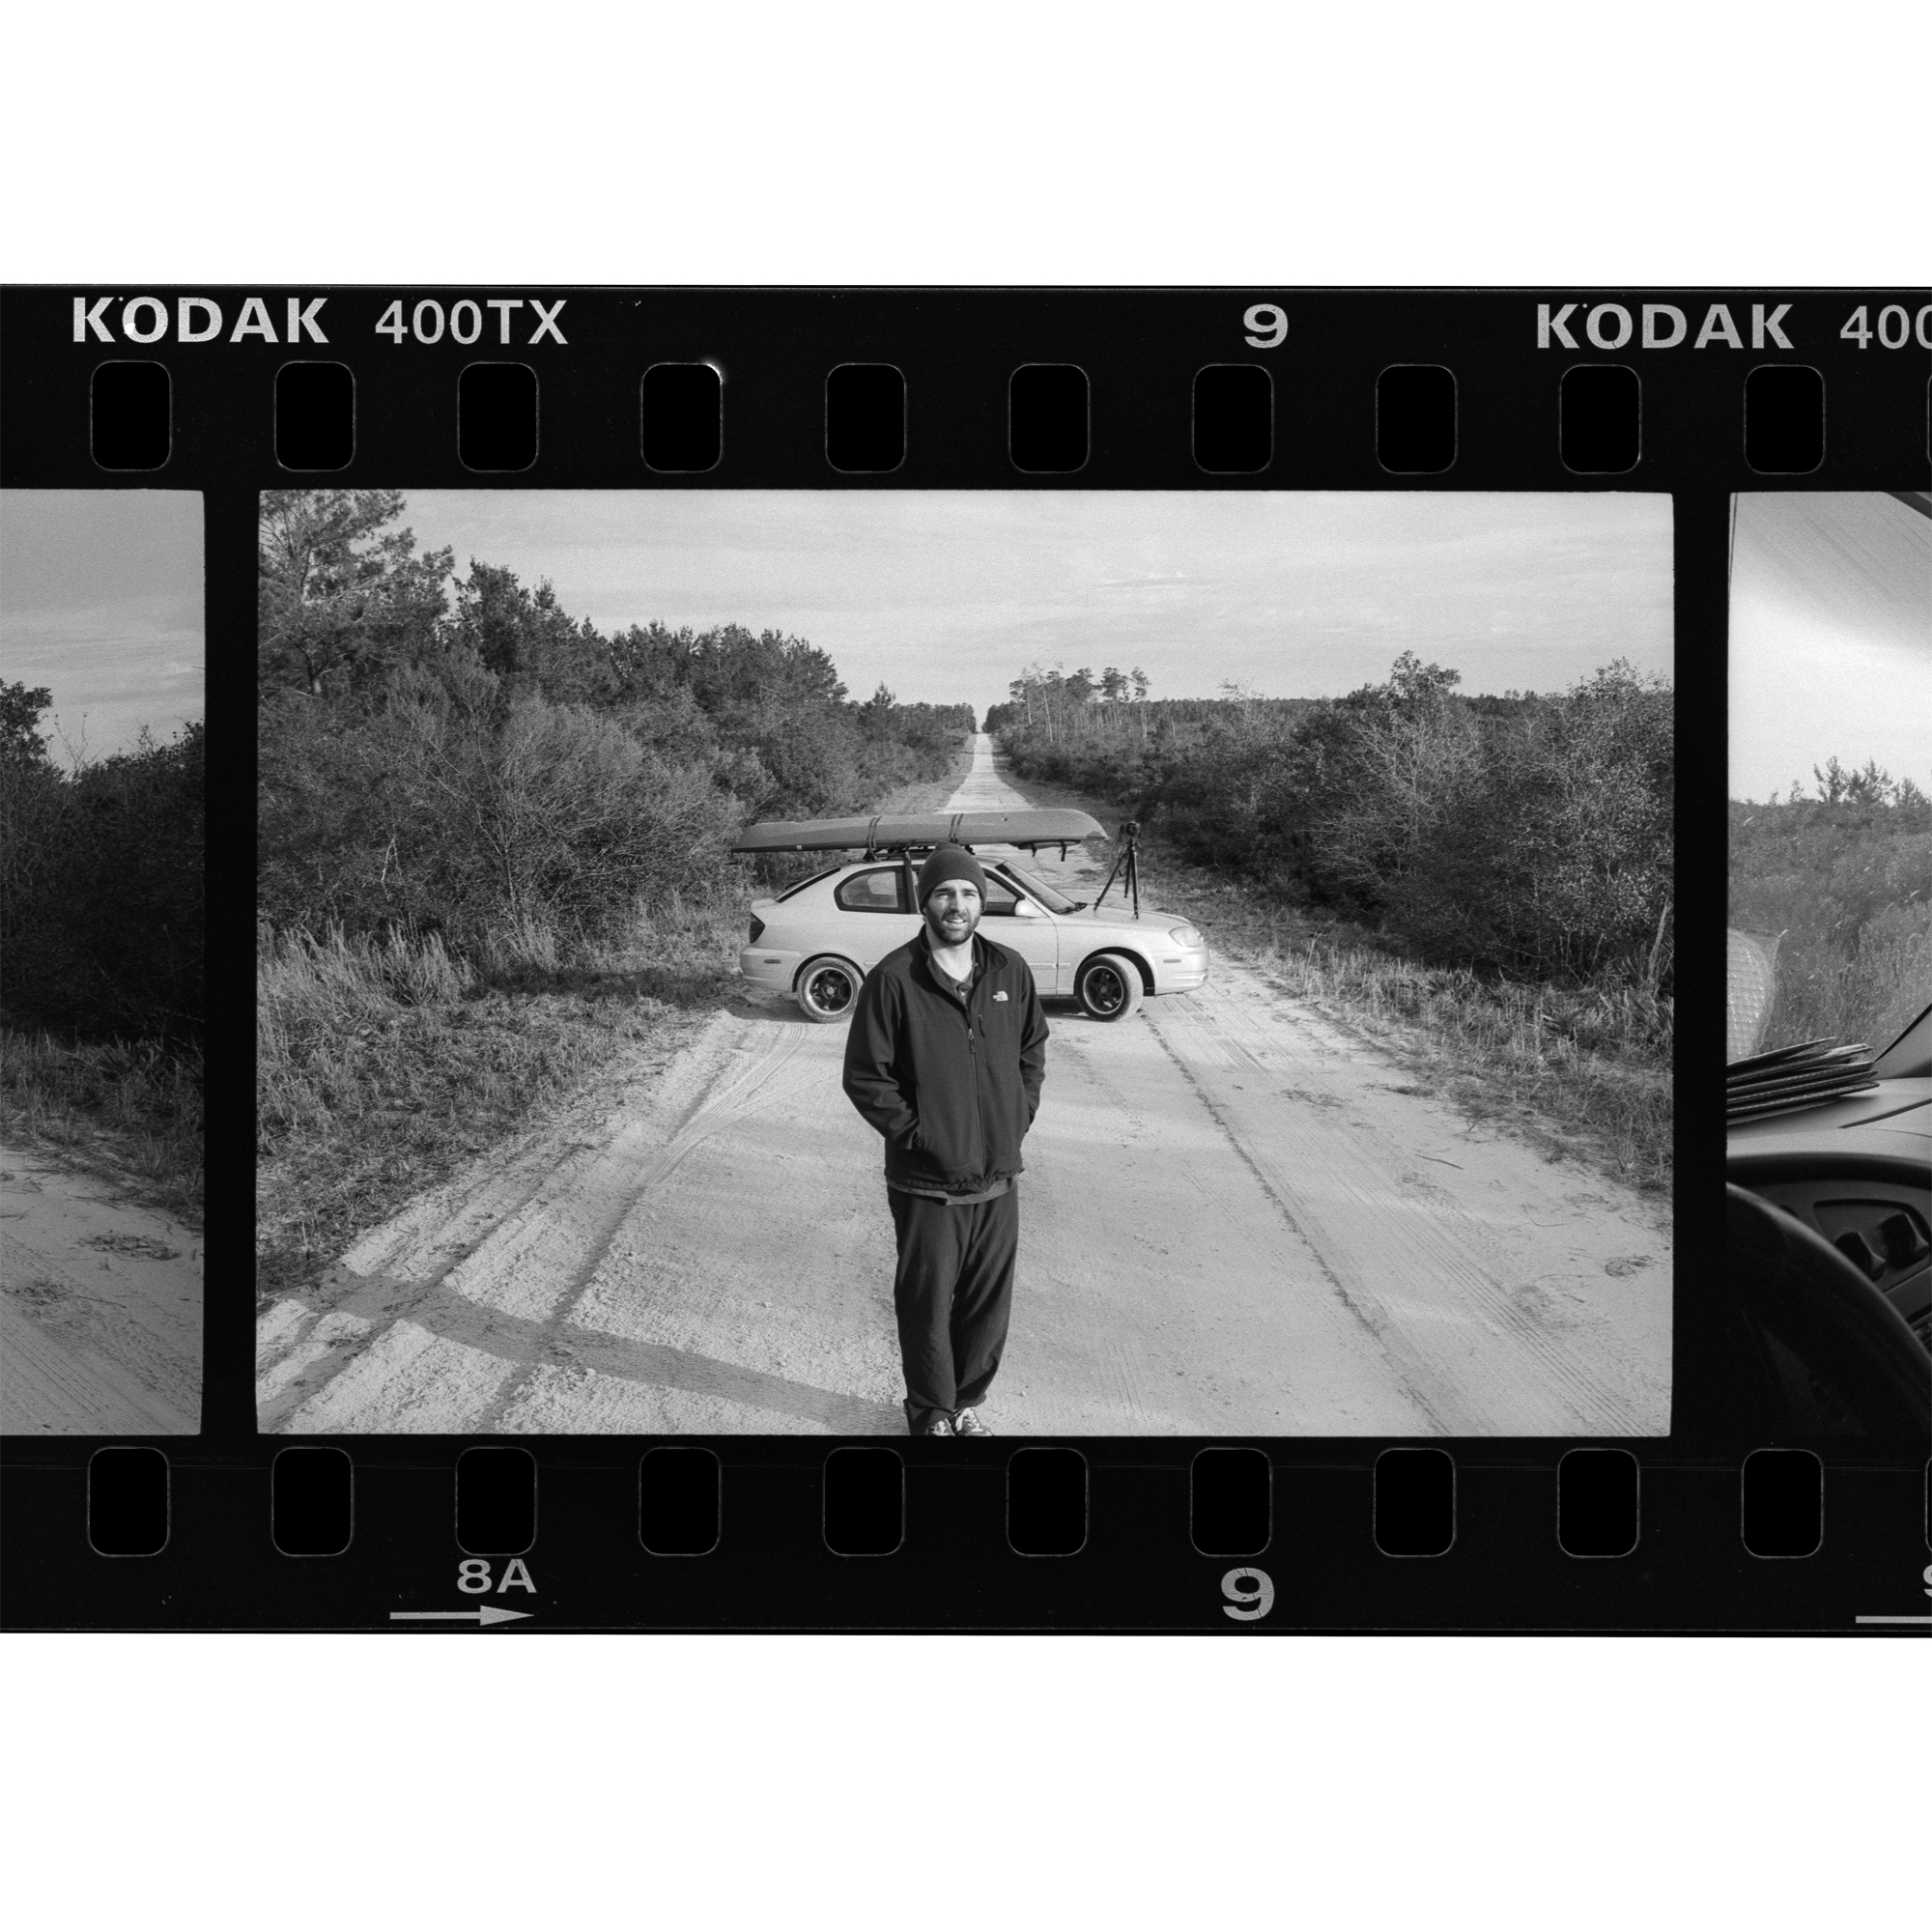
Alex pauses for a portrait in the middle of Forest Road 46 before hiking south into the Juniper Prairie Wilderness.
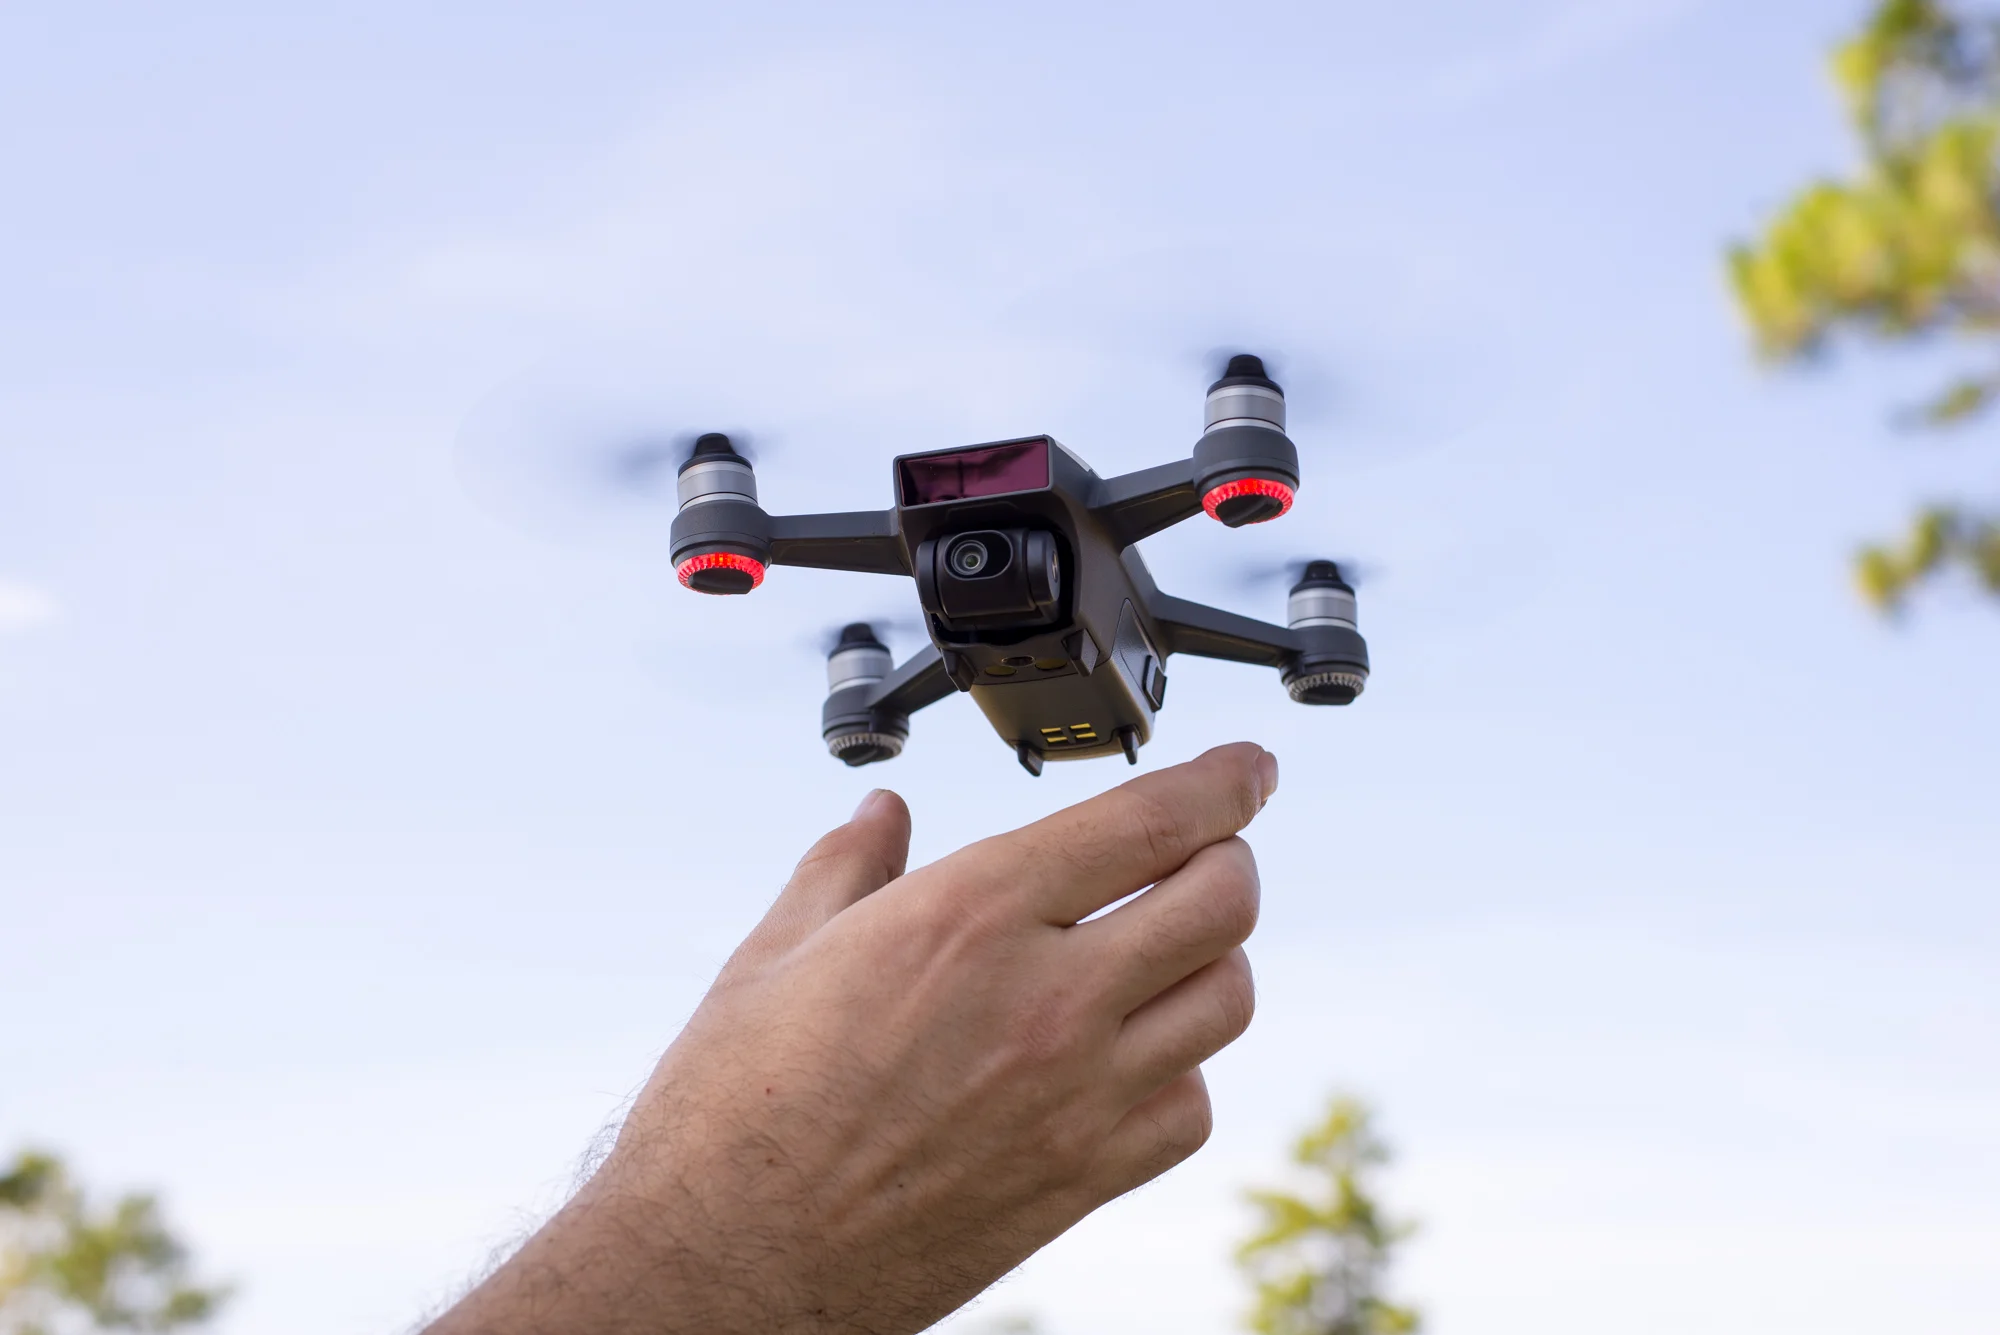
If you don’t follow Alex’s blog, you should. He codes and 3D prints cool inventions, and he prepared for this trip by designing and printing “dark feet” — small caps he inserts over the rotors of his DJI Spark quadcopter to block out the native red and green lights. You can see his recent Dark Feet post here.
Despite the preparation, the results were once again inadequate. There are many reasons for this, but the two biggest are that Alex’s drone has sustained multiple crashes that have compromised its stability, and since individual LEDs were attached beneath each rotor, we weren’t able to produce a single stream of light. The success of this image depended entirely on precision, and we didn’t even come close.

This is the image we created in camera by attaching blue LEDs to a drone.

This is the image I created entirely in Photoshop.
After returning home, processing the media and researching for this blog post, I came across some incredible work by Reuben Wu that proves it’s not only possible to create precise shapes with a drone, it’s utterly breathtaking when done correctly. This is exactly the kind of elegant and tasteful light painting I’ve been striving for!
I think the key to producing precise light painting with a drone is through programmable flight patterns. In order to create a precise image, the method used must be precise. And I don’t think humans are capable of that type of control.
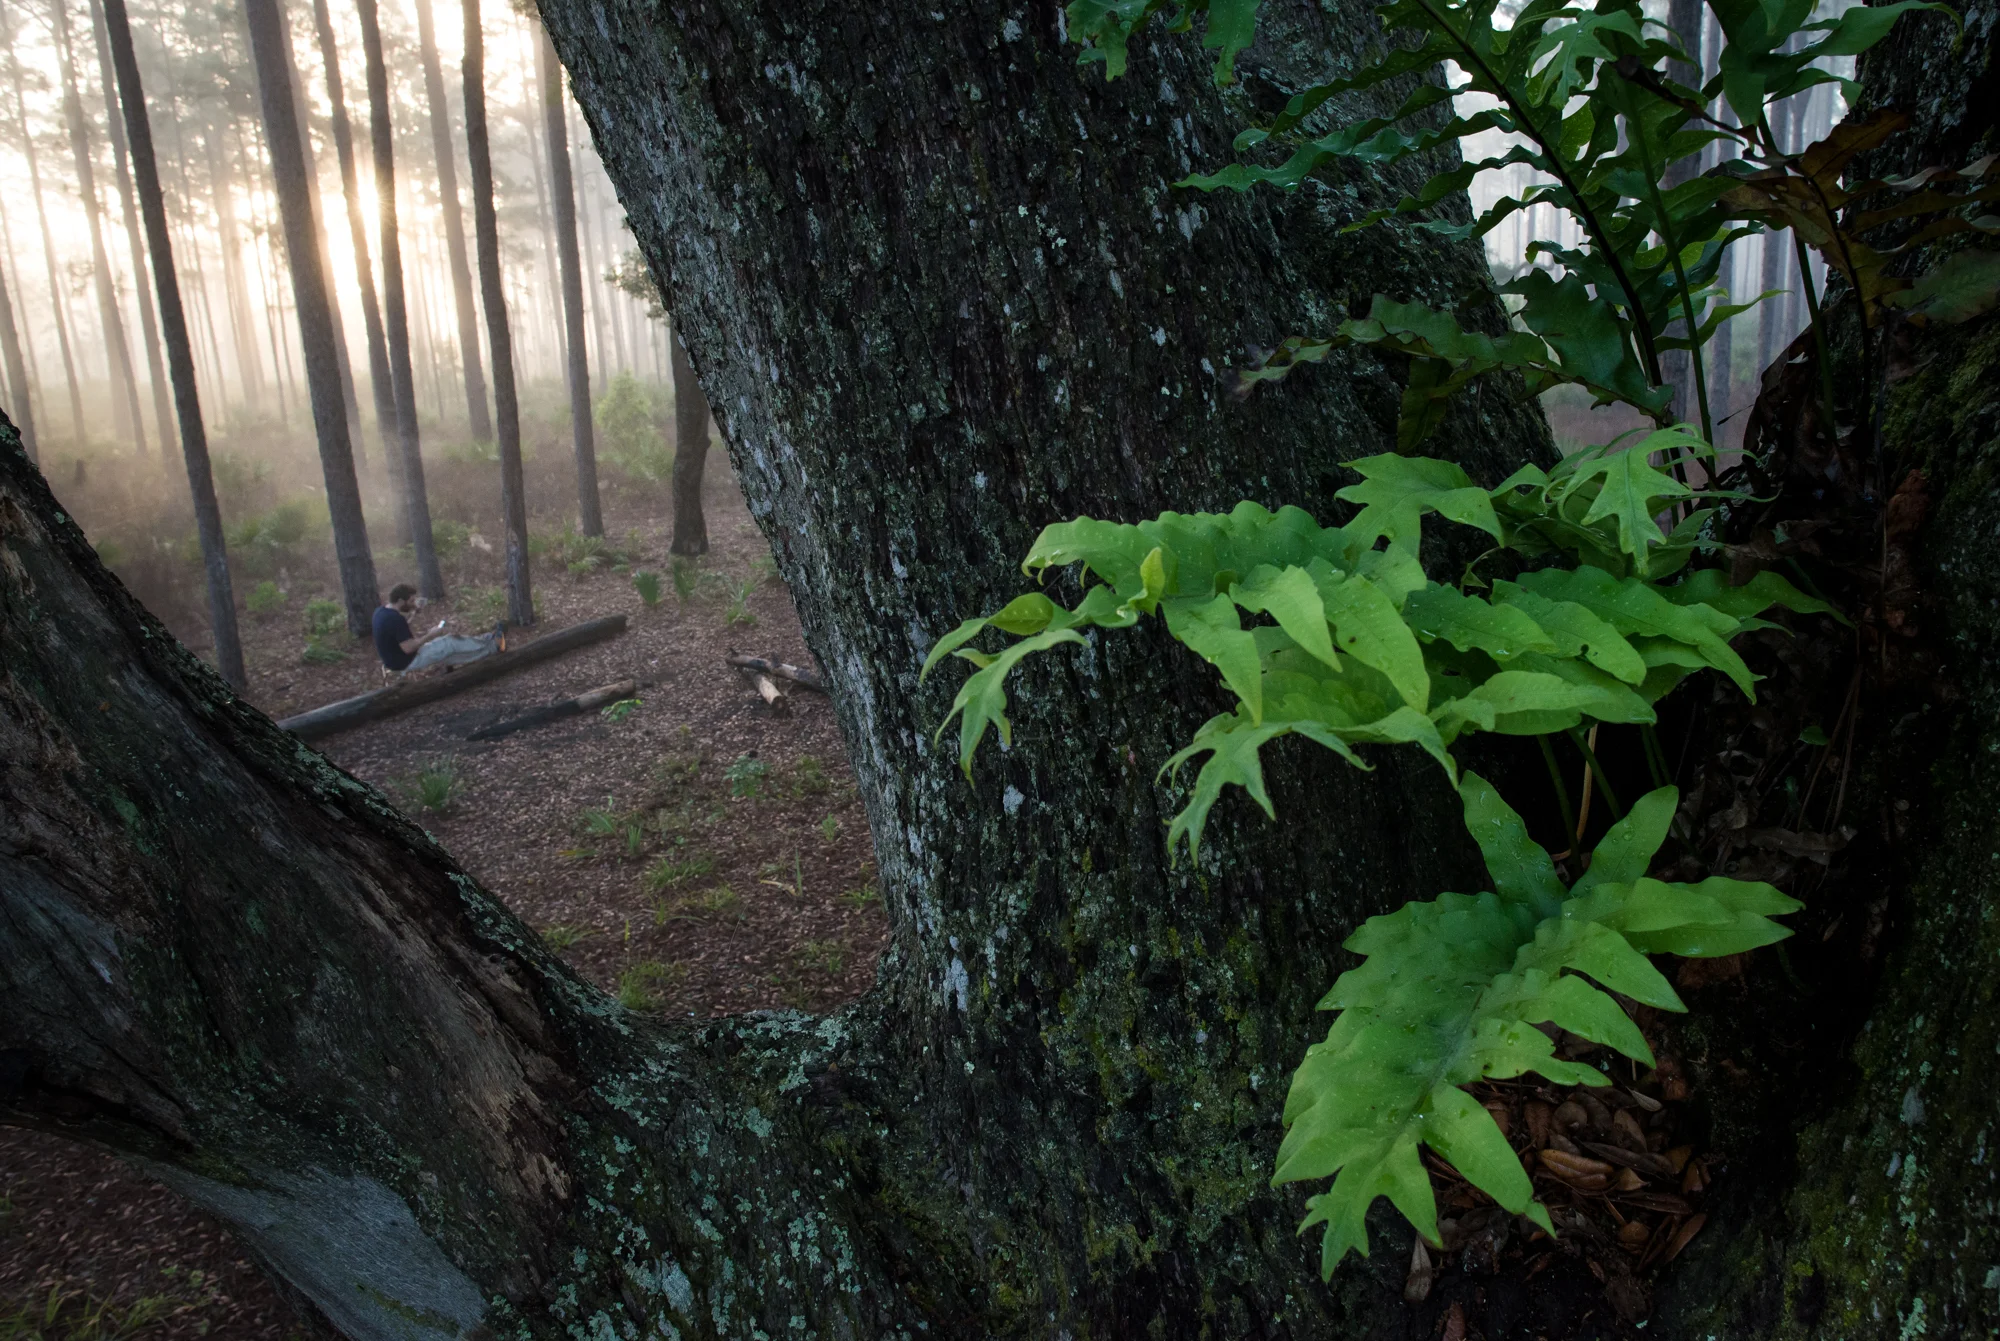
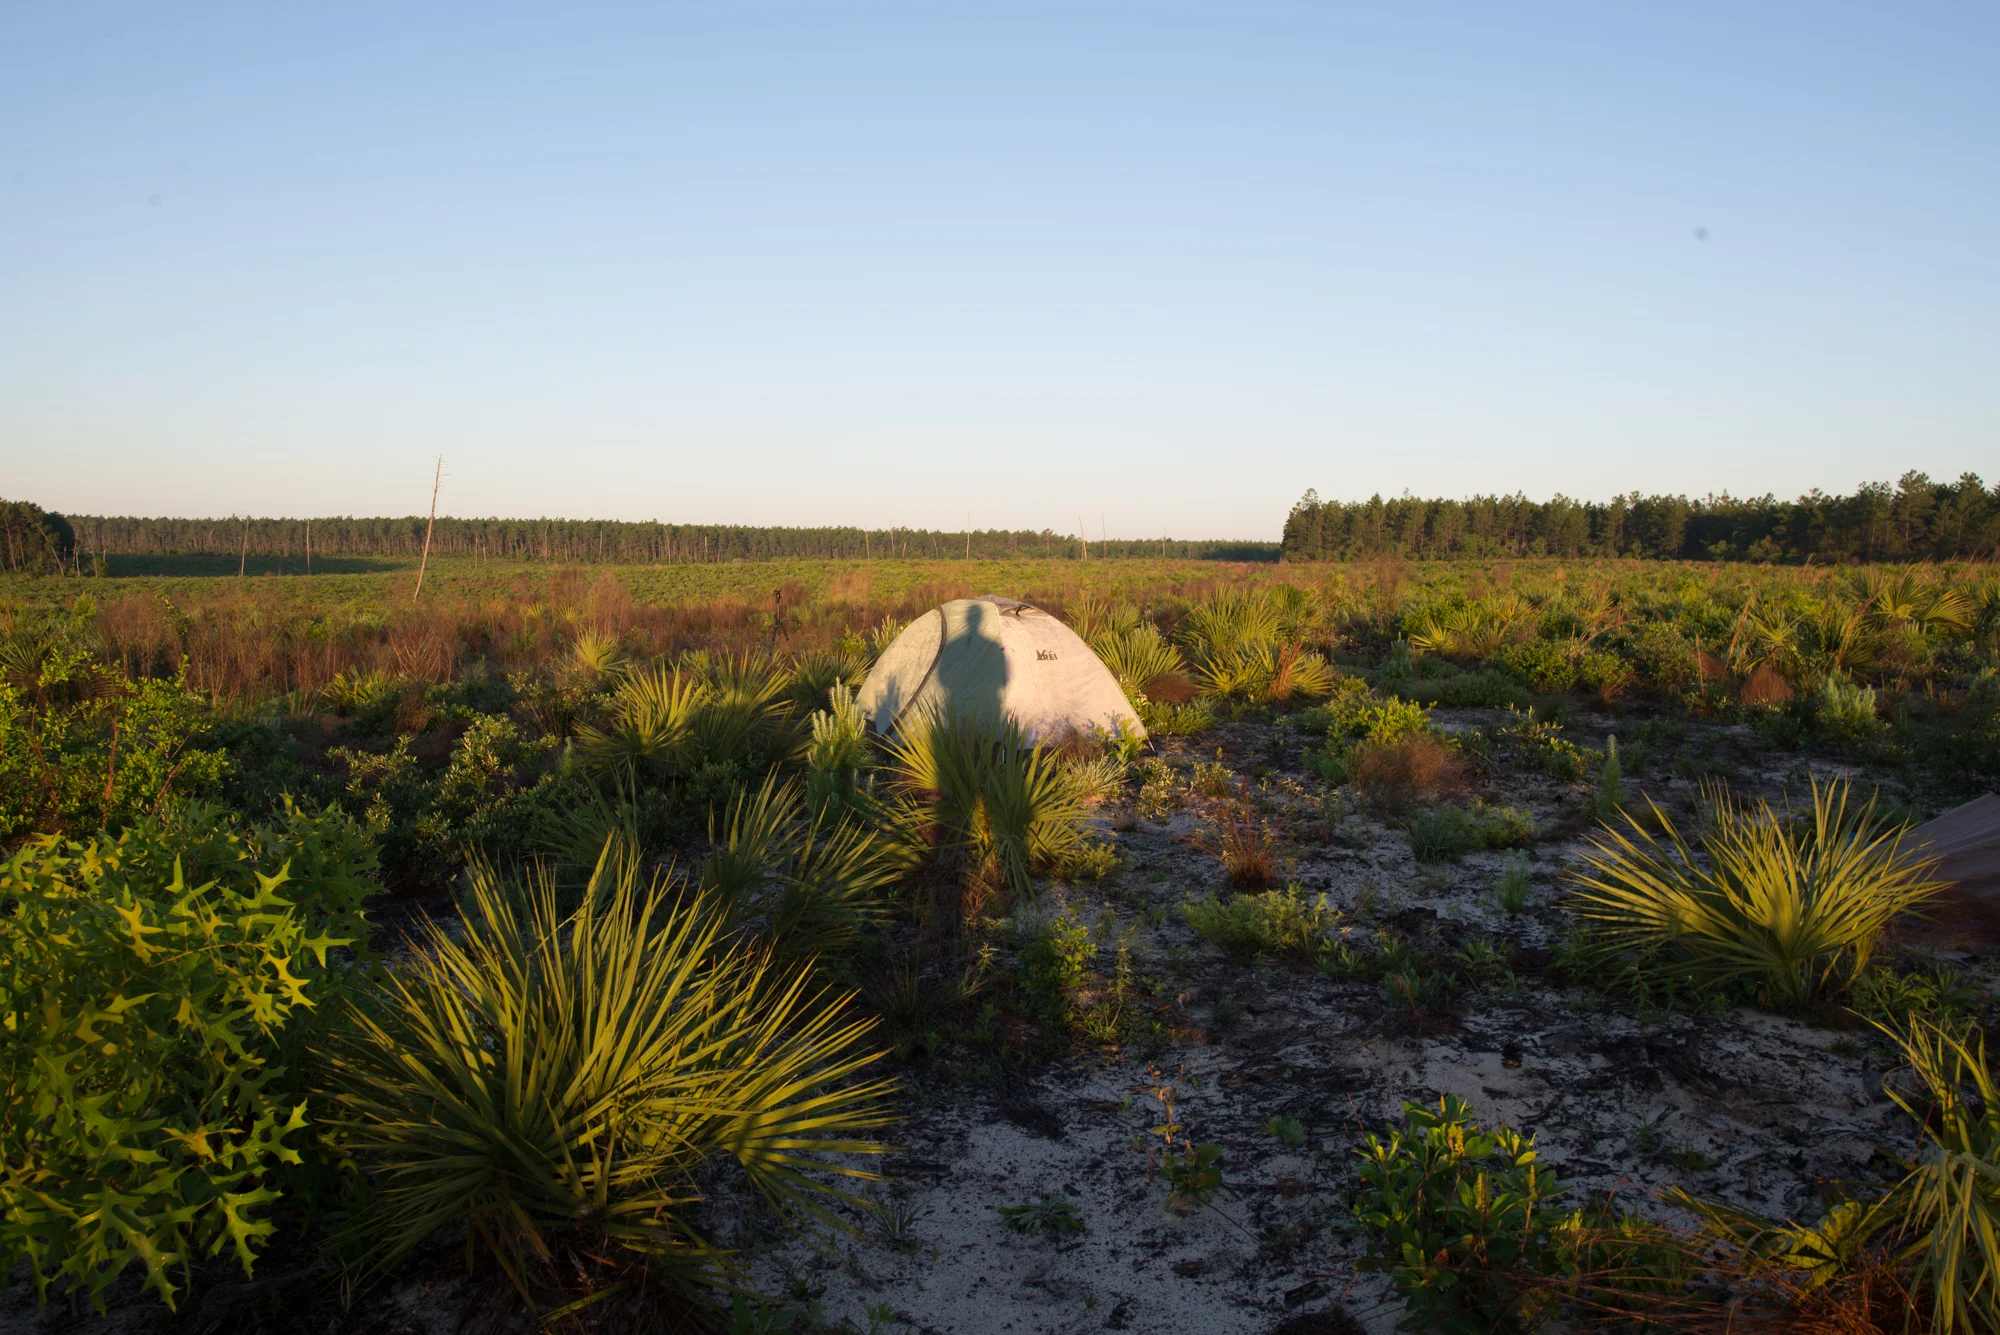
We returned to camp a little frustrated and spent the next couple hours photographing this magnificent live oak before heading to sleep.

I woke up at 6:30 to thunder rumbling in the distance. Small rain drops pattered my tent. I knew if I got up then I could pack before the inevitable onslaught of rain. I reluctantly climbed outside.
Alex was still asleep by the time I finished packing, so I covered my pack with a tarp, pulled out a chair and sat snug beneath an umbrella. It was probably one of the strangest and most peaceful experiences I’ve had out in the woods.

A picture of my feet after waking up to the sound of thunder. I’ve really been enjoying the comfort of my Nemo Hornet single person tent.

With my gear packed and covered, I sat in a chair in the rain. I don’t usually carry an umbrella (in fact, this is the first time I’ve ever brought an umbrella), but I’m sure glad I did!
I’m disappointed the light painting didn’t go as planned, but I think it brings up an interesting discussion regarding the role the process of creating art plays in the way we view the finished product. I like my photoshopped image. It’s literally exactly what I was picturing in my head, and in my opinion it’s far more powerful than the light painted version. But the methods used to create it make it more of a graphic design piece than a photography piece; and there’s something in me that knows I would like it just a little bit more if I had achieved the end result entirely in camera.
If you have any thoughts about the two images or ideas about how we can achieve more precise results in camera, leave them in the comments below. I’d love to hear from you!

Moon Flower Blues
We drove to the Juniper Prairie Wilderness Friday evening with the goal of photographing white pond lilies beneath the glow of a rare “blue flower moon.”

My tent glows green under the light of a rare blue flower moon in Juniper Prairie Wilderness.
Introduction
We drove to Juniper Prairie Wilderness Friday evening with the goal of photographing white pond lilies beneath the glow of a rare “blue flower moon.”
Alex and I noticed during a recent trip that the pond lilies were blooming. Fast forward two weeks and we’re sitting on the floor of Alex’s apartment dropping LEDs into a bucket of water to test for waterproofness. Our plan was to illuminate both the lilies and the surrounding water with blue and green LEDs, hoping that the artificial light paired with the ambient glow of the moon would result in a somewhat mystical and ethereal image.
Armed with high hopes, a sense of adventure and more bug spray than should ever be required for two people, we headed for the woods.

One of Alex’s blue LEDs attached to a 3V button cell

Blue LED covered and dropped into a bucket of water

Howl parked at the Fire Trail on Forest Road 33
The designated pond is just a five-minute hike from the parking lot; and while it’s known to accommodate frequent campers, Alex and I were pleased to find we were its only occupants that night.
But our enthusiasm quickly turned to disappointment at the sight of the pond. What had been covered with lilies just two weeks prior was now a barren wasteland … or so we thought. Unable to accept the reality, we dropped our gear and walked the perimeter in search of flowers, buds, anything we could poke with an LED and photograph.
We eventually found some less-than-ideal yellow lily buds to photograph and decided to return to the location after dark. We went back to set up camp and wait.

The moon rises over the Juniper Prairie Wilderness during our hike to the pond.
Despite our initial disappointments, we did happen to find a couple other photo opportunities to entertain us while we waited.
The first came right after I set up my tent and sat down in my chair to rest. I didn’t realize while setting up that the moon was rising perfectly over my tent and peeking through a small gap in the canopy. It was a happy accident, and I rushed to set up my camera.
The second photo opportunity was a gnarly old oak tree we found sticking up from the scrub. Alex and I have been eagerly planning to attach LEDs to his drone and fly a helix around a tree; and although it wasn’t on the agenda for this trip, we decided it was a good opportunity to test it.

The eerie green glow produced on the surrounding foliage made this shot for me. I was glad I had decided to bring my Nemo Hornet one person tent along for this trip.
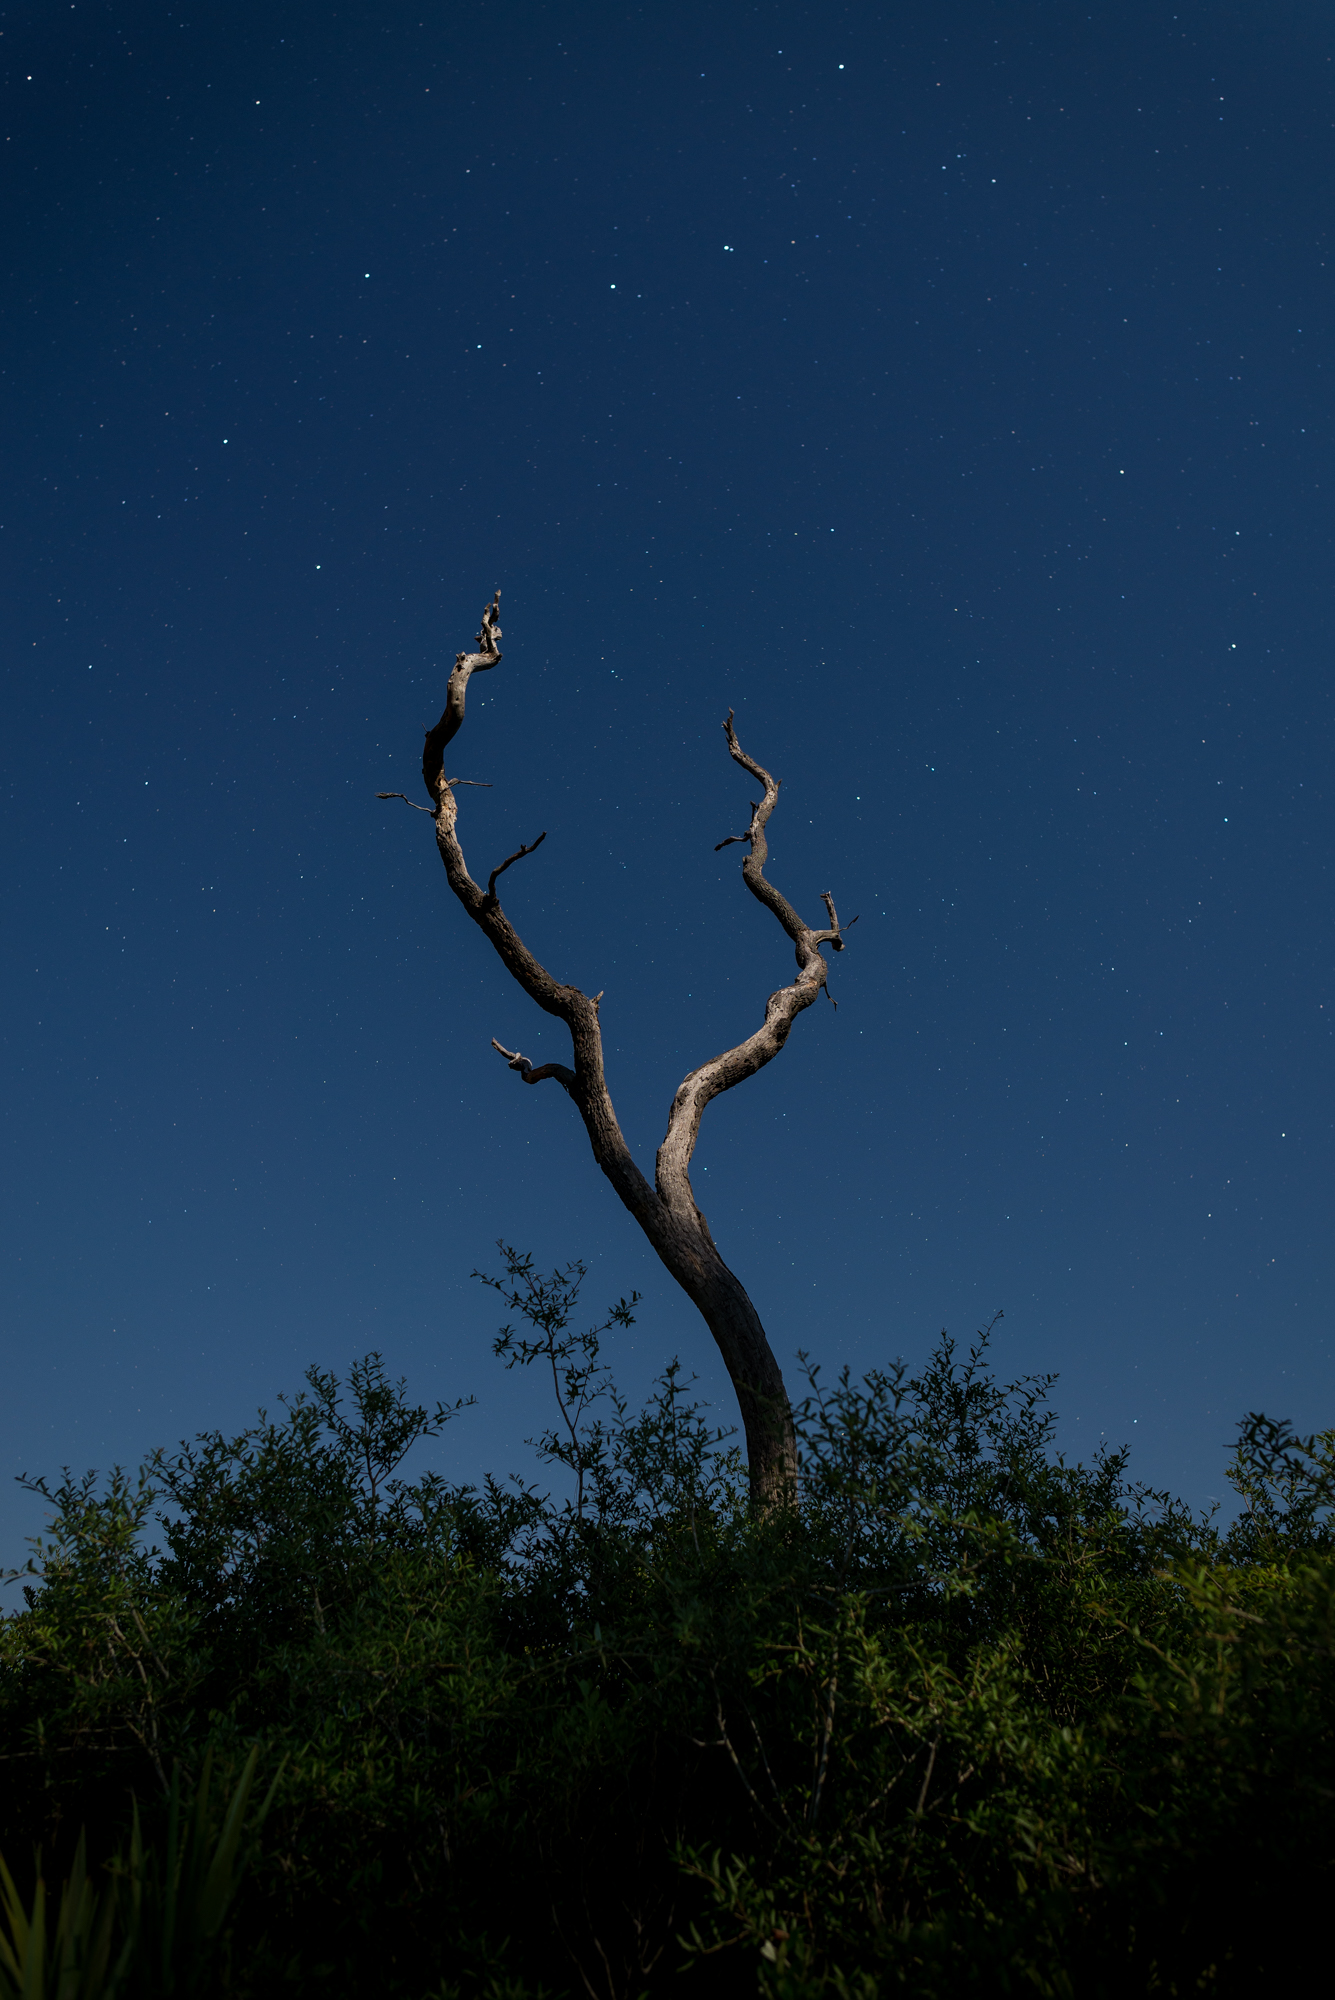
A moonlit oak tree rises from the scrub in the Juniper Prairie Wilderness of the Ocala National Forest.

Alex attaches LEDs to his DJI Spark, Spudnik, in the glow of the camp fire.

Drone helix attempt four of seven

Drone helix attempt six of seven
It turns out flying perfectly precise helixes around an imperfectly shaped tree in the dark is more difficult than we originally anticipated. The drone sustained a fairly devastating crash, and we weren’t able to achieve the unrealistic shapes we had in our minds. But I think the results are still pretty cool, and it was good practice for the future.
It was late when we finished, so we decided it was time to rig up the green LEDs and head into the swamp. This is when the trip got a little weird.

Alex holds a bag of green LEDs to his face for a portrait before getting in the water.
“If they had ever even seen humans before, they certainly hadn’t met any like us.”
It was 1:30 a.m. when we waded into the swamp. We tried photographing the lilies, but it wasn’t working. The pond was thick with mud, frogs and mosquitoes, and the lily pad stems made it nearly impossible to maneuver the tripod legs. We decided to give up and point our cameras at the frogs instead.
I’m pretty sure the frogs thought we were mad, because they wouldn’t even move. They just stood there in a sort of paralyzed trance at the sight of two human beings trudging through their home at two o’clock in the morning. If they had ever even seen humans before, they certainly hadn’t met any like us. We were in the pond for about 30 minutes to an hour before jogging back to the campsite to dry off beside the fire.
Sleep came easy that night, and I soon found myself dozing off to the grunts and groans of the frogs, imagining they were discussing among each other the significance of what just happened.

A frog glows green in the light of the LEDs.
Only a few hours passed before the sun came up and turned our tents into ovens. We decided not to linger that morning, and we swiftly packed up our things and headed for the van.
It felt good being warm and dry, and I remember thinking to myself the last thing I wanted to do for a while was to wade back into one of those nasty swamps. That was right about the time Alex said, “Matt, there are lilies in the pond.”
We did the only responsible thing and got back in the water.

Alex wades into the swamp to capture macro images of the water lilies.
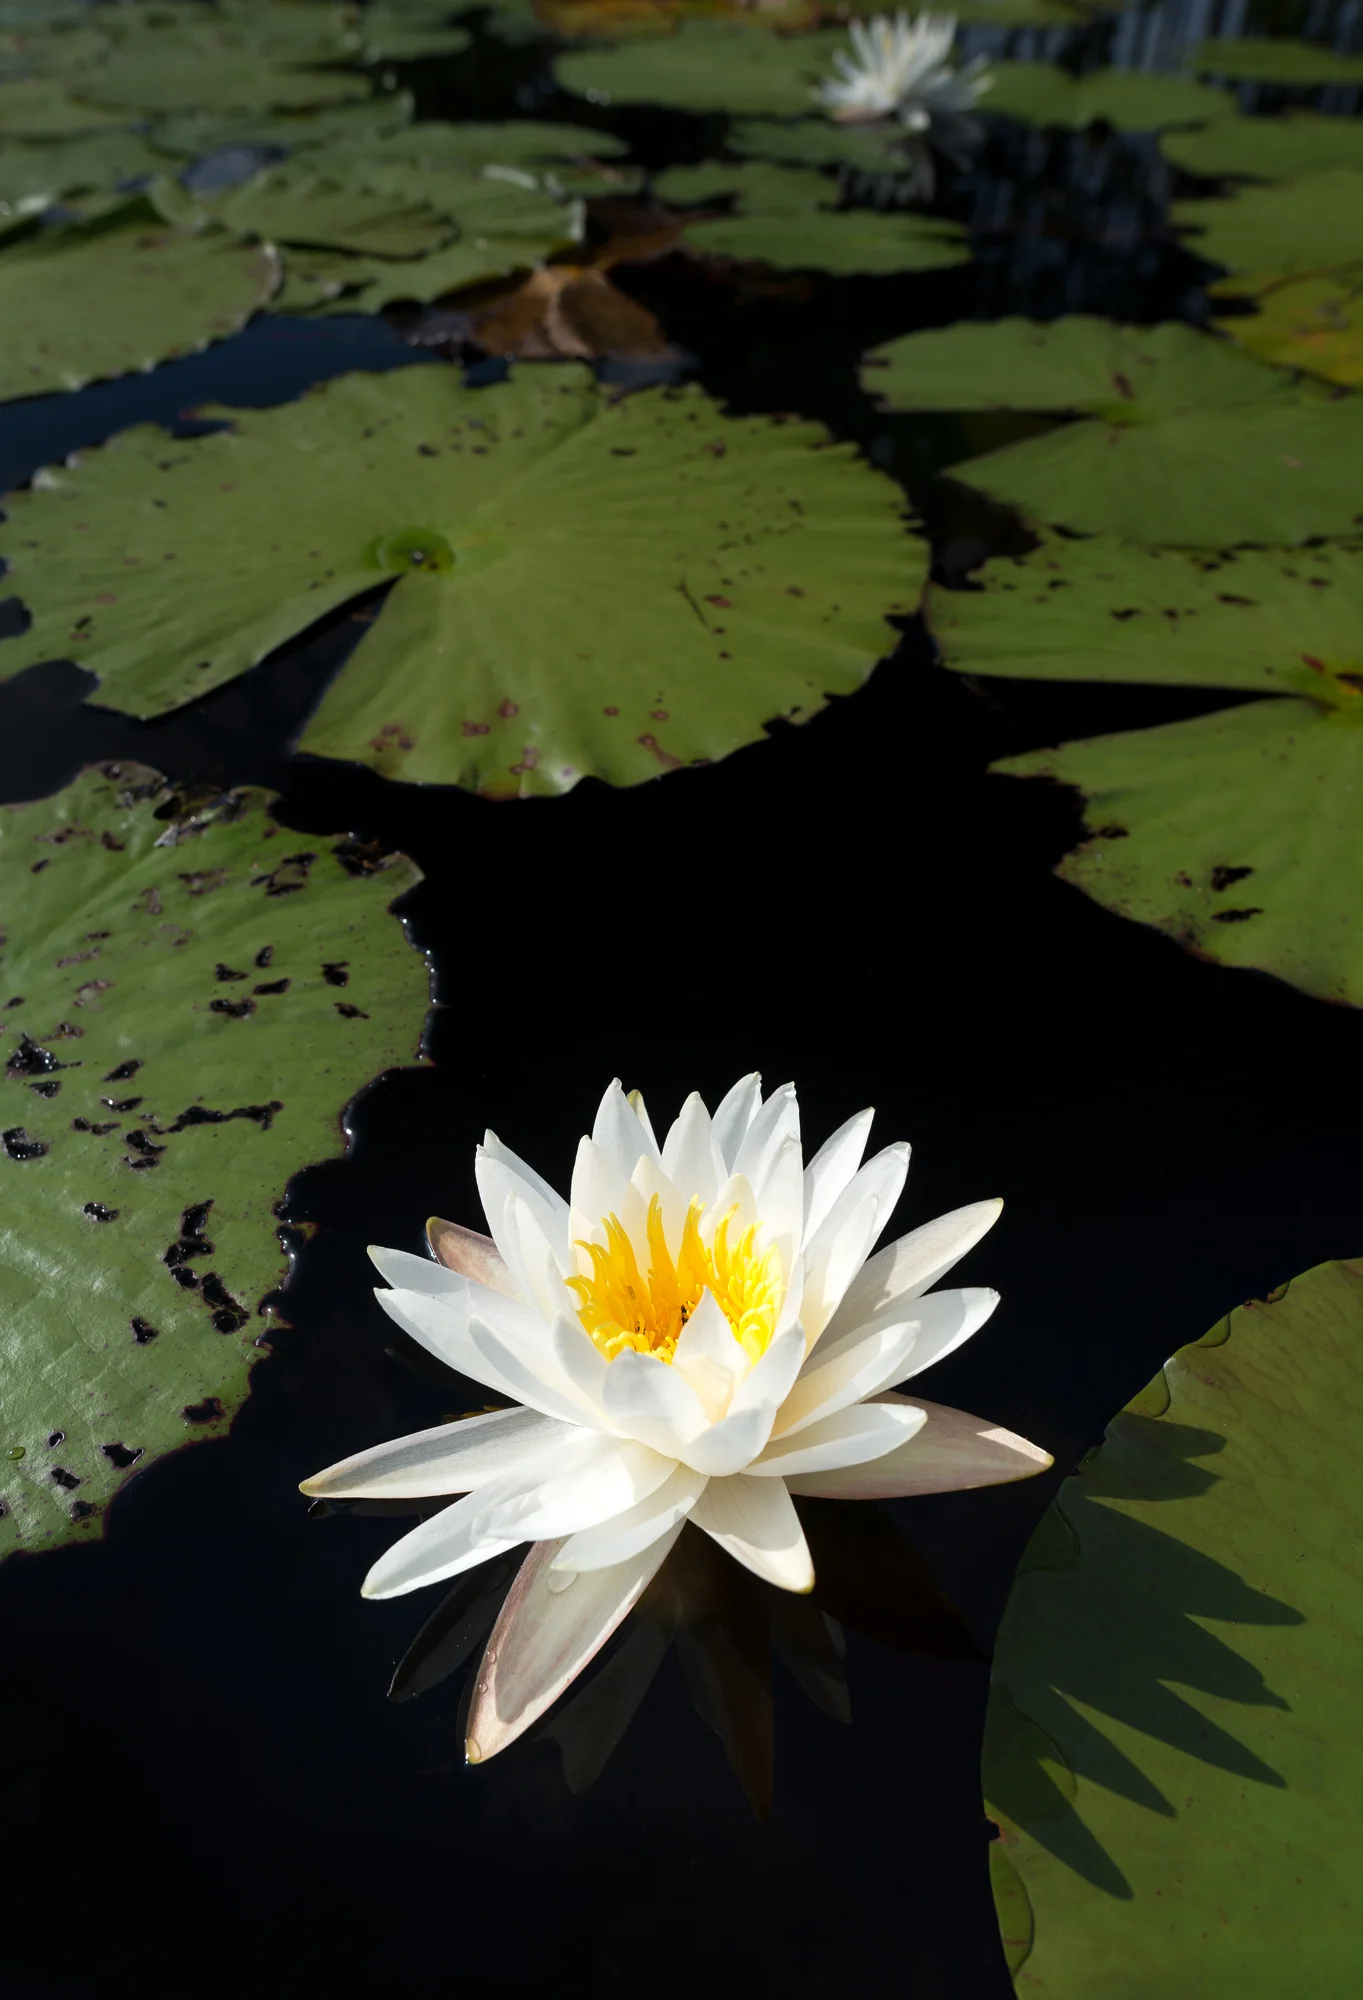
A white water lily pops against the dark pond water in the Juniper Prairie Wilderness.
I returned from this trip with two key takeaways.
The first is that flowers don’t generally open at night. I’m sure this statement sounds obvious to everyone reading, but for some reason I really expected the lilies to be at least partially open when we arrived, especially since it was still light out at the time.
The second takeaway is a big one, and that is to always check, double check, and then triple check the details. It wasn’t until after I got home and processed the media that I realized the “blue flower moon” was actually Saturday night, not Friday night. What I photographed was only a 97-percent-full moon. And although this fact doesn’t change the images I brought home, it does change the context of those images. A photo of a rare blue flower moon rising over my tent is significantly more interesting than one of an almost-but-not-quite blue flower moon rising over my tent, even if the two images look identical.
Bill Gates famously said, “content is king.” But I think he only got it half right. It is the combination of both content and context that truly is king.

Gear Parade
Here is a list of my top ten favorite things to bring into the woods. Some are practical, others just fun. There is no particular order. It’s just ten things. That I like. Out of order. Here we go.

Top 10 list of my favorite things to bring into the woods
Some of these items are practical, and others are just fun. This list doesn’t account for large items like tents and backpacks. I feel like those are a little obvious. This is more a list of the little things I love - things that make my experience in the woods easier, safer and just more enjoyable. It’s probably worth noting that this list is in no particular order. It’s just ten things. That I like. Out of order. Here we go.

1. Sea To Summit Aeros Pillow
For a long time I saw a pillow as more of a luxury item than a practical one. I used to just cram my dirty clothes into a stuff sack and rest my precious head on that lumpy concoction. I’ve evolved a little since then.
The Sea To Summit Aeros Pillow is the best weight-to-comfort value you can buy. It weighs almost nothing, packs down to almost nothing, and costs almost nothing. It’s the one piece of gear you won’t even notice you have until you pull it out at night.

2. Small Tarp
Having a small sheet of plastic in the woods is invaluable. It is arguably the most useful thing on this list. You can sit on it, you can put your gear on it, you can cover your gear with it or cover yourself with it, not to mention all the uses it has if you were to find yourself in a survival situation.
The biggest reason I love this tarp is because when I’ve spent the day walking through swamp and bugs and the ground is wet and muddy and I just want to stop and sit, I can deploy this tarp and instantly have a safe, dry place to rest. It’s amazing how luxurious a tarp can feel after a day like that!
If you are going camping in Florida, bring a tarp. You’ll thank me later.

3. Garmin eTrex 10
The ability to instantly summon a straight line to any specific point in the woods has gotten me out of more than one sticky situation. But the main reason I carry this is to log trip data.
After each trip, I import the GPS data into Google Earth and have instant feedback of what I did right and what I did wrong and which places I might want to explore in the future. It’s a powerful tool, and I argue it is the backbone of mine and Alex’s Juniper Prairie Wilderness project.
I like the eTrex 10 because it’s basic without all the bells and whistles. It’s also the cheapest Garmin on the market by a significant amount.

4. Buff
If you aren’t familiar with Buff, it’s a company that makes lightweight airy pieces of cloth that keep the sun off your neck, head and face. I mostly use mine like a scarf around my neck, and while it might sound uncomfortable putting something around your neck while hiking through the sun, it actually keeps me cooler! Plus it helps to prevent skin cancer, so definitely worth the 20 bucks.

5. Sawyer Squeeze water filter
Neglecting to bring enough water can turn a fun camping trip into a dangerous one. But bringing enough water can turn an easy hike into a miserable one. A water filter ensures you’ll have more than enough to drink without having to carry all the weight … as long as you have a fresh water source nearby.
There are many good water filters out there. The reason I like the Sawyer Squeeze is because it’s small and versatile. I can attach it straight to my dirty water bag or my clean water bottle, or I can use it like a straw and drink straight from the water source. Sawyer is also a Florida-based company, which counts for something in my book!

6. Backpacking trowel
The invention of the sewage system was one of the single greatest advancements in human civilization. Please don’t forget this when you go out into the woods.
There are much nicer titanium trowels available. I bought this ridiculously colorful plastic version as an add-on item on Amazon and it hasn’t let me down yet. Probably good to note that most of Florida is sand, and that this particular trowel wouldn’t fare too well in rocky terrain.
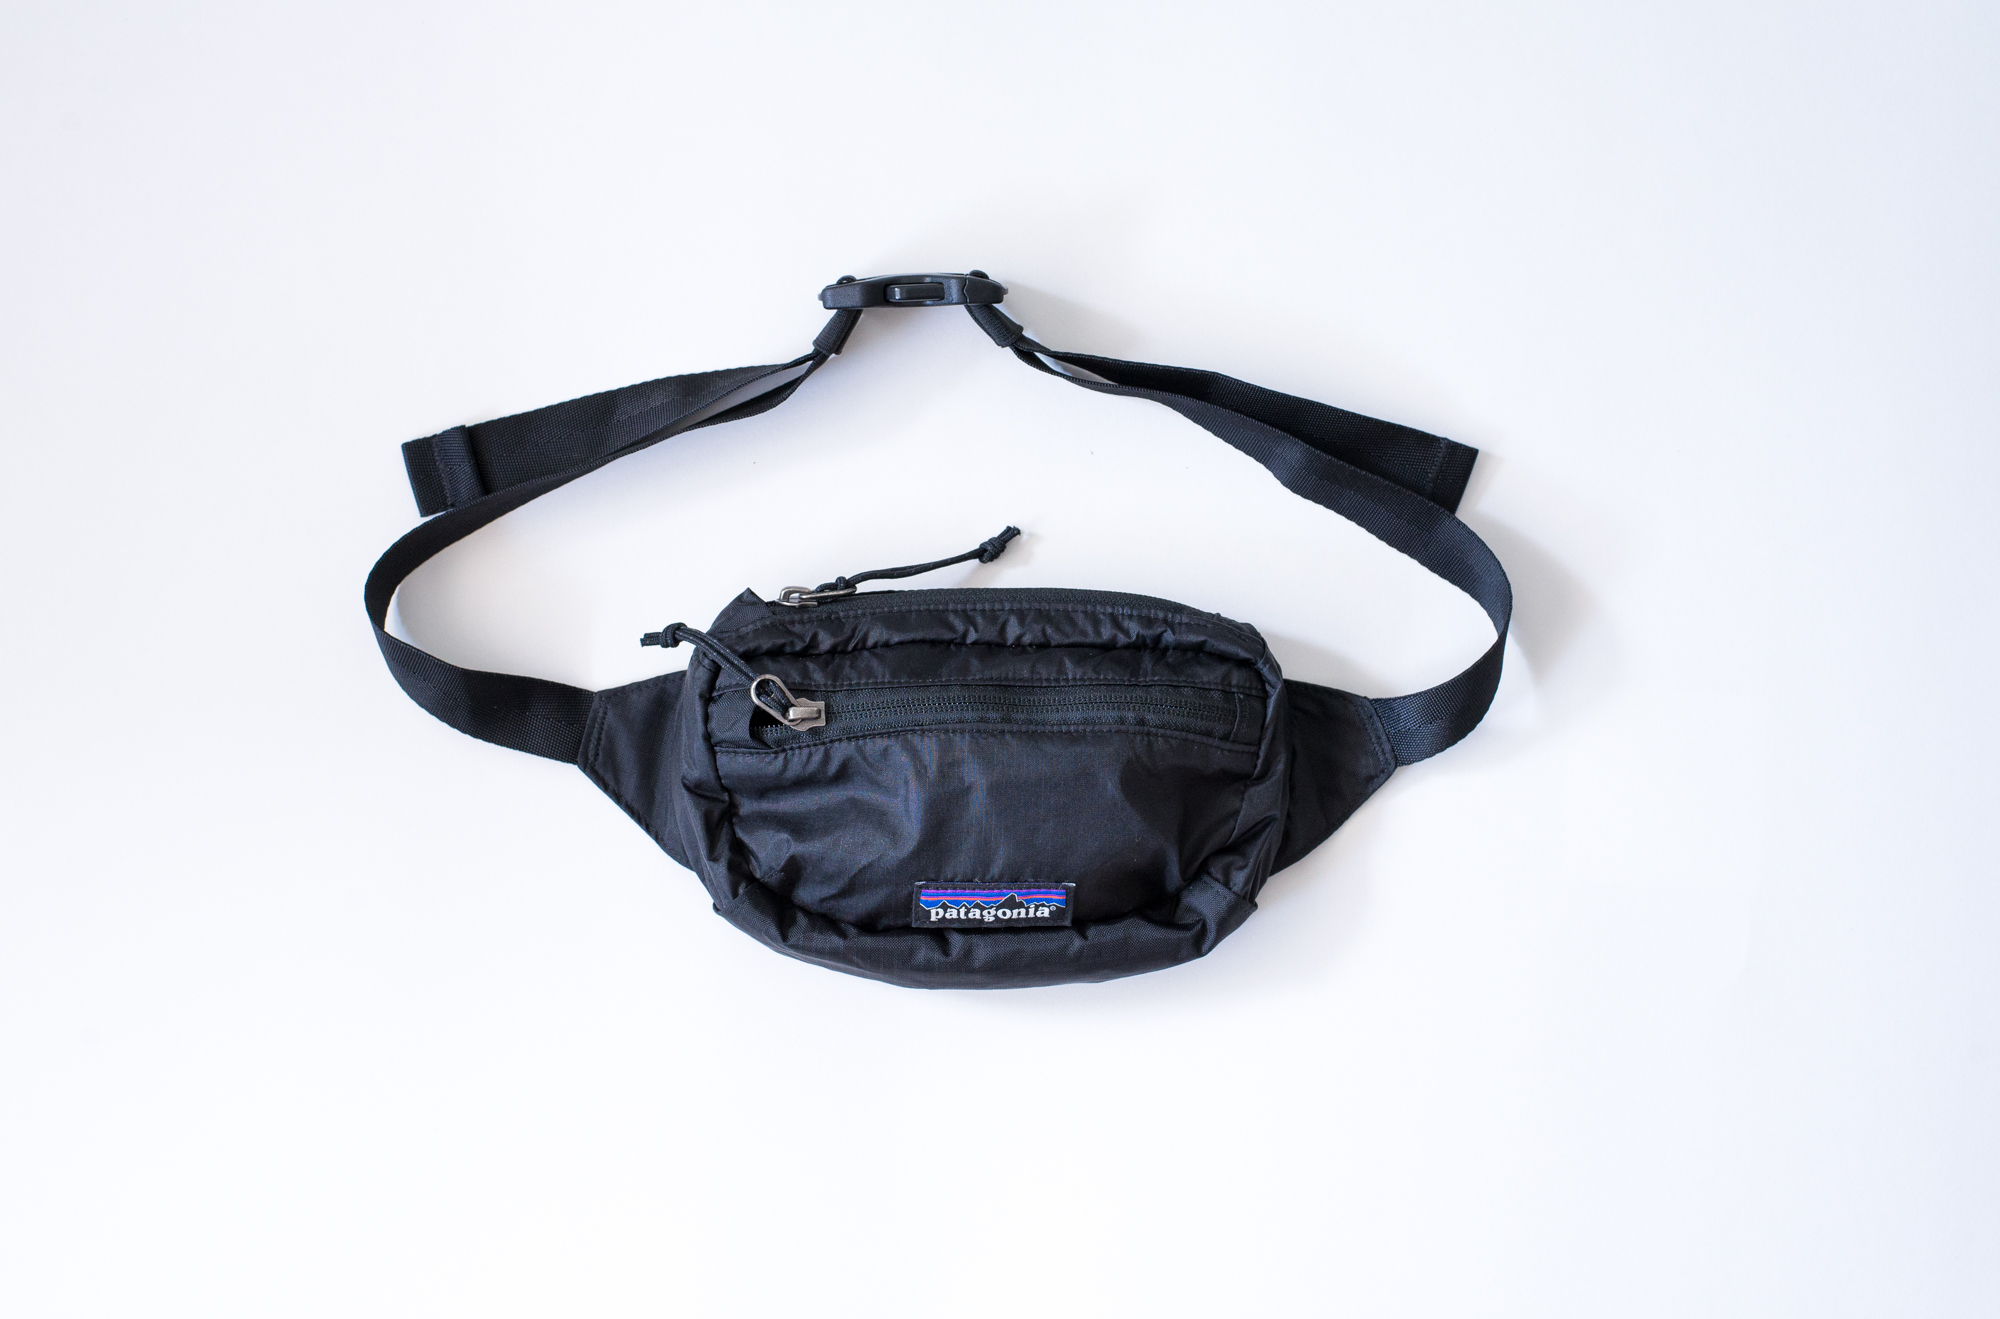
7. Patagonia Lightweight Travel Mini Hip Pack
That’s a lot of words to basically just say “fanny pack.” While fanny packs are making a small comeback, you still have to be pretty confident to wear one out in public. However, when you’re wading with your camera through a swamp in the wilderness while trying to keep track of your phone and lens cap and filters and other accessories, the practicality of the fanny pack really shines. And practicality always trumps fashion when you’re in the woods.
I like this Patagonia model because it’s small, lightweight, fairly water proof, and I like supporting Patagonia for the awesome things they do.

8. Petzl ACTIK headlamp
Flashlights are nice, but it’s substantially more useful to have a focused beam of light at eye level, automatically illuminating whatever you point your head at. It also serves as a nice light painting tool when I’m photographing at night.
I have a few headlamps from different manufacturers, but I always seem to come back to this Petzl ACTIK. It’s lightweight, comfortable and obnoxiously powerful.

9. Pentax Digital Spotmeter
If it’s good enough for Ansel Adams, it’s good enough for me. The Pentax Digital Spotmeter is almost more fun to use than the camera! I’m not kidding.
Unfortunately, Pentax no longer makes these, so you’ll need to find one used. But if you’re a film landscape photographer and you’re trying to decide which light meter to buy, I highly recommend grabbing one of these while they’re still available. There’s a lot to be said about good design, and the Pentax is just that. It’s simple, intuitive, and exceptional at the one thing it does. I hope mine lasts forever.

10. Mamiya 7ii
Last but certainly not least is my Mamiya 7ii. I had to fight the urge to make all ten items on this list camera related. It took an extraordinary amount of self control.
Of all my cameras, the Mamiya 7ii made the cut because of its form factor. You get the size of 6x7 medium format film in a camera the size of a DSLR. I’m a firm believer that every type of camera, whether digital or film or full frame or medium format or cell phone, has a specific purpose. But objectively speaking, the Mamiya 7ii is my favorite camera to bring to the woods. Period. In fact, it’s sometimes the entire reason I go to the woods. It’s just so much fun.

Let There Be (F)light
There have been two trips that have definitively revolutionized our Juniper Prairie Wilderness project. The first was when we started bringing GPS devices to the woods. The second occurred this weekend.
Introduction
There have been two trips that have definitively revolutionized our Juniper Prairie Wilderness project. The first was when we started bringing GPS devices to the woods. The second occurred this weekend. But before I get to that, let me start with the reason Alex and I went to the woods in the first place. A cactus.
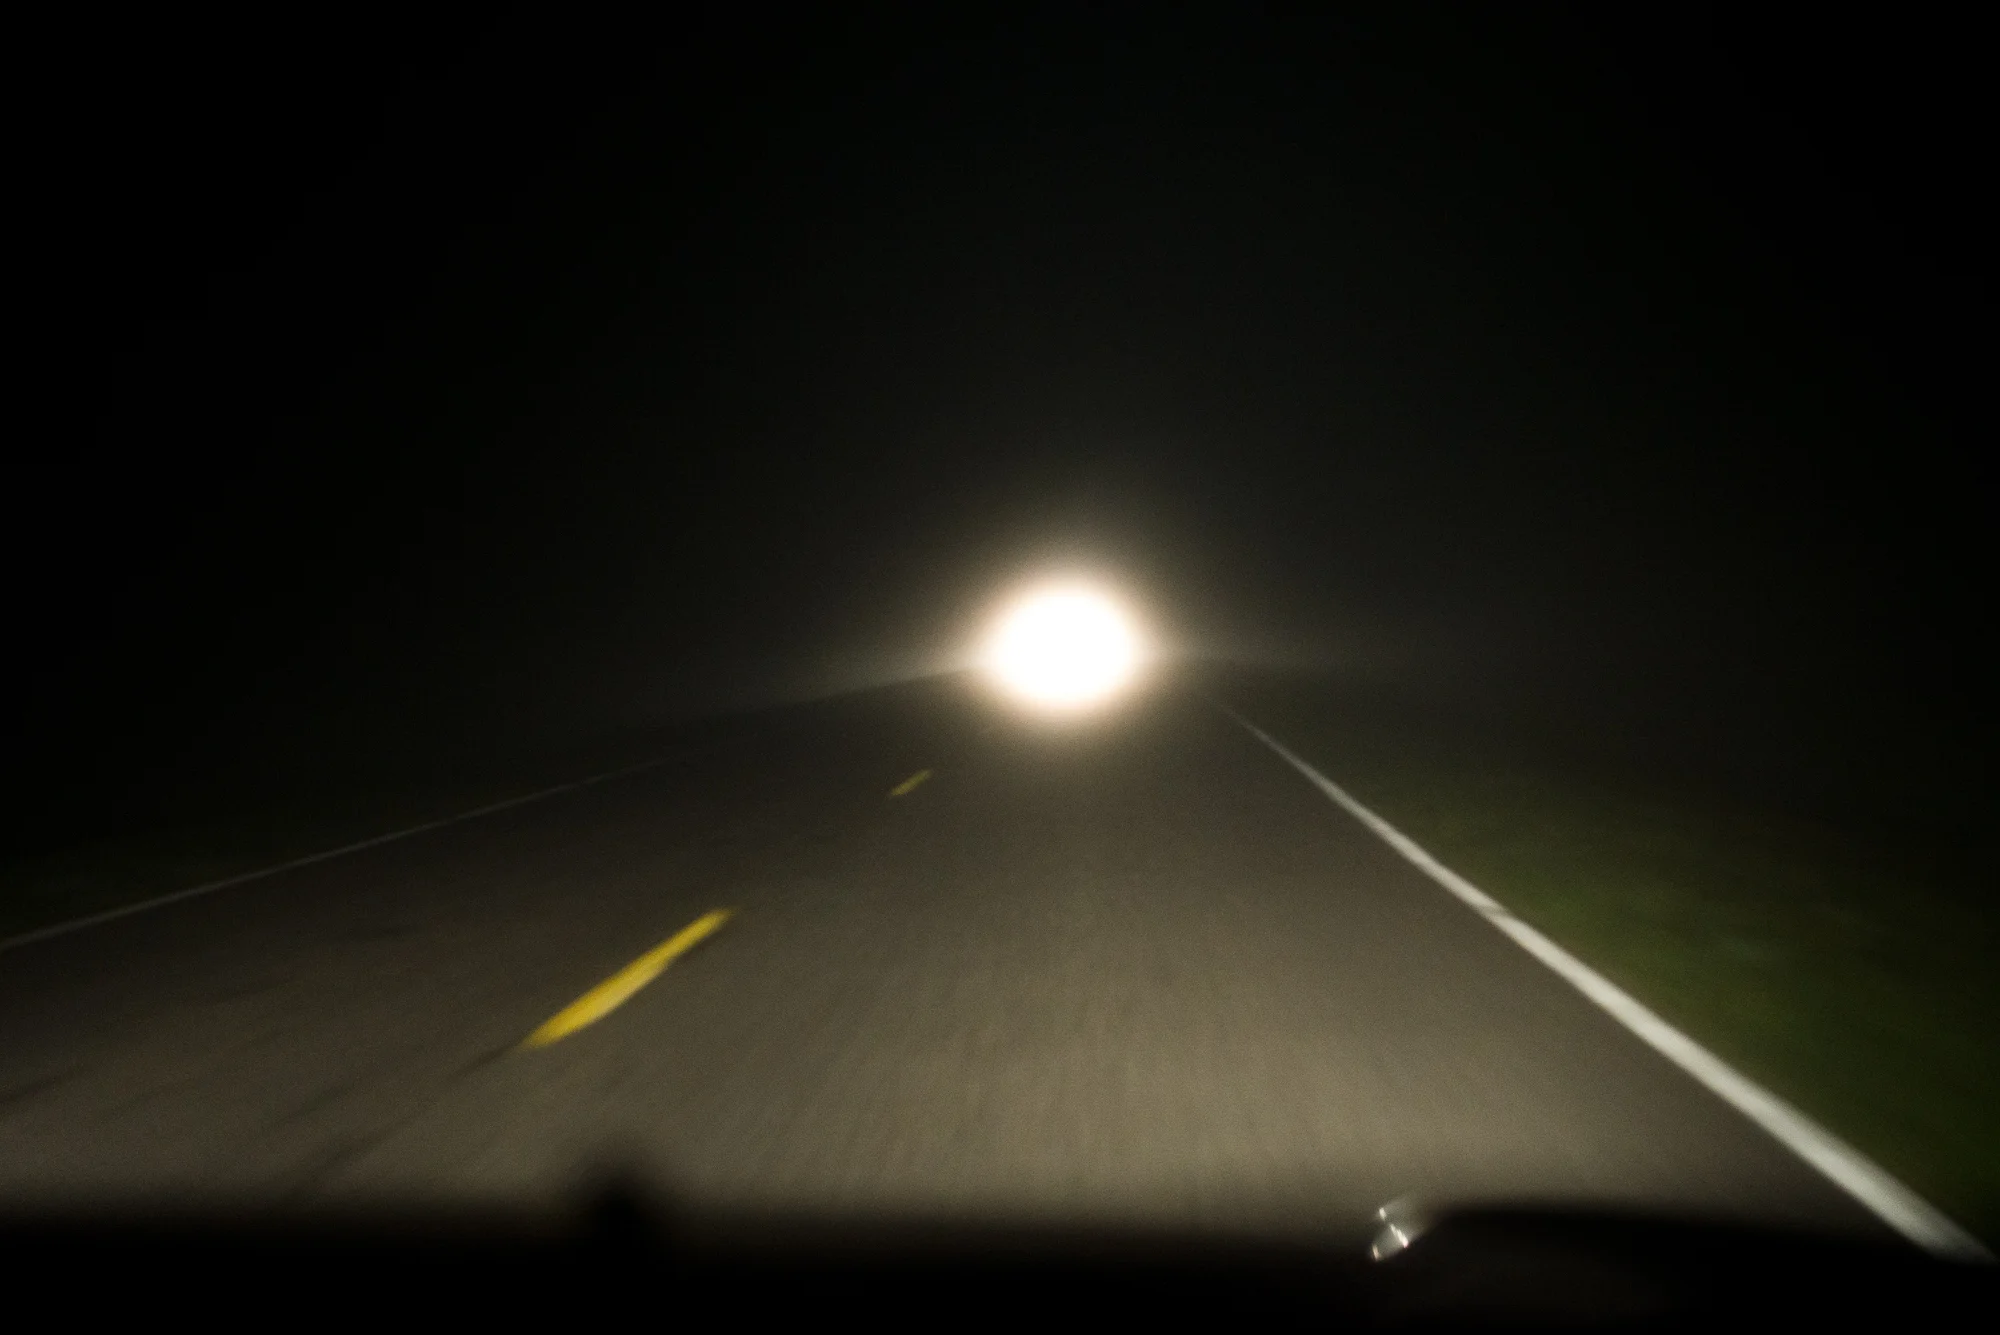
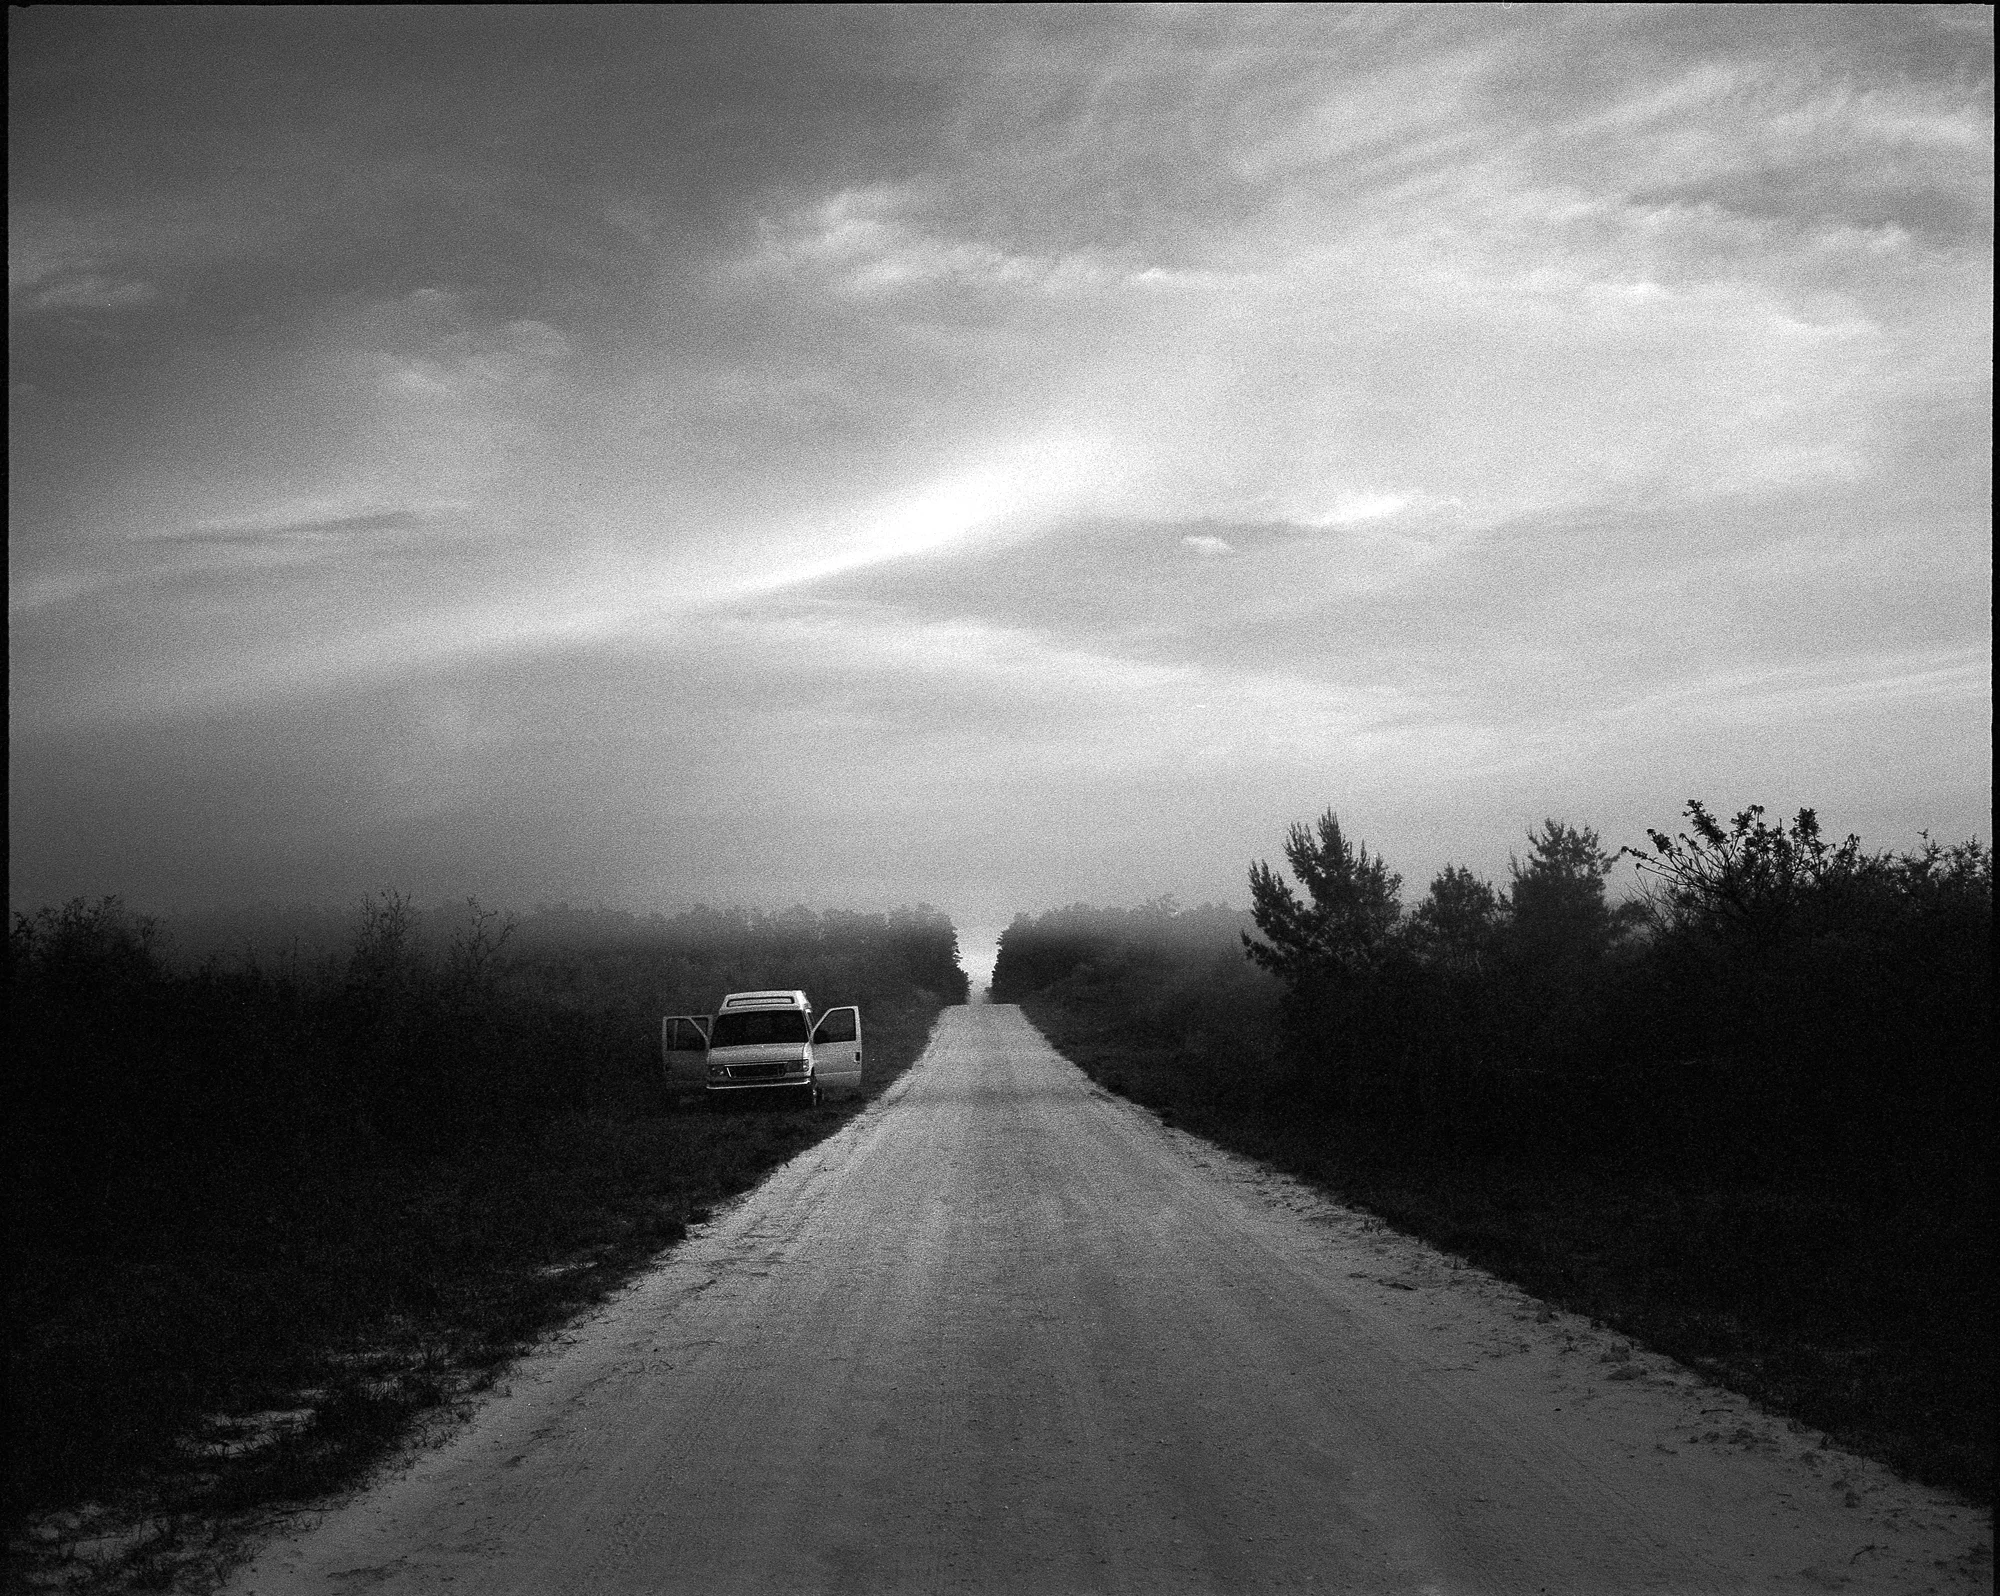
The headlights of a passing vehicle foreshadow the dawn of a new era in our Juniper Prairie Wilderness adventures.
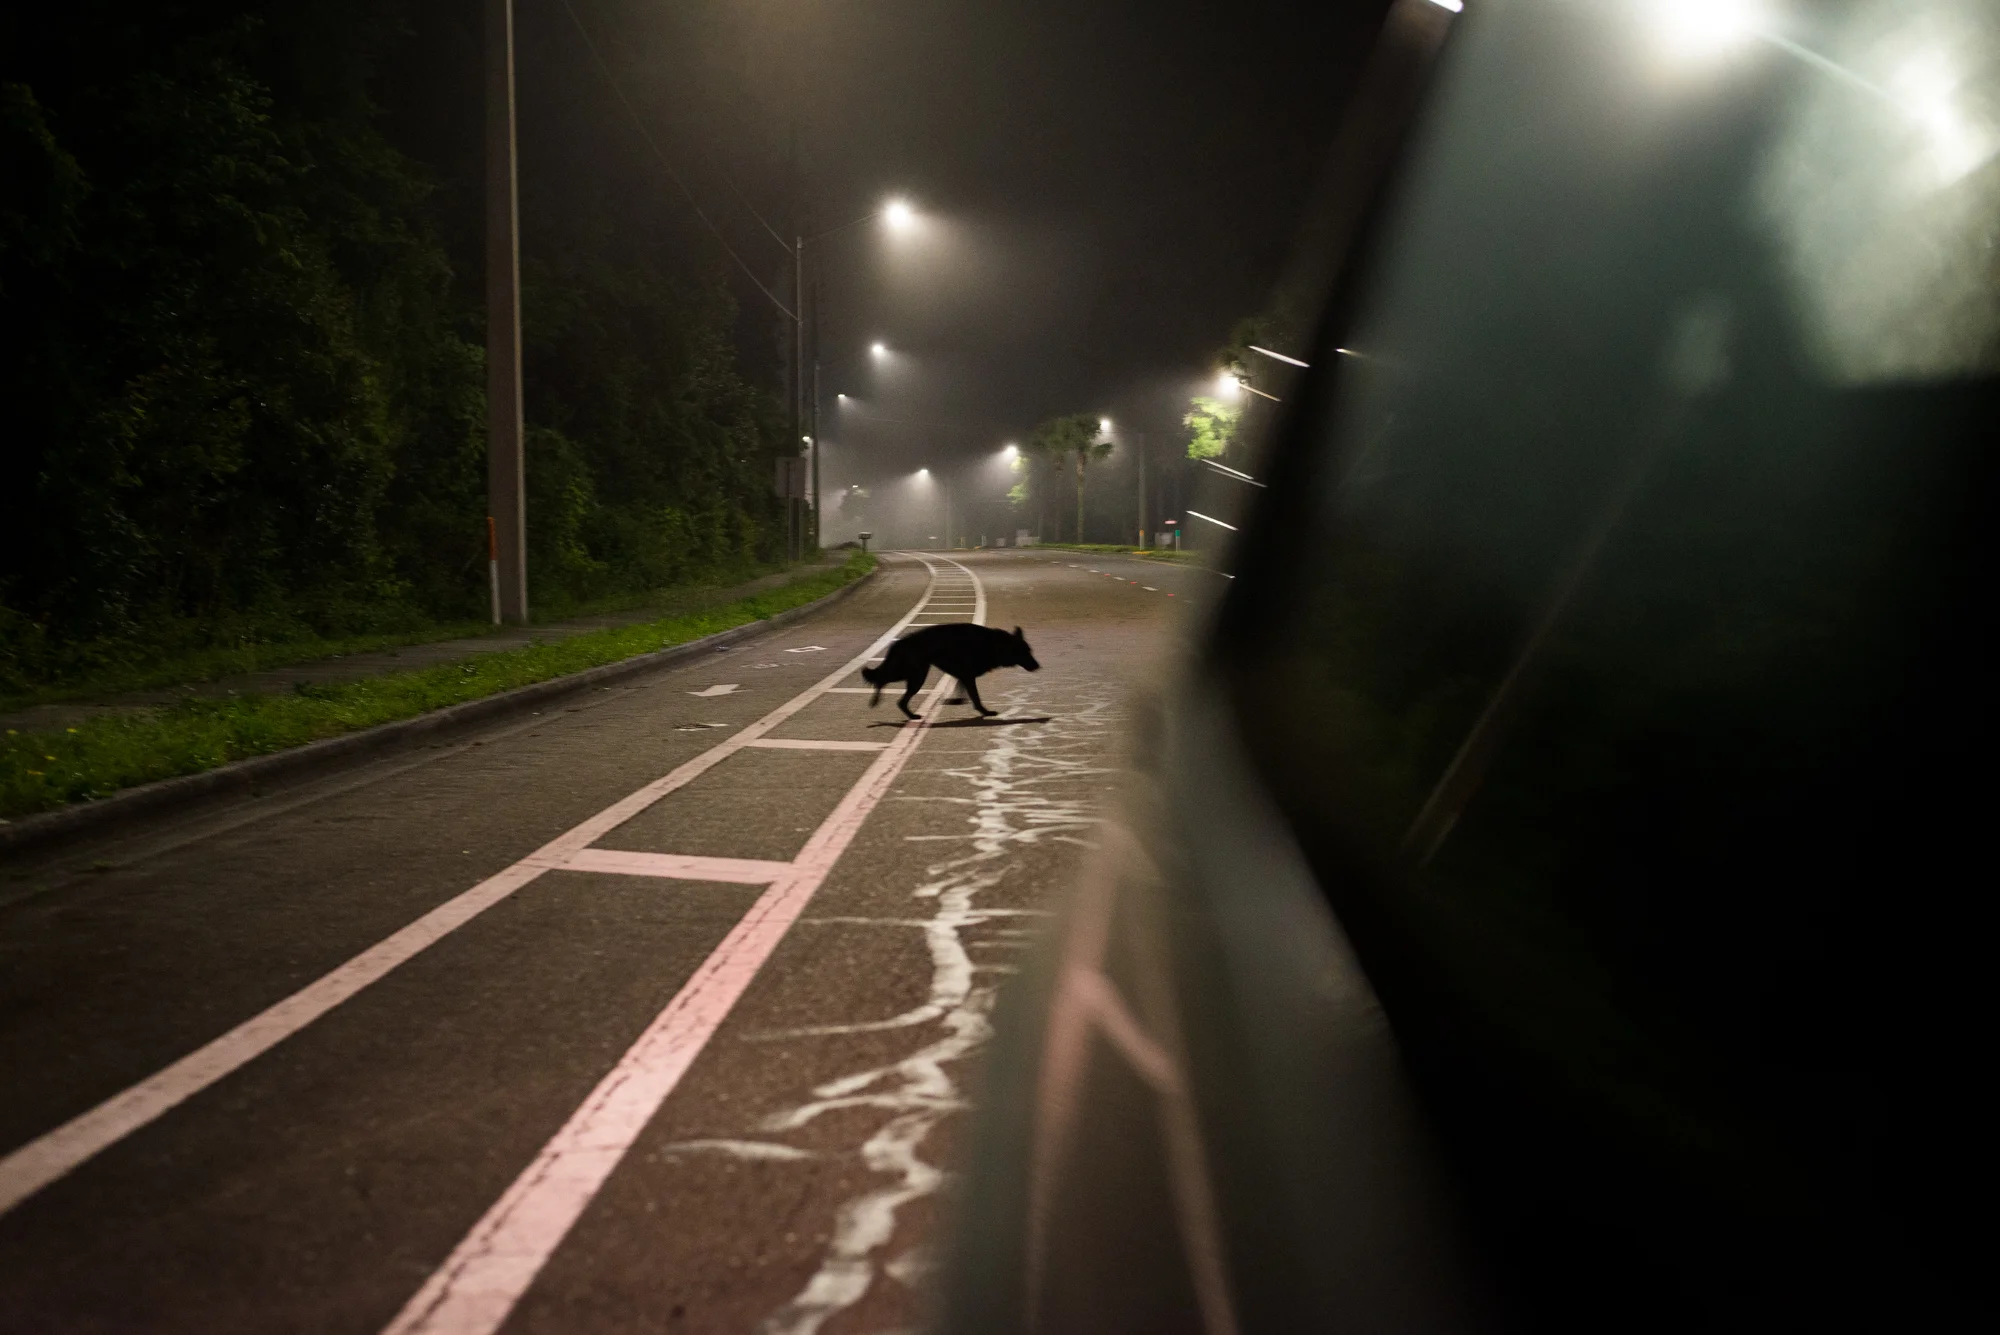
The antithesis of the image above, a dog lurking in the road behind the car poetically symbolizes the passing of an age.
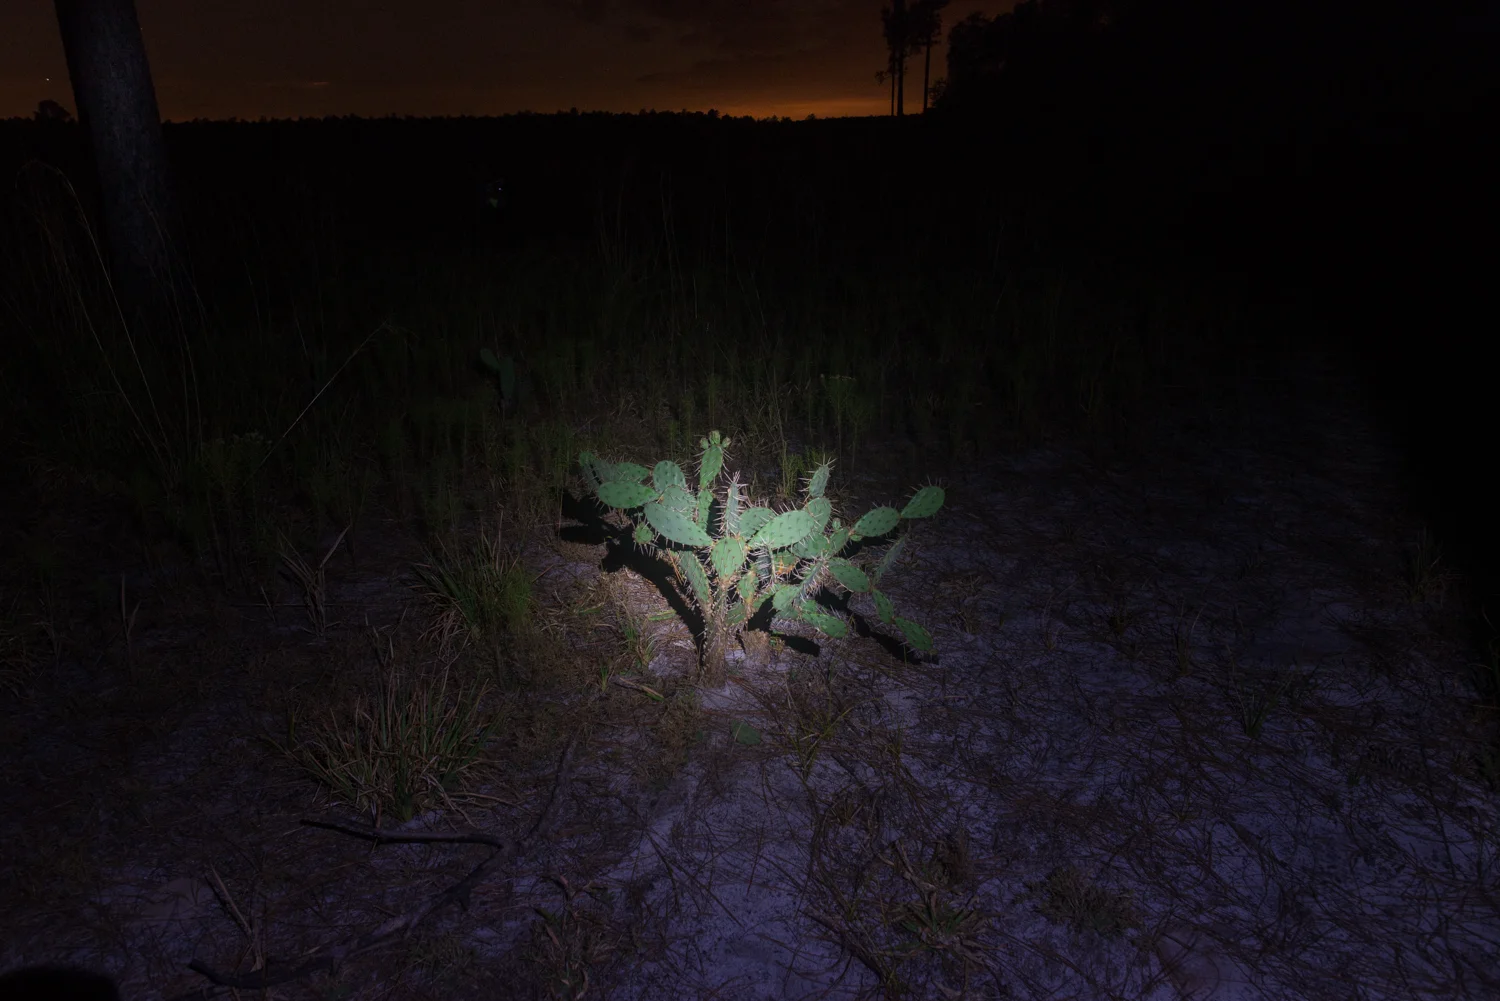
During last week’s trip to the Juniper Prairie Wilderness, we noticed the cacti were flowering. We decided it was a good opportunity to capture an image Alex and I have been talking about since 2016, so we devised a plan to place tiny LEDs into the cactus buds and photograph the warm glowing buds against the cool predawn light.
In theory our plan was simple: place the LEDs into the centers of the buds, feed the wires along the backside of the cactus and hide the batteries behind the leaves. The problem with theories is they neglect the realities of spiky cactus glochids, tenaciously blood-thirsty mosquitoes and the ever-present war on rapidly changing light.
I took this image at Hopkins Prairie in 2016 during our first camping trip together. I remember discussing how difficult it is to take a nice photo of a prickly pear cactus.
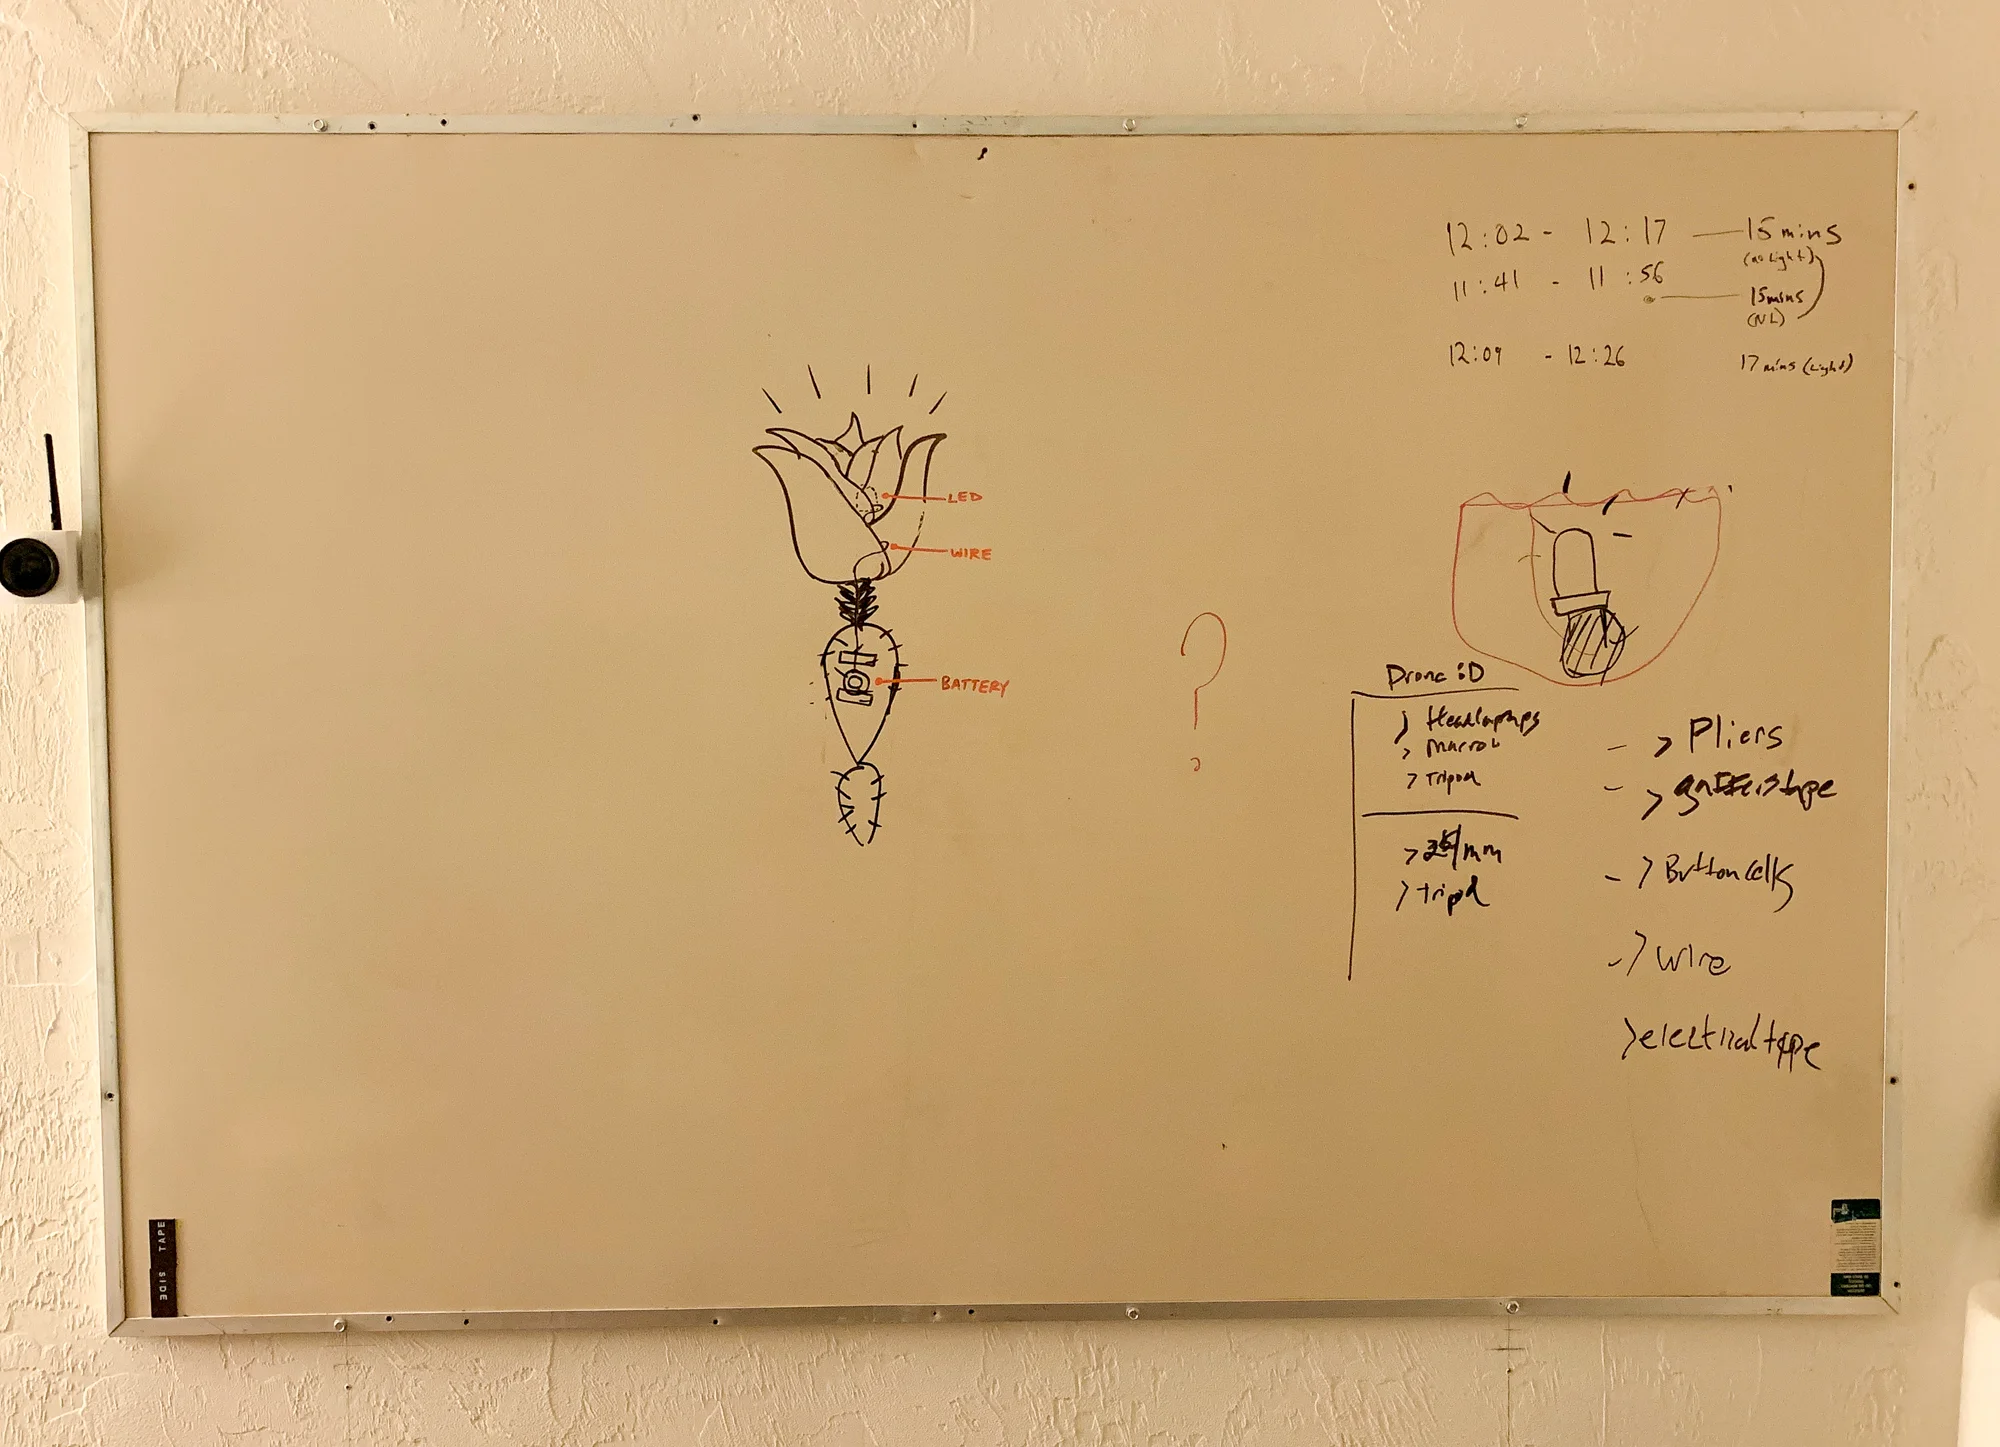
Project blueprints sketched on Alex’s whiteboard during our weekly meeting last Thursday.
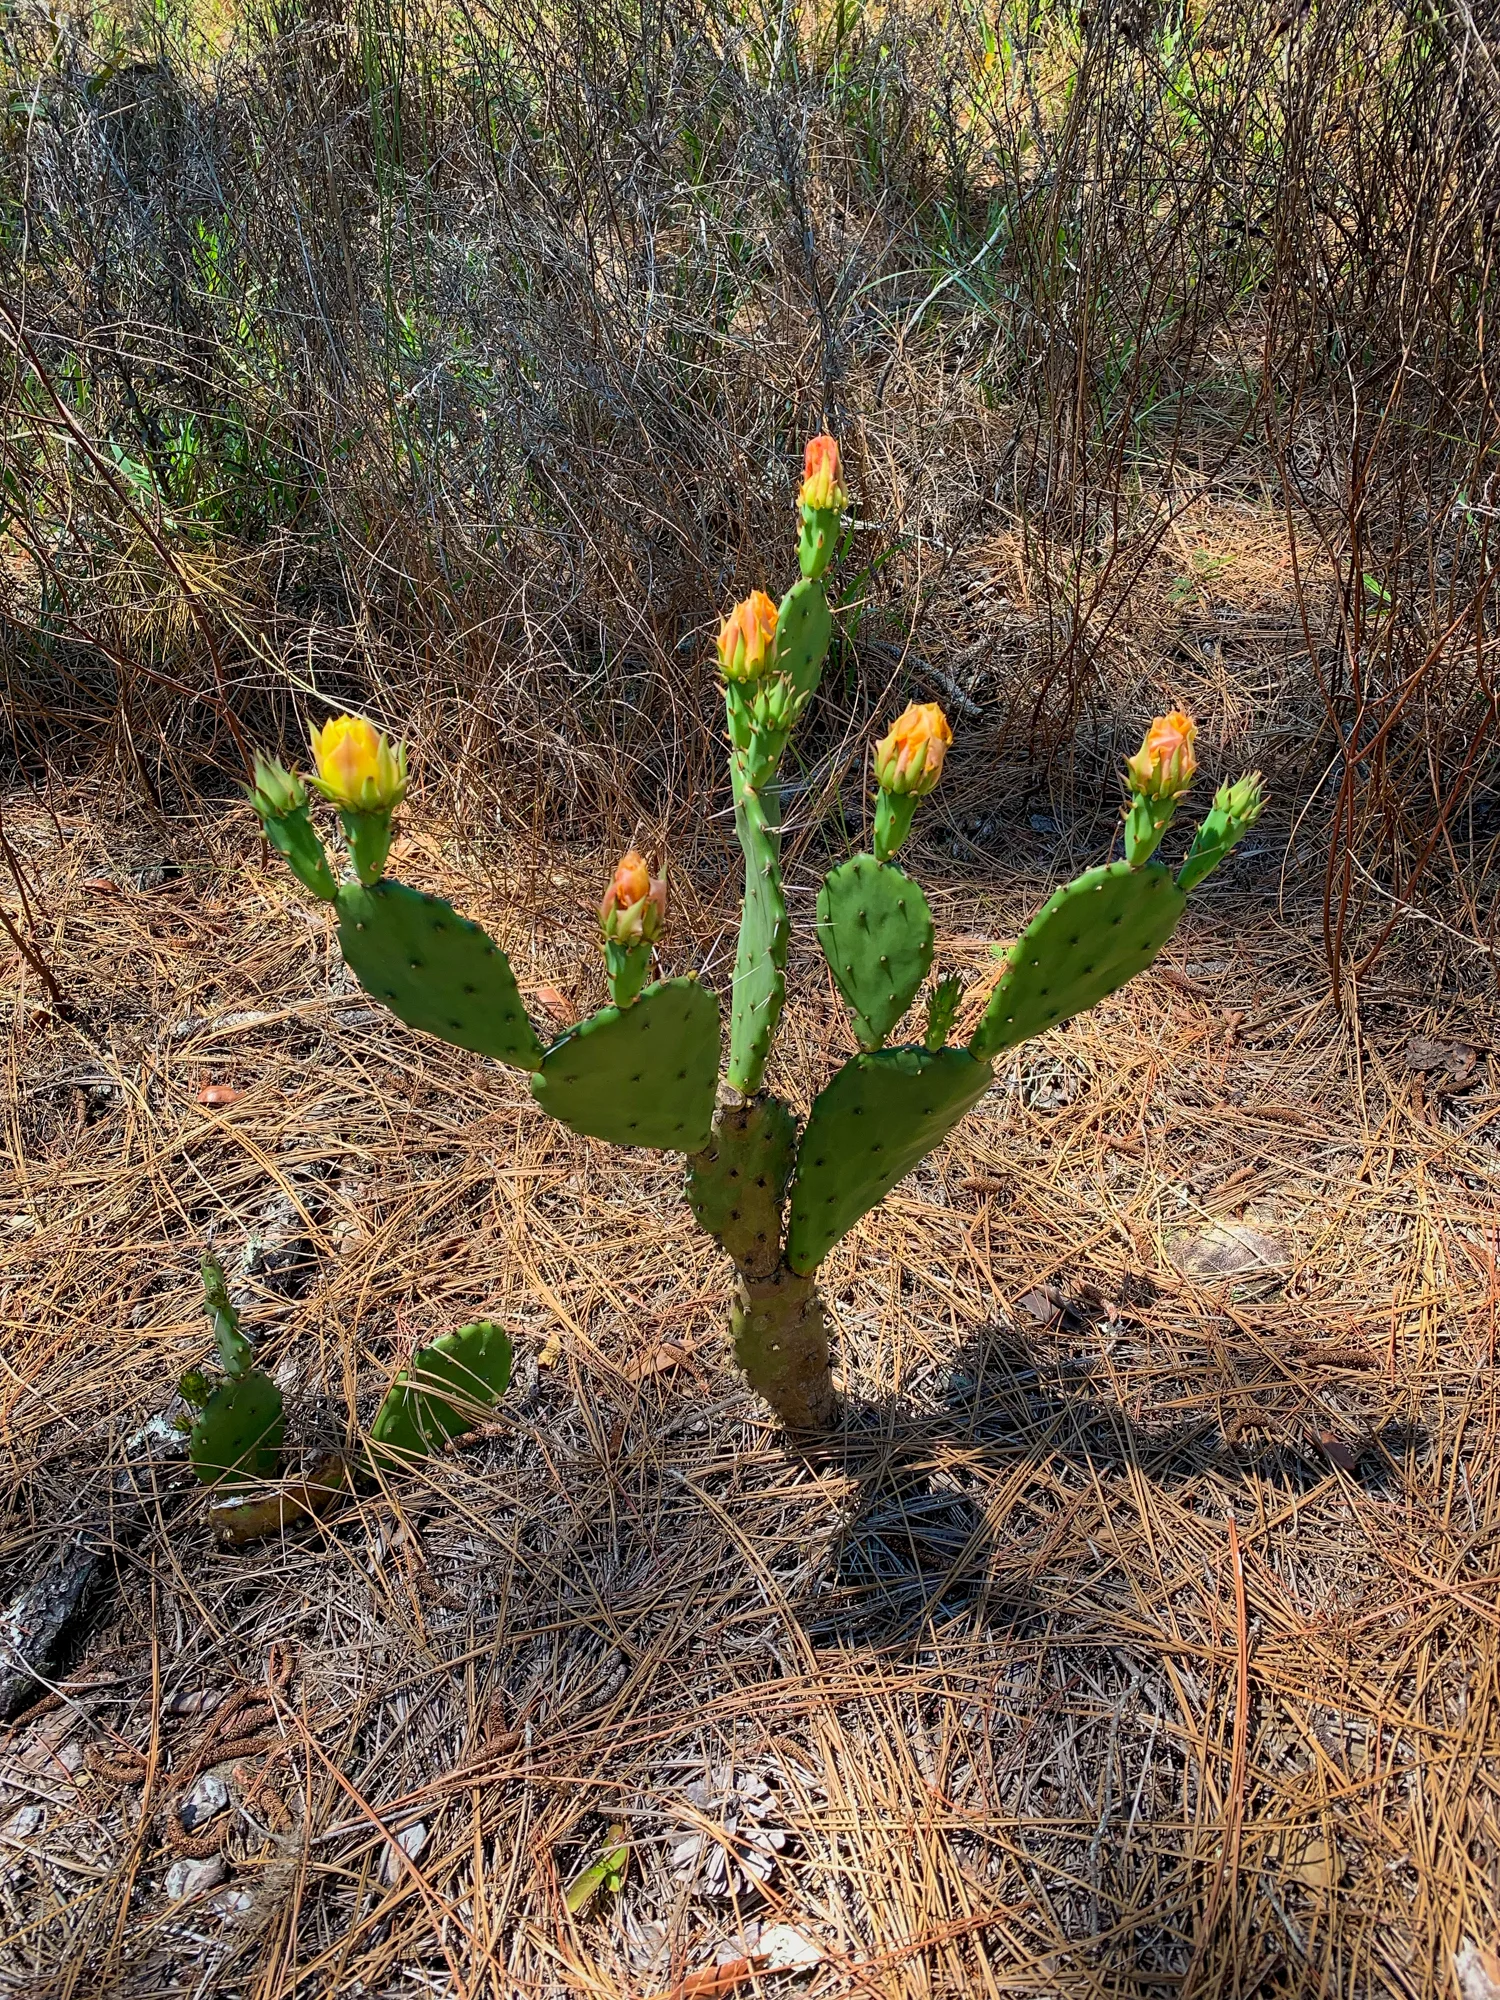
I took this image on my phone during last week’s trip. We designed our project around this cactus due to its large display of buds and close proximity to the Yearling Trail.
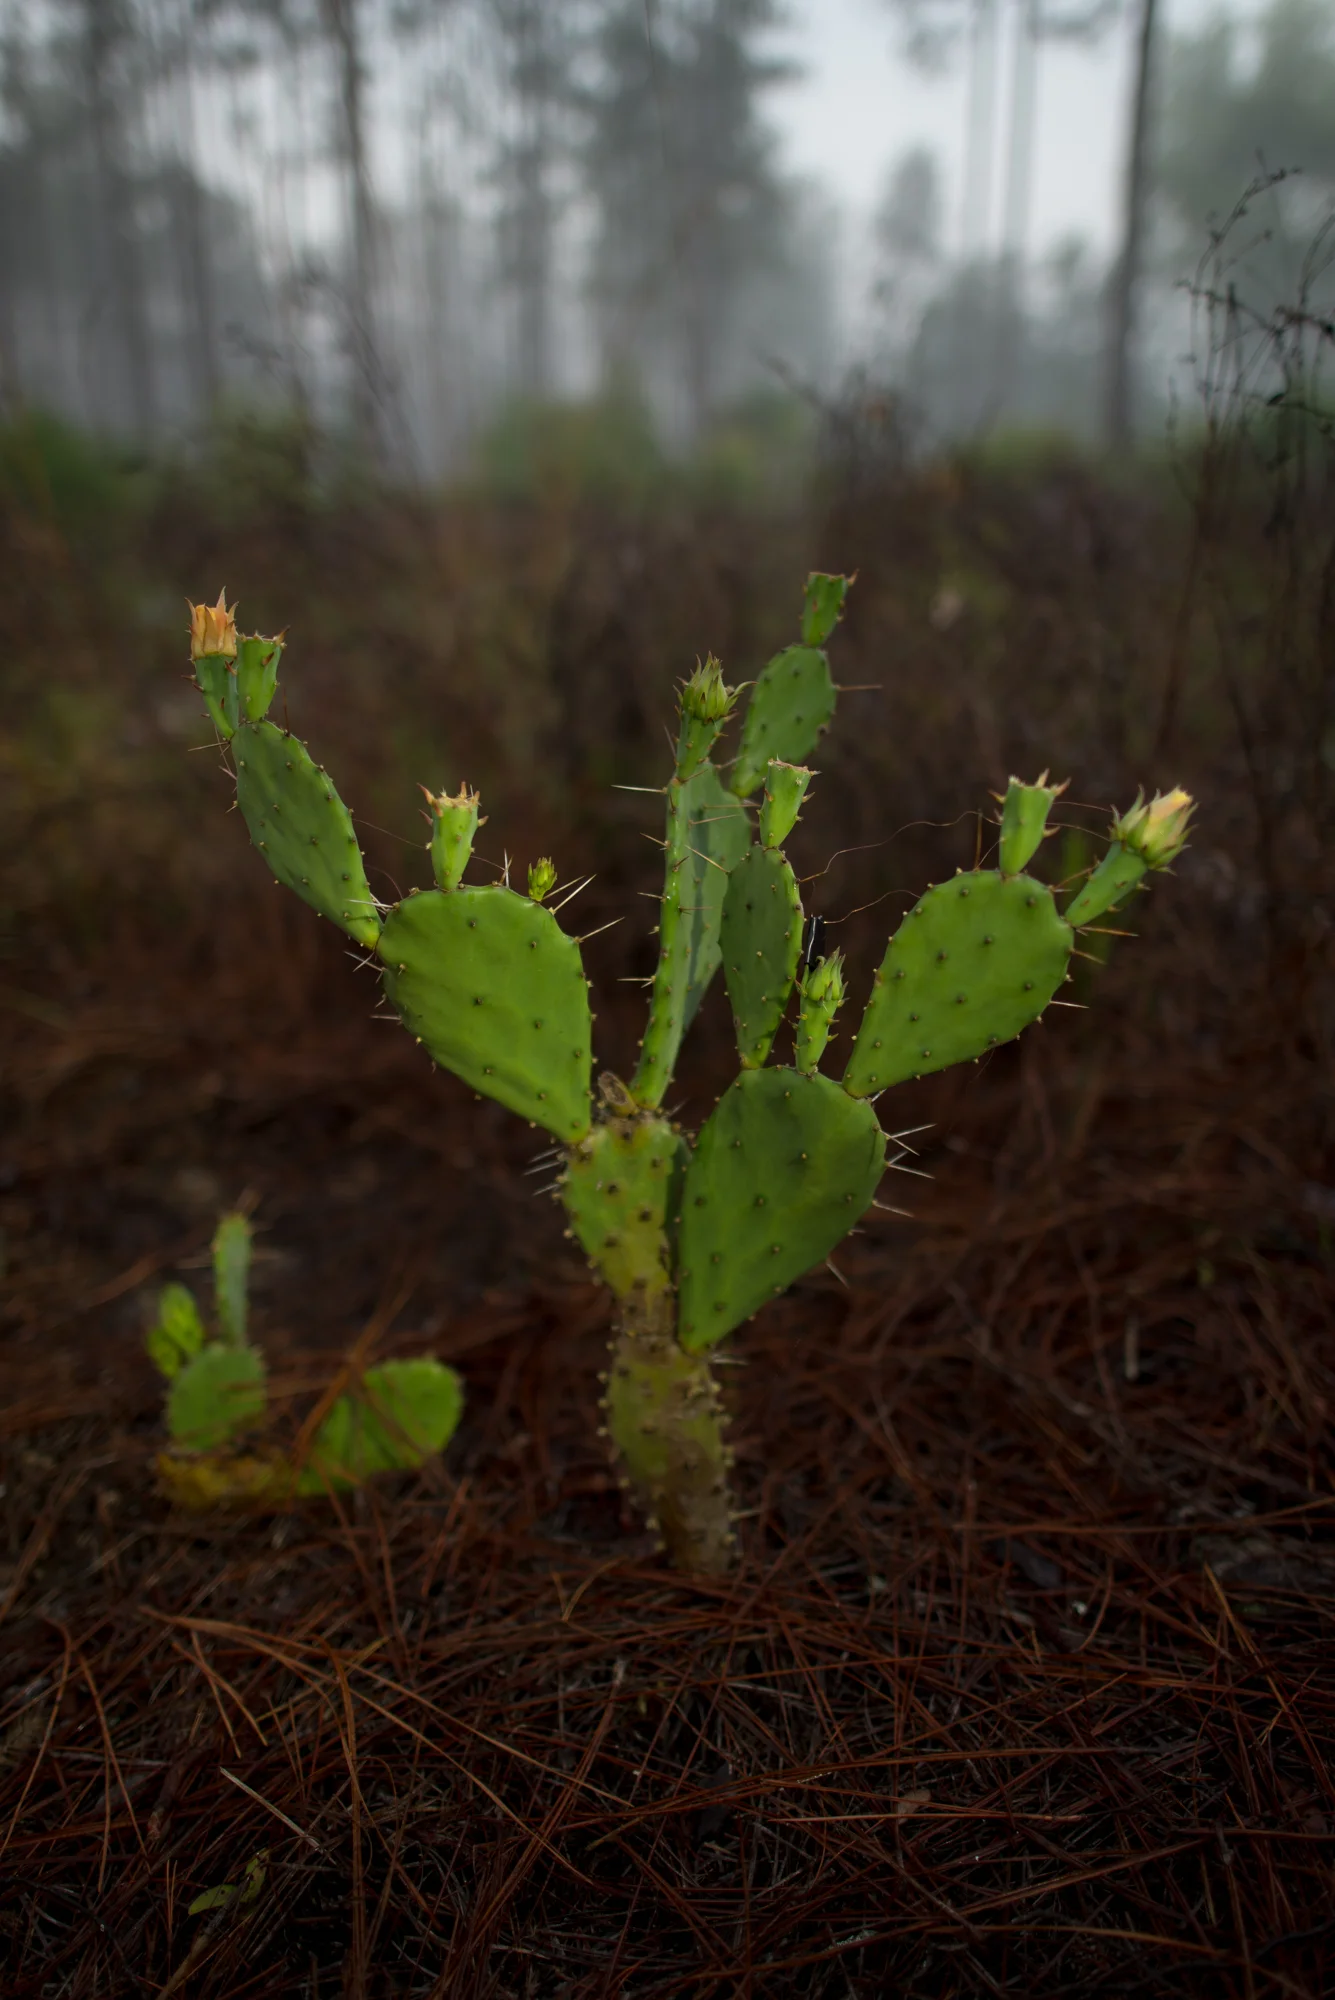
Here is the same cactus exactly seven days later. To our sad surprise, most of the buds had died and fallen off, save the two that were completely green in the previous image.
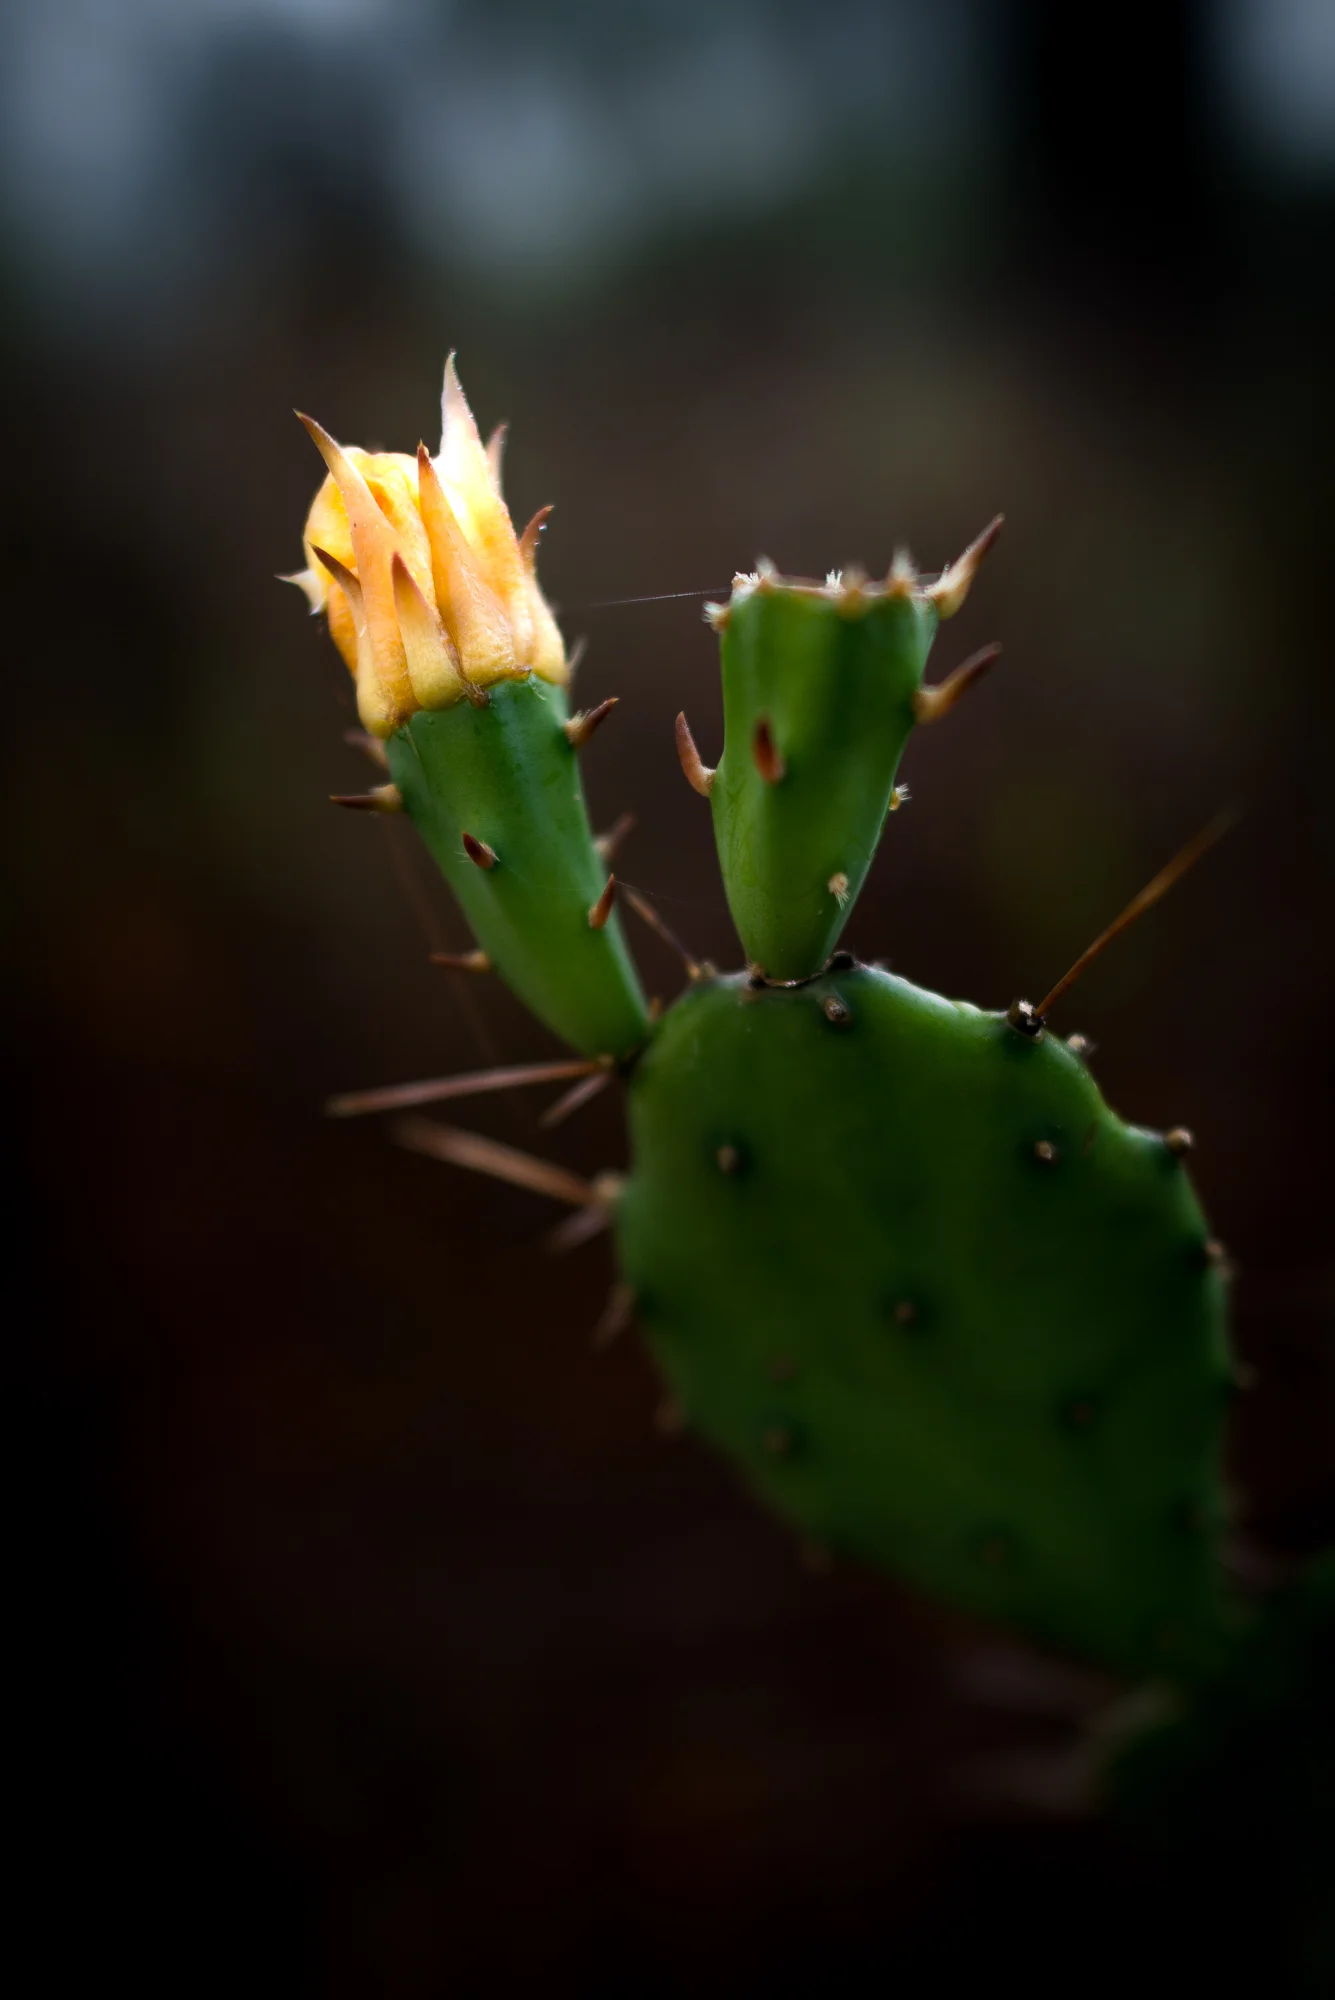
Even failure glows in the dark. After some research, I learned that what we had originally thought were buds were actually what are called “old flowers.” By the time I took that first cell phone image, the flowers had already bloomed, shriveled, and were in the process of falling off, hence the reason why, when we returned only one week later, the same cactus had only two real buds.
Maybe it was the spikes in my fingers. Maybe it was the bites on my neck. Maybe it was the sobering realization that we likely won’t be able to attempt this shot for another year. Whatever the reason, this failure stung a little more than normal.
We eventually conceded defeat and relaxed under the cover of my favorite oak before heading south for our next project.
Alex enjoys the sunrise from the cover of an oak tree on the Yearling Trail.
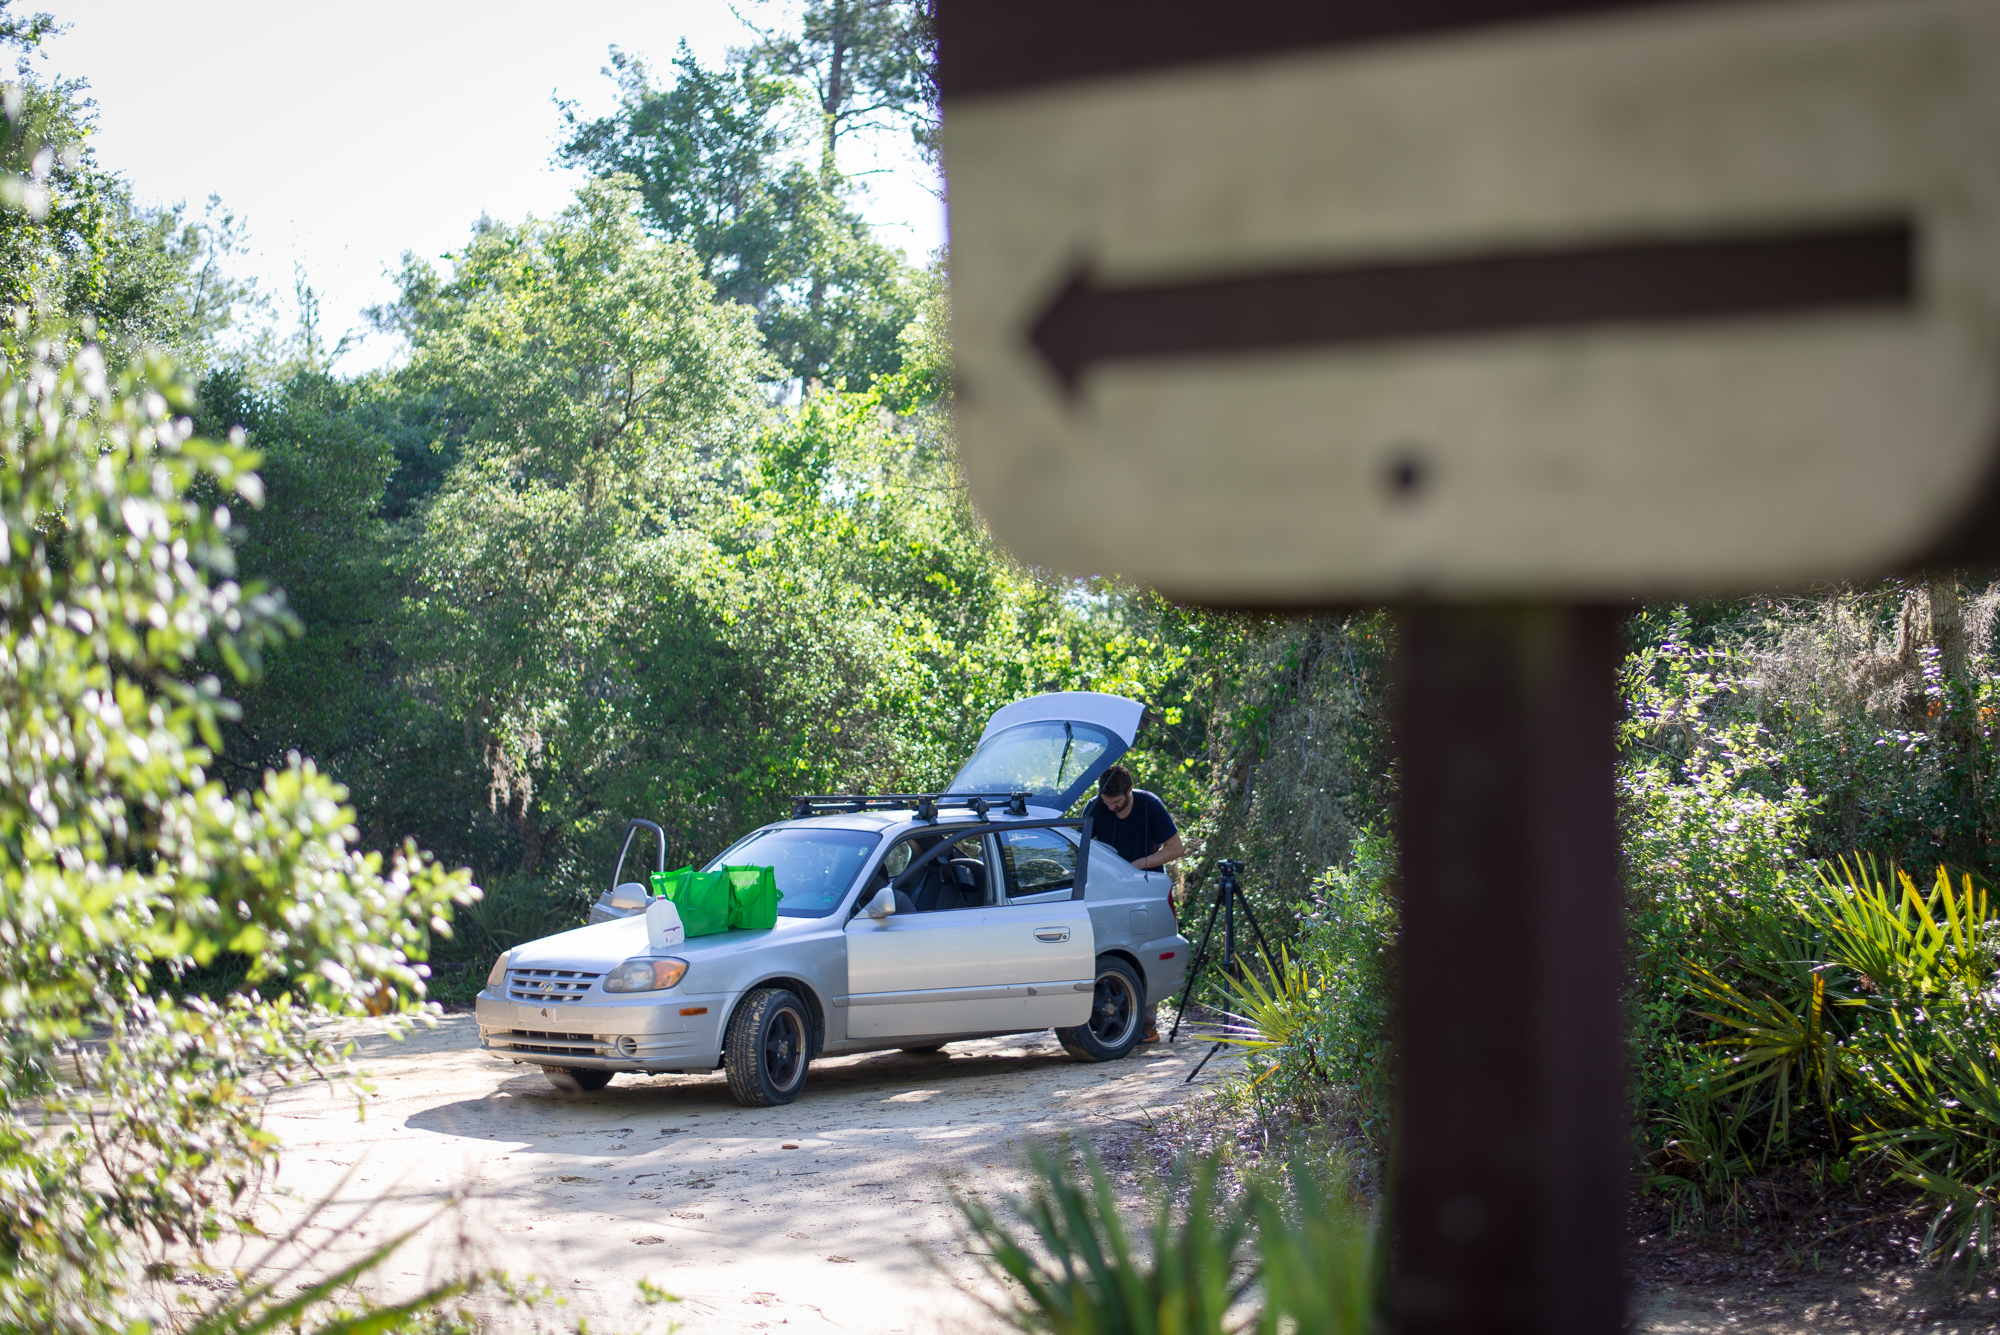
Alex packs up the car as we prepare to leave Pat’s Island and head farther south.
It didn’t take long to forget about the cactus. What was just a few hours earlier the entire purpose of the trip was now a mere shadow in the inevitable wake of new technology.
Alex and I have been discussing the merits of a drone for a while. We’re both believers that dedicated tools should be used sparingly. But after realizing that the implications of a drone far outweigh the media it directly produces (we have backlogs of projects that involve using the combination of a drone and LEDs as a lighting tool), Alex took the plunge and purchased the perfect drone for our applications: a DJI Spark.
We hiked out to a prairie we call “Gorilla” for the inaugural flight.
Alex prepares to set up a temporary launch pad for the drone.
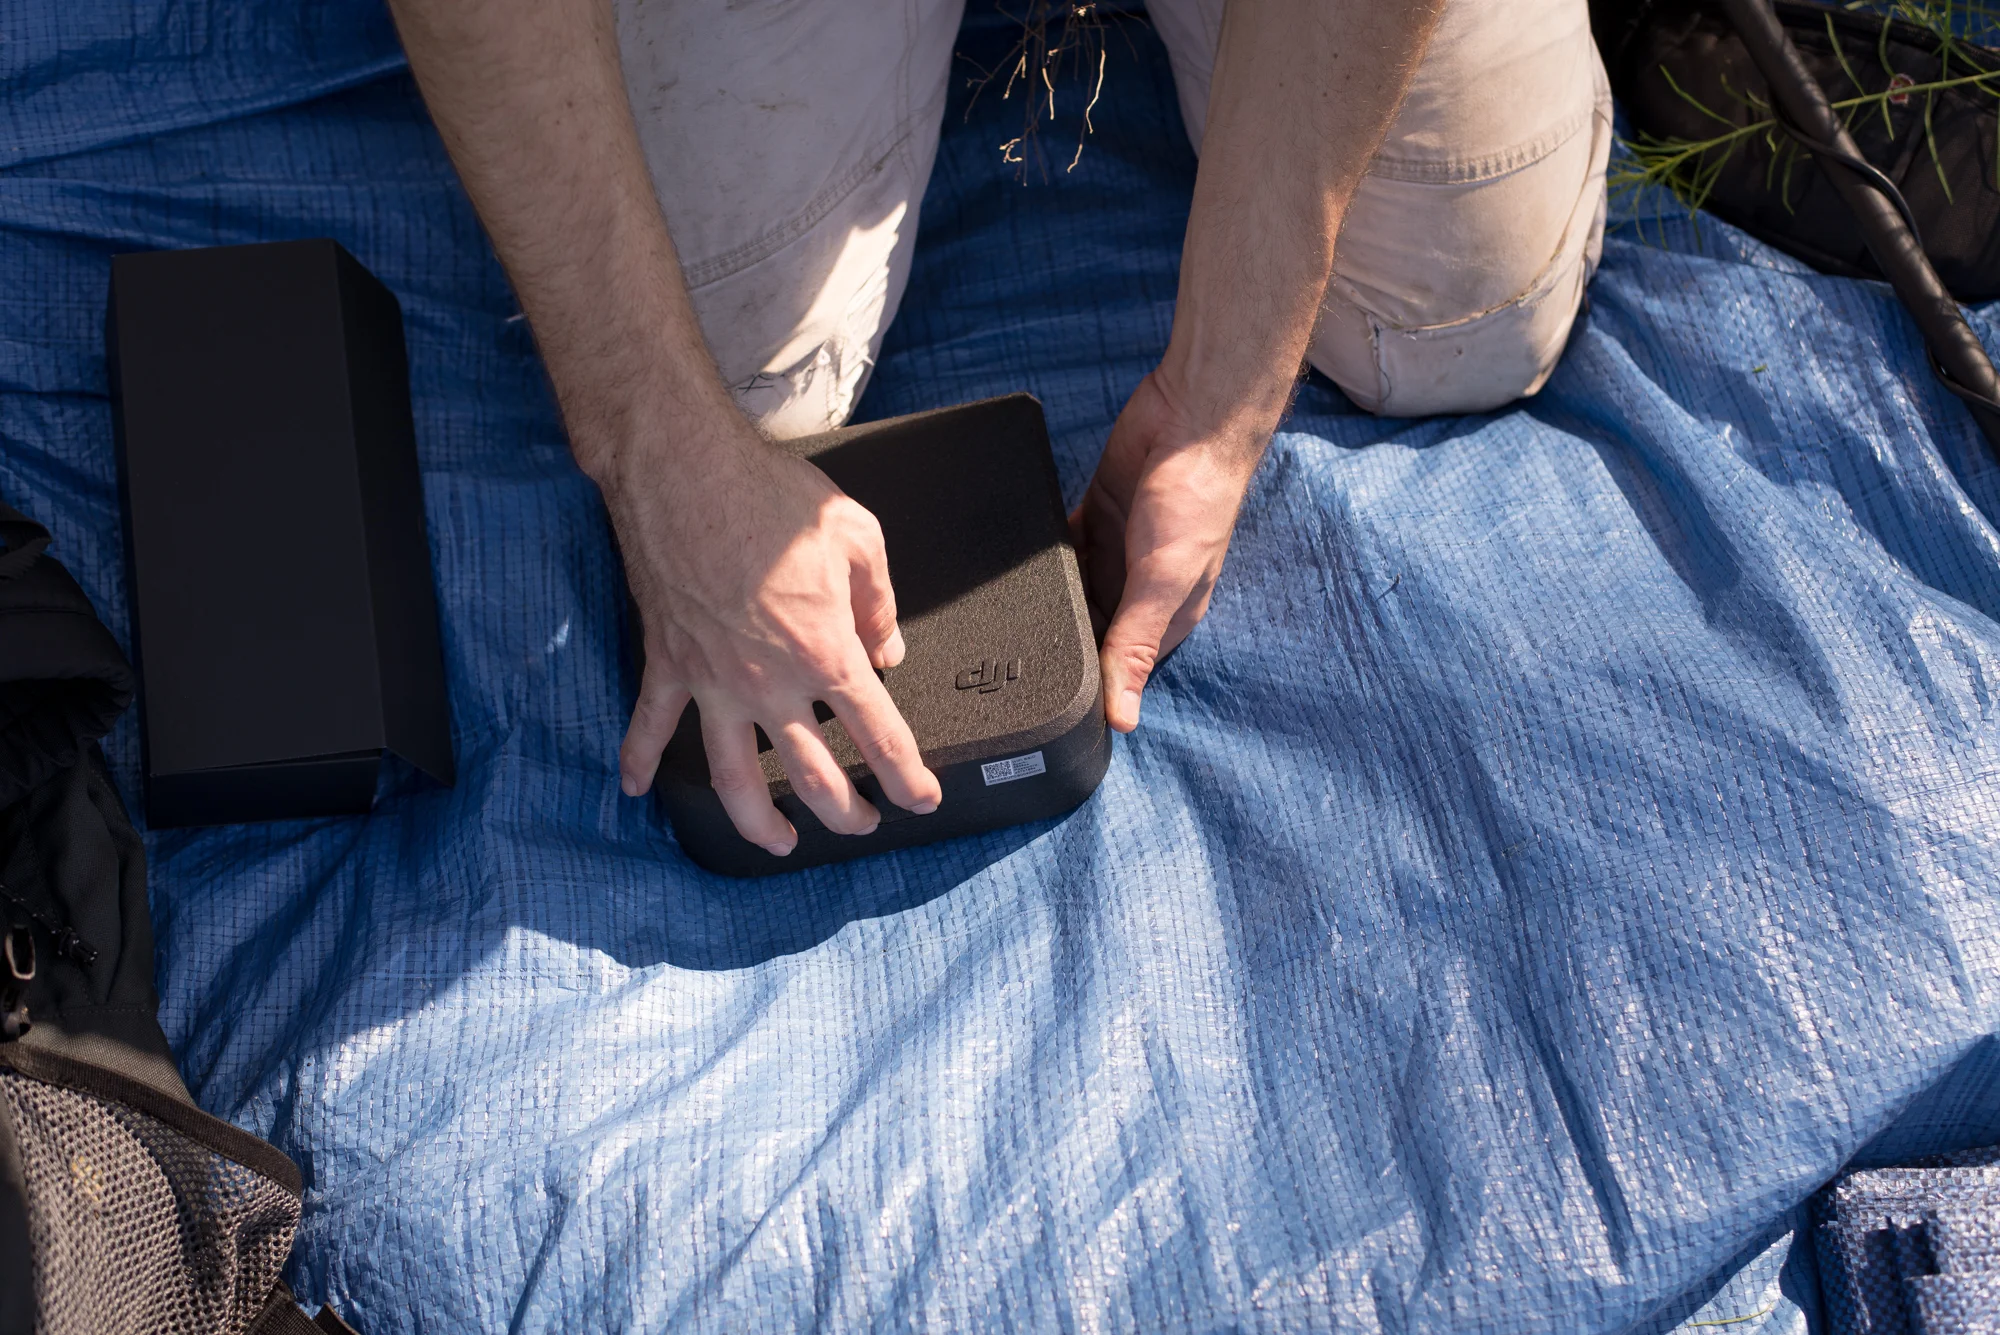
One of the practical qualities of the Spark is its compact size.
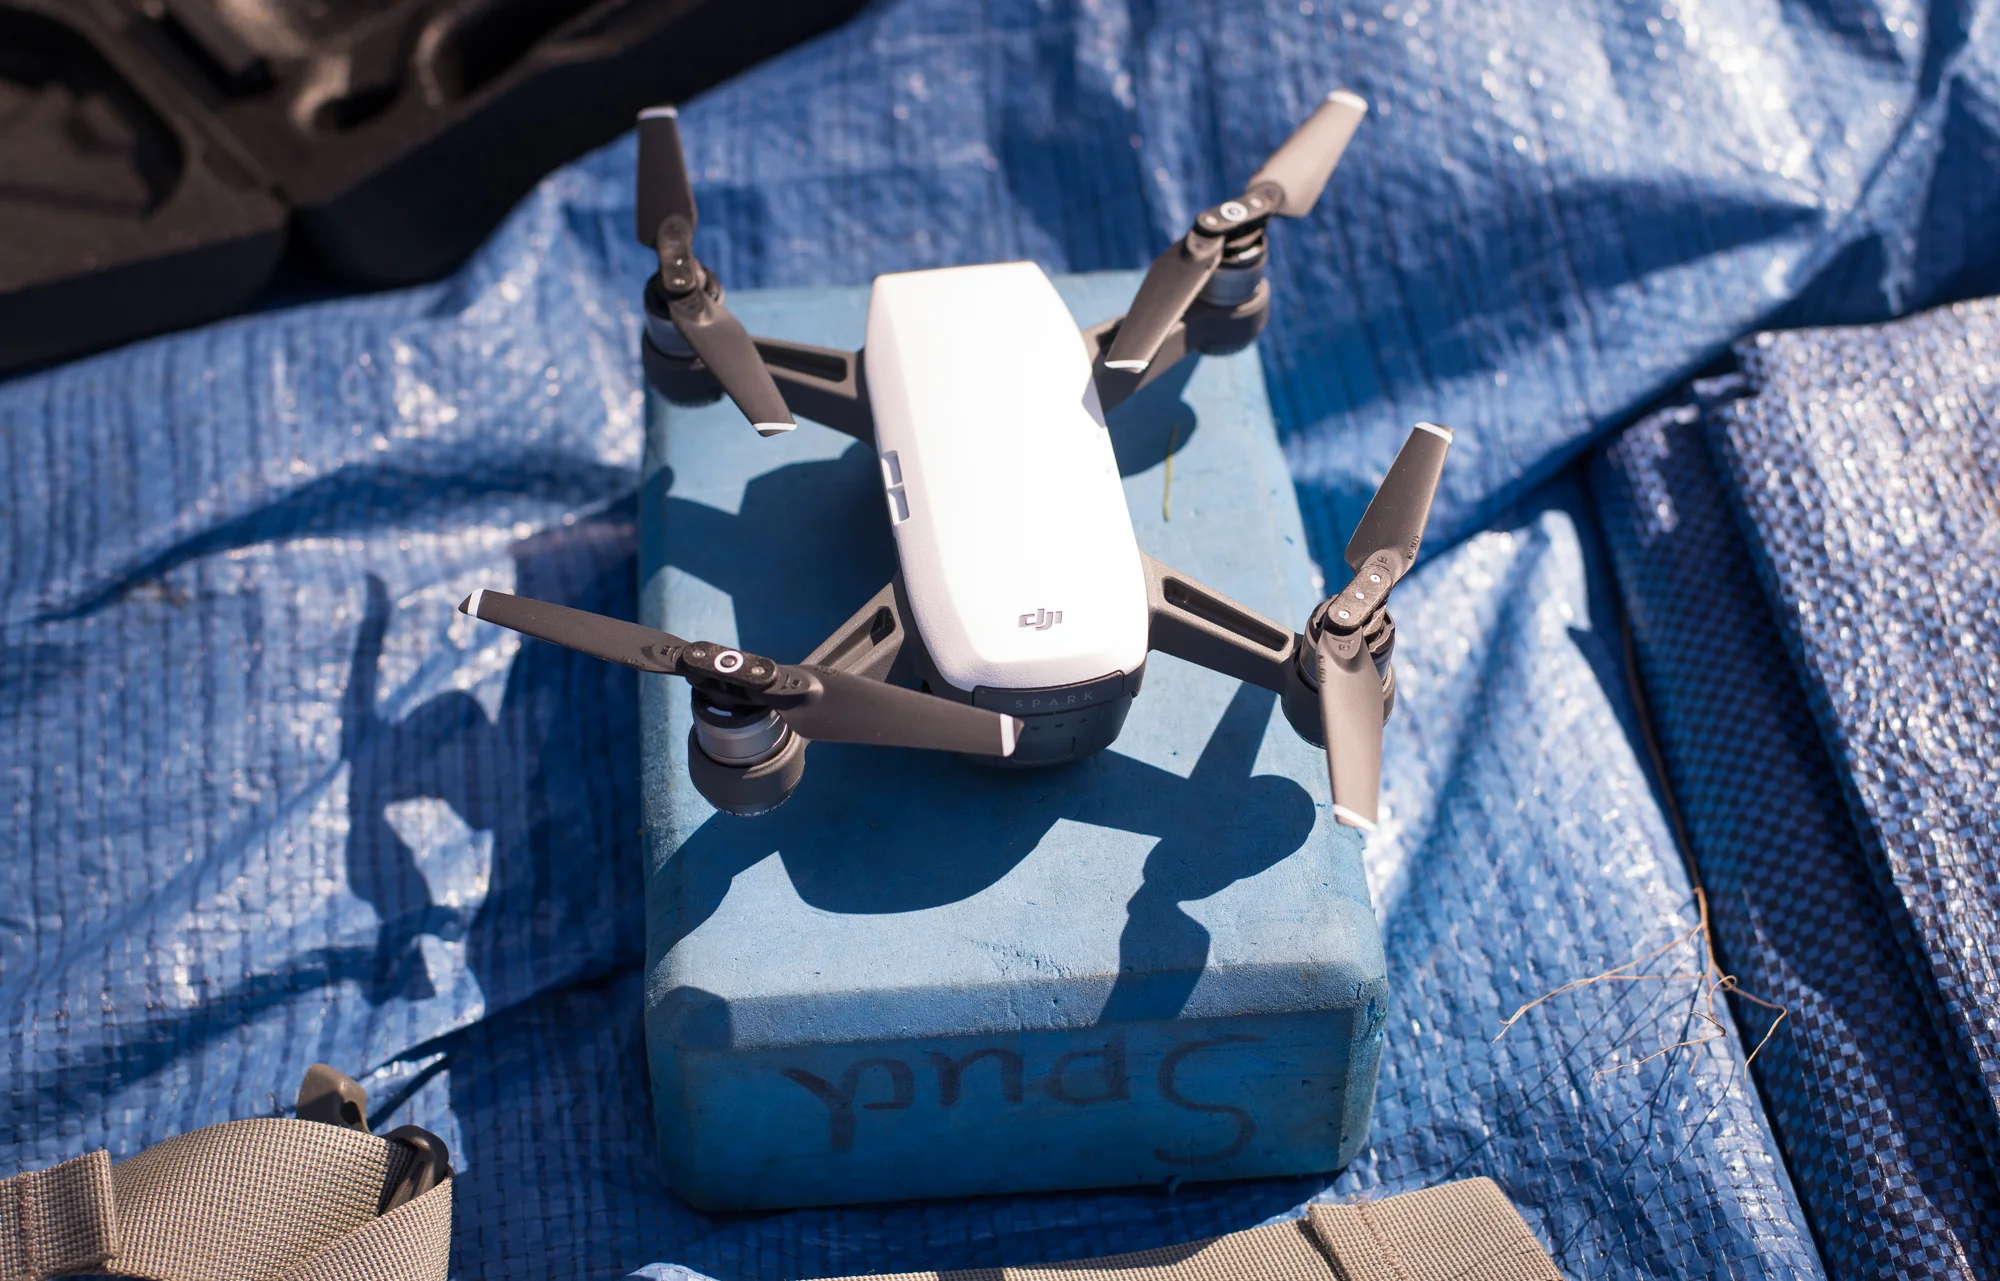
Alex’s DJI Spark, which we appropriately nicknamed “Spudnik” due to the word “Spud” written on the side of Alex’s yoga block launch pad, prepares for takeoff.
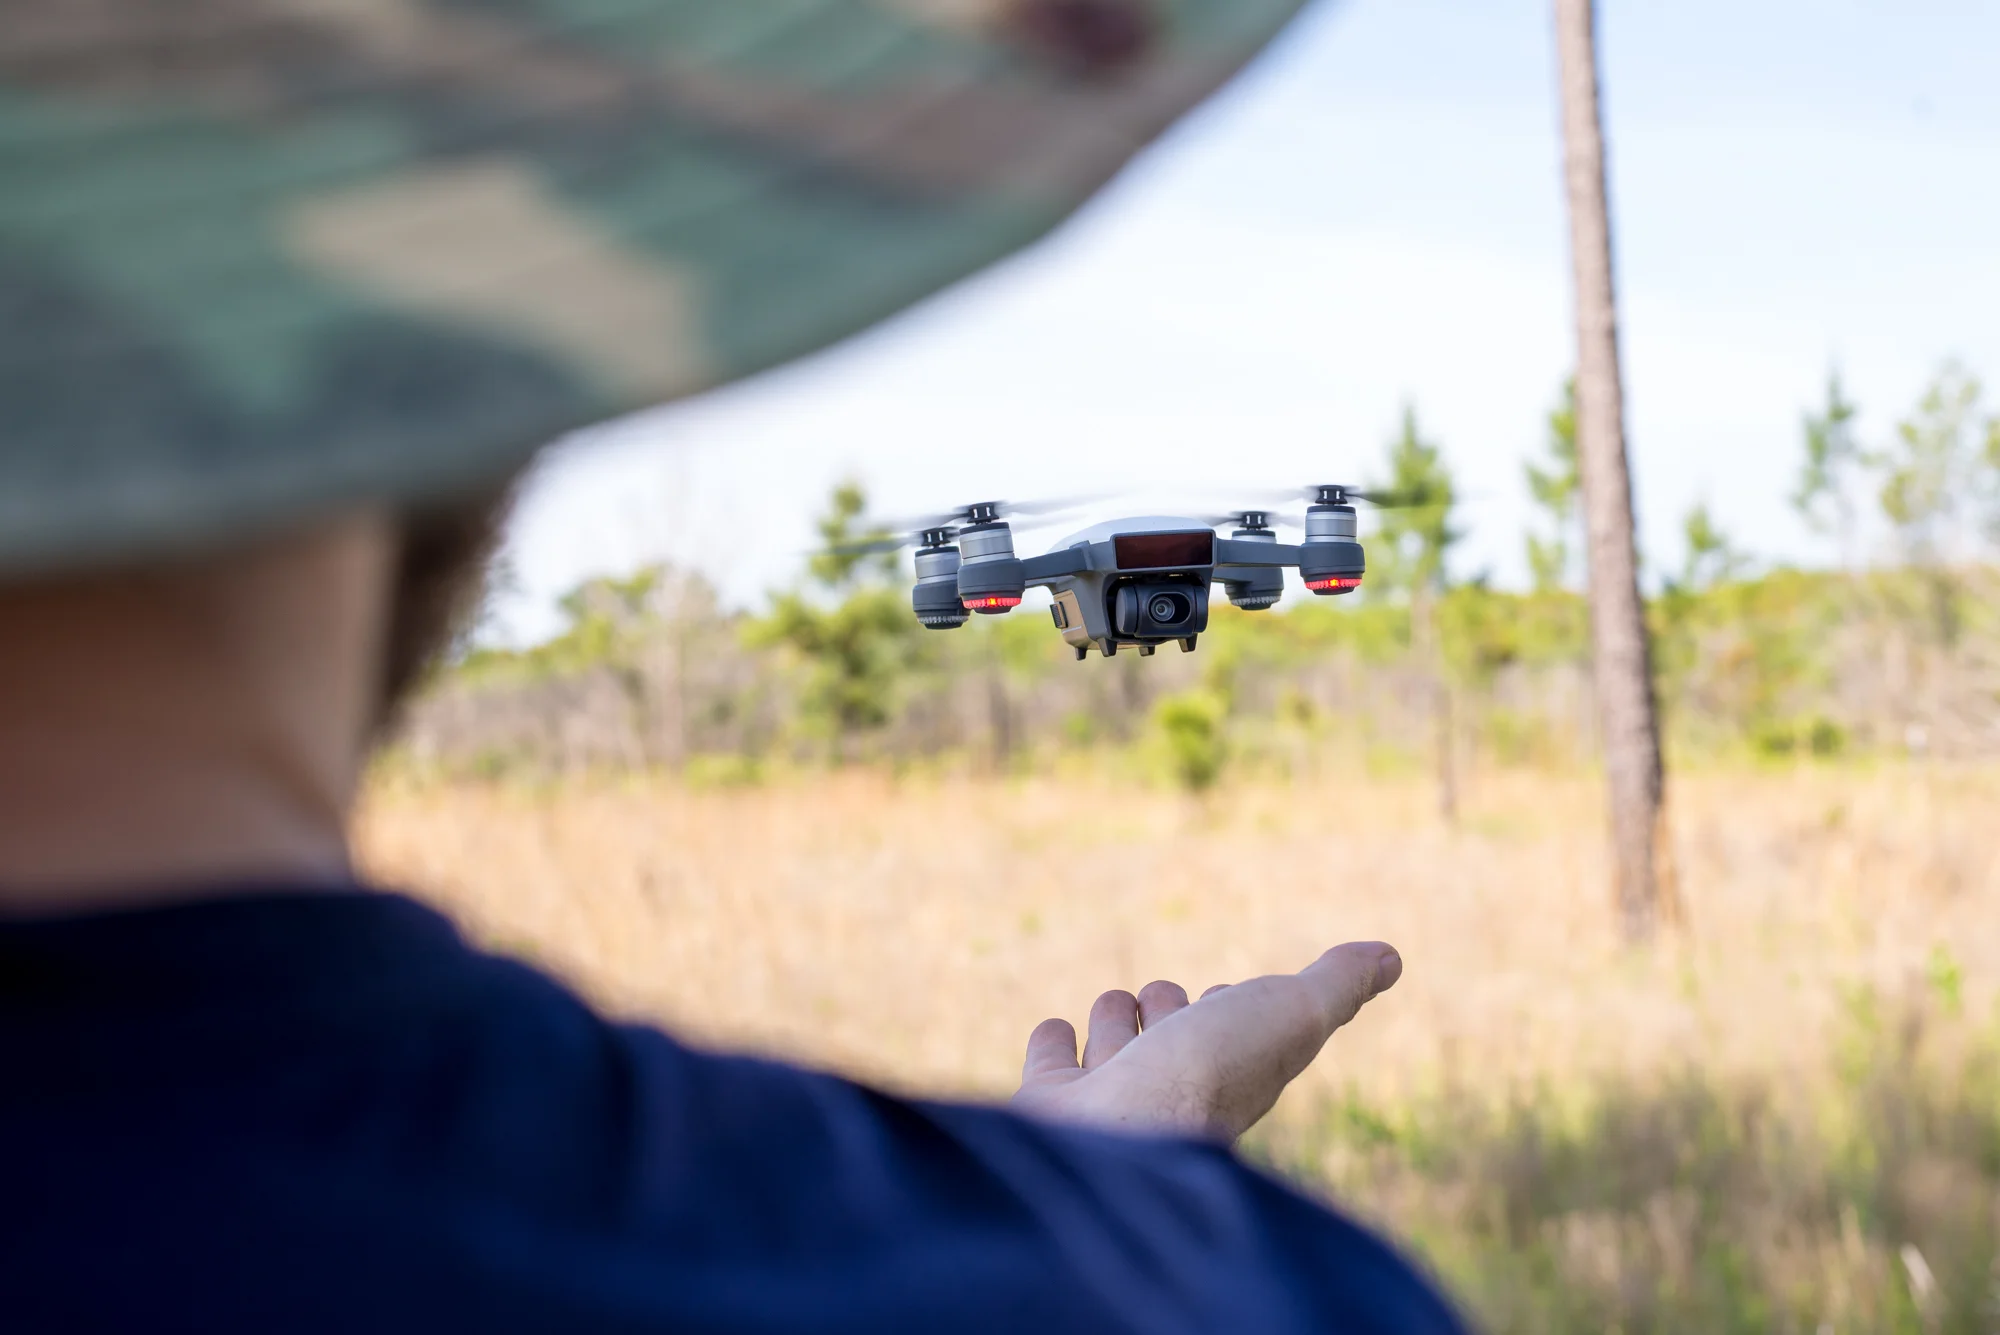
“Now I am become death, the destroyer of worlds.”
Behold.
This blog post’s name is a nod to the irony that a trip designed entirely around a lighting project will now only be remembered as the first time we sent a drone into the sky. For the first time ever, Alex and I were able to see in real time a high definition view of everything around us. It’s hard to overstate the implications.
If you’re curious about the media captured from the air, be sure to check out Alex’s blog post.

The Woods is a Time Machine
This past weekend I did some time traveling. Not in the science fiction sense, where someone jumps into a DeLorean or a phone booth and leaps forward and backward in a dramatic attempt to rectify some injustice committed in an alternate timeline. No, my time travel was a little more tame than that.

My tent beneath the stars in the Juniper Prairie Wilderness. Shot details: Mamiya 7ii, 80mm f/4, Kodak Tri-X 400 pushed to 1600, Nikon SB910 fired remotely
It was dark when we arrived.
No moon in the sky. Just headlights, then pitch black, then our footsteps in the sand.
Alex and I are on pace for visiting the prairie once per month this year. That’s about half of what I’d prefer, but families and jobs are priority, and it's hard to complain about a consistent one for four.
This past weekend we camped in what used to be a pine forest at the southwest corner of the Juniper Prairie Wilderness. The trees had presumably been harvested and the field burned, and although it is an unusual place to set up camp, it was one of our last remaining areas to explore west of Juniper Creek.

Same scenario as above, but I also managed to capture a shooting star in the upper left corner. Shot details: Nikon D610, 24mm f/1.4, Nikon SB910 fired remotely
The sky was clear and the stars were bright. I could see the Milky Way with my bare eyes, which is rare for Florida. I stayed awake until about 3:30 a.m. looking up, wondering how many of those dots were the ghosts of long since burnt out giants.

The Milky Way rises above the Juniper Prairie Wilderness in the Ocala National Forest. Shot details: Nikon D610, 24mm f/1.4
I woke up at 6:30 a.m. to two little turkey heads poking out at me from behind the palmettos. Despite the clear sky, the outsides of our tents were soaked from moisture, so we left them to dry in the sun while we explored.

The sun rises over the prairie on a clear morning. Shot details: Nikon D610, 24mm f/1.4

Two New Castle Brown Ale bottles catch the first rays of the morning. Don’t worry, everything we carry in, we carry out. Shot details: Mamiya 7ii, 80mm f/4, Kodak Tri-X 400 pushed to 1600
After walking the perimeter, we started down a path that leads directly east toward the Florida Trail. We had studied this path in Google Earth, so we were aware of its existence. Nevertheless, we were impressed with its relative lack of obstruction.
At the end of the trail we found a tiny lantern hanging in a pine tree. This is the second lantern we’ve found out here, and while it probably doesn’t sound or look all that remarkable, it really is a strange place to find anything at all. I often make the mistake of thinking Alex and I are the only ones out here exploring these obscure prairies and so-called “trails,” but discoveries like this make me second guess everything I think I know.
We also found what looks like a feeder hanging from a tree, so Alex left a note attached to a flag with questions and contact info.

Alex investigates what seems to be a feeder hanging from a pine tree. Shot details: iPhone XR

The sun shines through a small lantern hanging from a pine tree branch. Shot details: iPhone XR
Early morning self portrait of my shadow cast against my tent. Shot details: Nikon D610, 24mm f/1.4
By the time we finished exploring, our tents were dry, so we packed up and drove north to Pat’s Island to visit a location we discovered last November.
I hesitate writing this paragraph, because I don’t have a photo to show for it, but as we traveled on F.R. 33, we saw a huge black bear standing in the road a couple hundred yards north of us. It reminded me of that time we found Juniper (the dog) on our way home from the woods. Alex was able to capture a blurry image of the bear, but other than that, our bear encounters up to this point remain devoid of much proof.
We met a woman named Krysten, whom Alex recognized from Instagram, at the Pat’s Island Trailhead parking lot. Much like what Jenny and I used to do, Krysten lives and travels in a large shuttle bus named Bertha. Seeing her rig parked in the lot made me miss life on the road.

Krysten Nelson smiles for a portrait at the Pat’s Island Trailhead parking lot. You can follow her Instagram account @thehennahighway. Shot details: Mamiya 7ii, 80mm f/4, Kodak Tri-X 400 pushed to 1600
After grabbing a portrait, we headed south on the Florida Trail and then east onto the Yearling Trail toward a location we call “Silver Nip” due to the 65 Silver Nip bottles we found there. Research indicates the bottles date back to the early-to-mid 1900s.
Similar Silver Nip bottles are going for about 10 to 14 dollars a piece on eBay, so this is probably the closest we’ll ever come to finding treasure.

After much searching and digging, Alex and I put all the bottles into a pile for an official count. Shot details: Mamiya 7ii, 80mm f/4, Kodak Tri-X 400 pushed to 1600

Close up of one of the bottles. Shot details: iPhone XR
Alex brought his metal detector and, along with various pieces of pull tabs and aluminum foil, found an old Colgate Shave Stick container, which also dates back to the early 1900s. Pretty cool!

Photo by Alex Catalano

Photo by Alex Catalano
As we hiked back toward the van, I couldn’t help but wonder about all the people before us who had visited these areas, stood in these locations, looked up at these stars. Like ships passing in the night, we find evidence of each other but never each other. Once in a while we are fortunate enough to cross paths with a bear, or a woman traveling the country in her vehicle, and I’m able to place faces with these artifacts, even if the faces I’m placing don’t actually belong to those items at all.
At the last dirt intersection during our drive out, we came across a shot up stop sign. And again, I pondered all the stories the woods has to offer, secrets it shares only with those who care to listen.
The woods really is like a time machine, but it only seems to point back.

The van casts a long shadow on the highway as the sun goes down. Shot details: iPhone XR

Shot up stop sign on the outskirts of the Juniper Prairie Wilderness. Shot details: Mamiya 7ii, 80mm f/4, #25 red filter, Kodak Tri-X 400 pushed to 1600

The Things We Carried
They warn you about the bears. They warn you about the alligators. They warn you about the rattlesnakes and the water moccasins. But they never warn you about the two guys hauling an oversized bathroom mirror miles through the brush and the thicket into the wilderness. Probably best to stay clear of those two.
They warn you about the bears.
They warn you about the alligators. They warn you about the rattlesnakes and the water moccasins. But they never warn you about the two guys hauling an oversized bathroom mirror miles through the brush and the thicket into the wilderness.
Probably best to stay clear of those two.
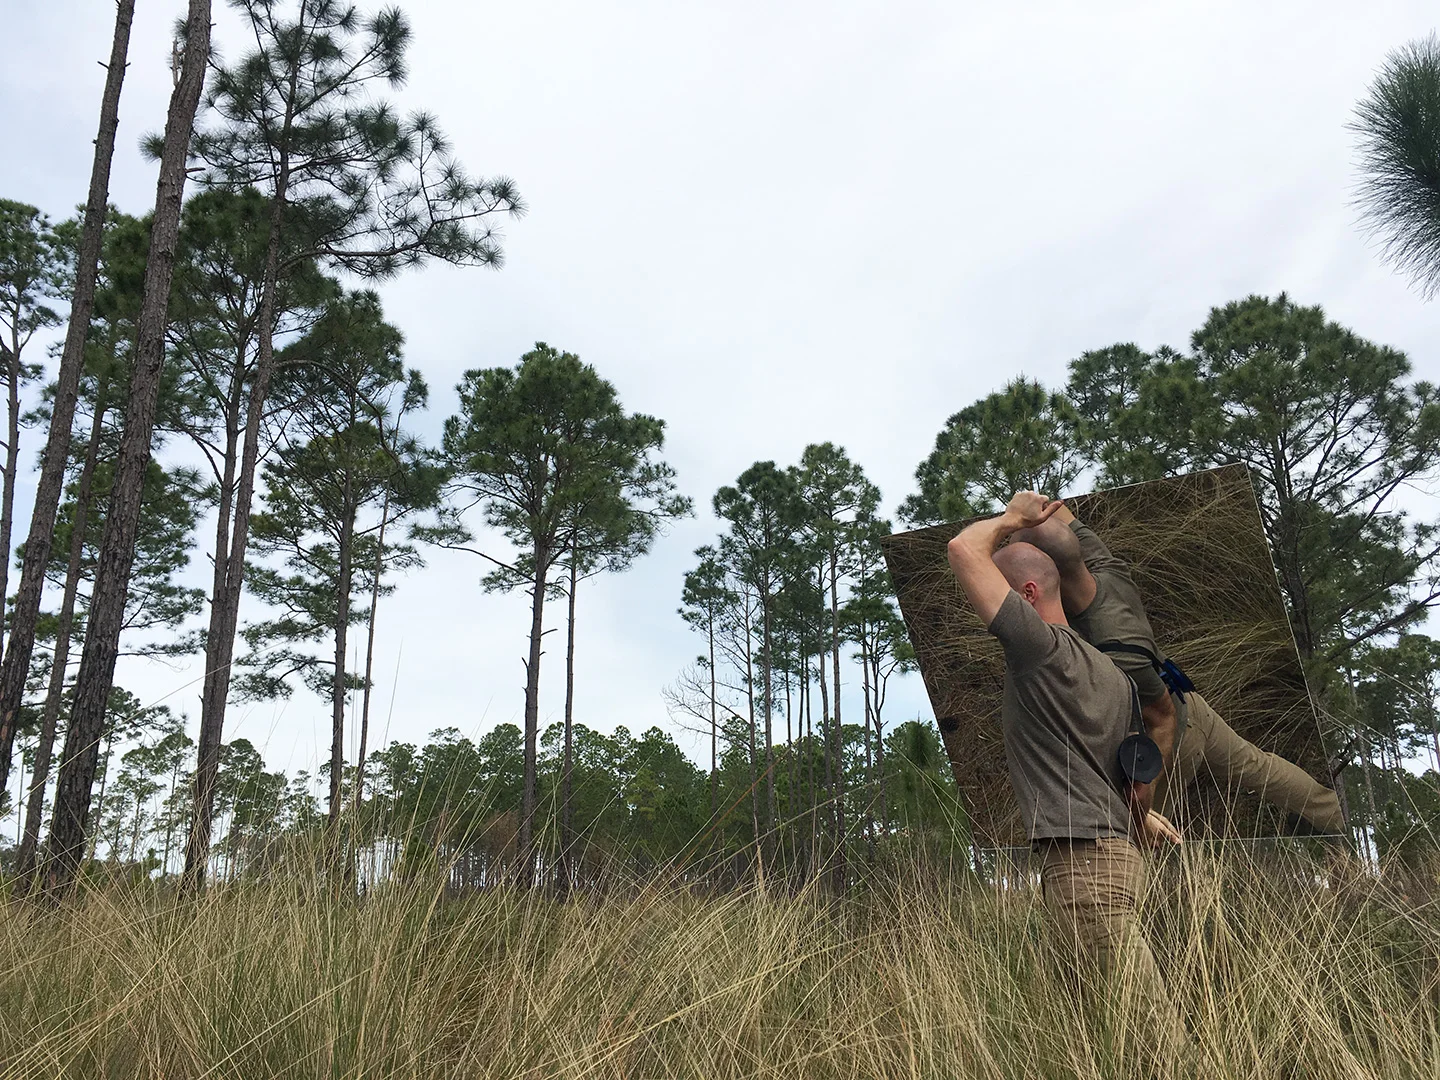
Me carrying the mirror in the Juniper Prairie Wilderness. Photo by Alex Catalano.
1. The mirror
I’ve had an unreasonably heavy four-feet-by-four-feet mirror taking up space in my office ever since rescuing it from the dumpster a few months back. I figured it was time to put it to use, so last week I emailed the only person I know who would willingly help me carry it into the woods. Alex agreed.
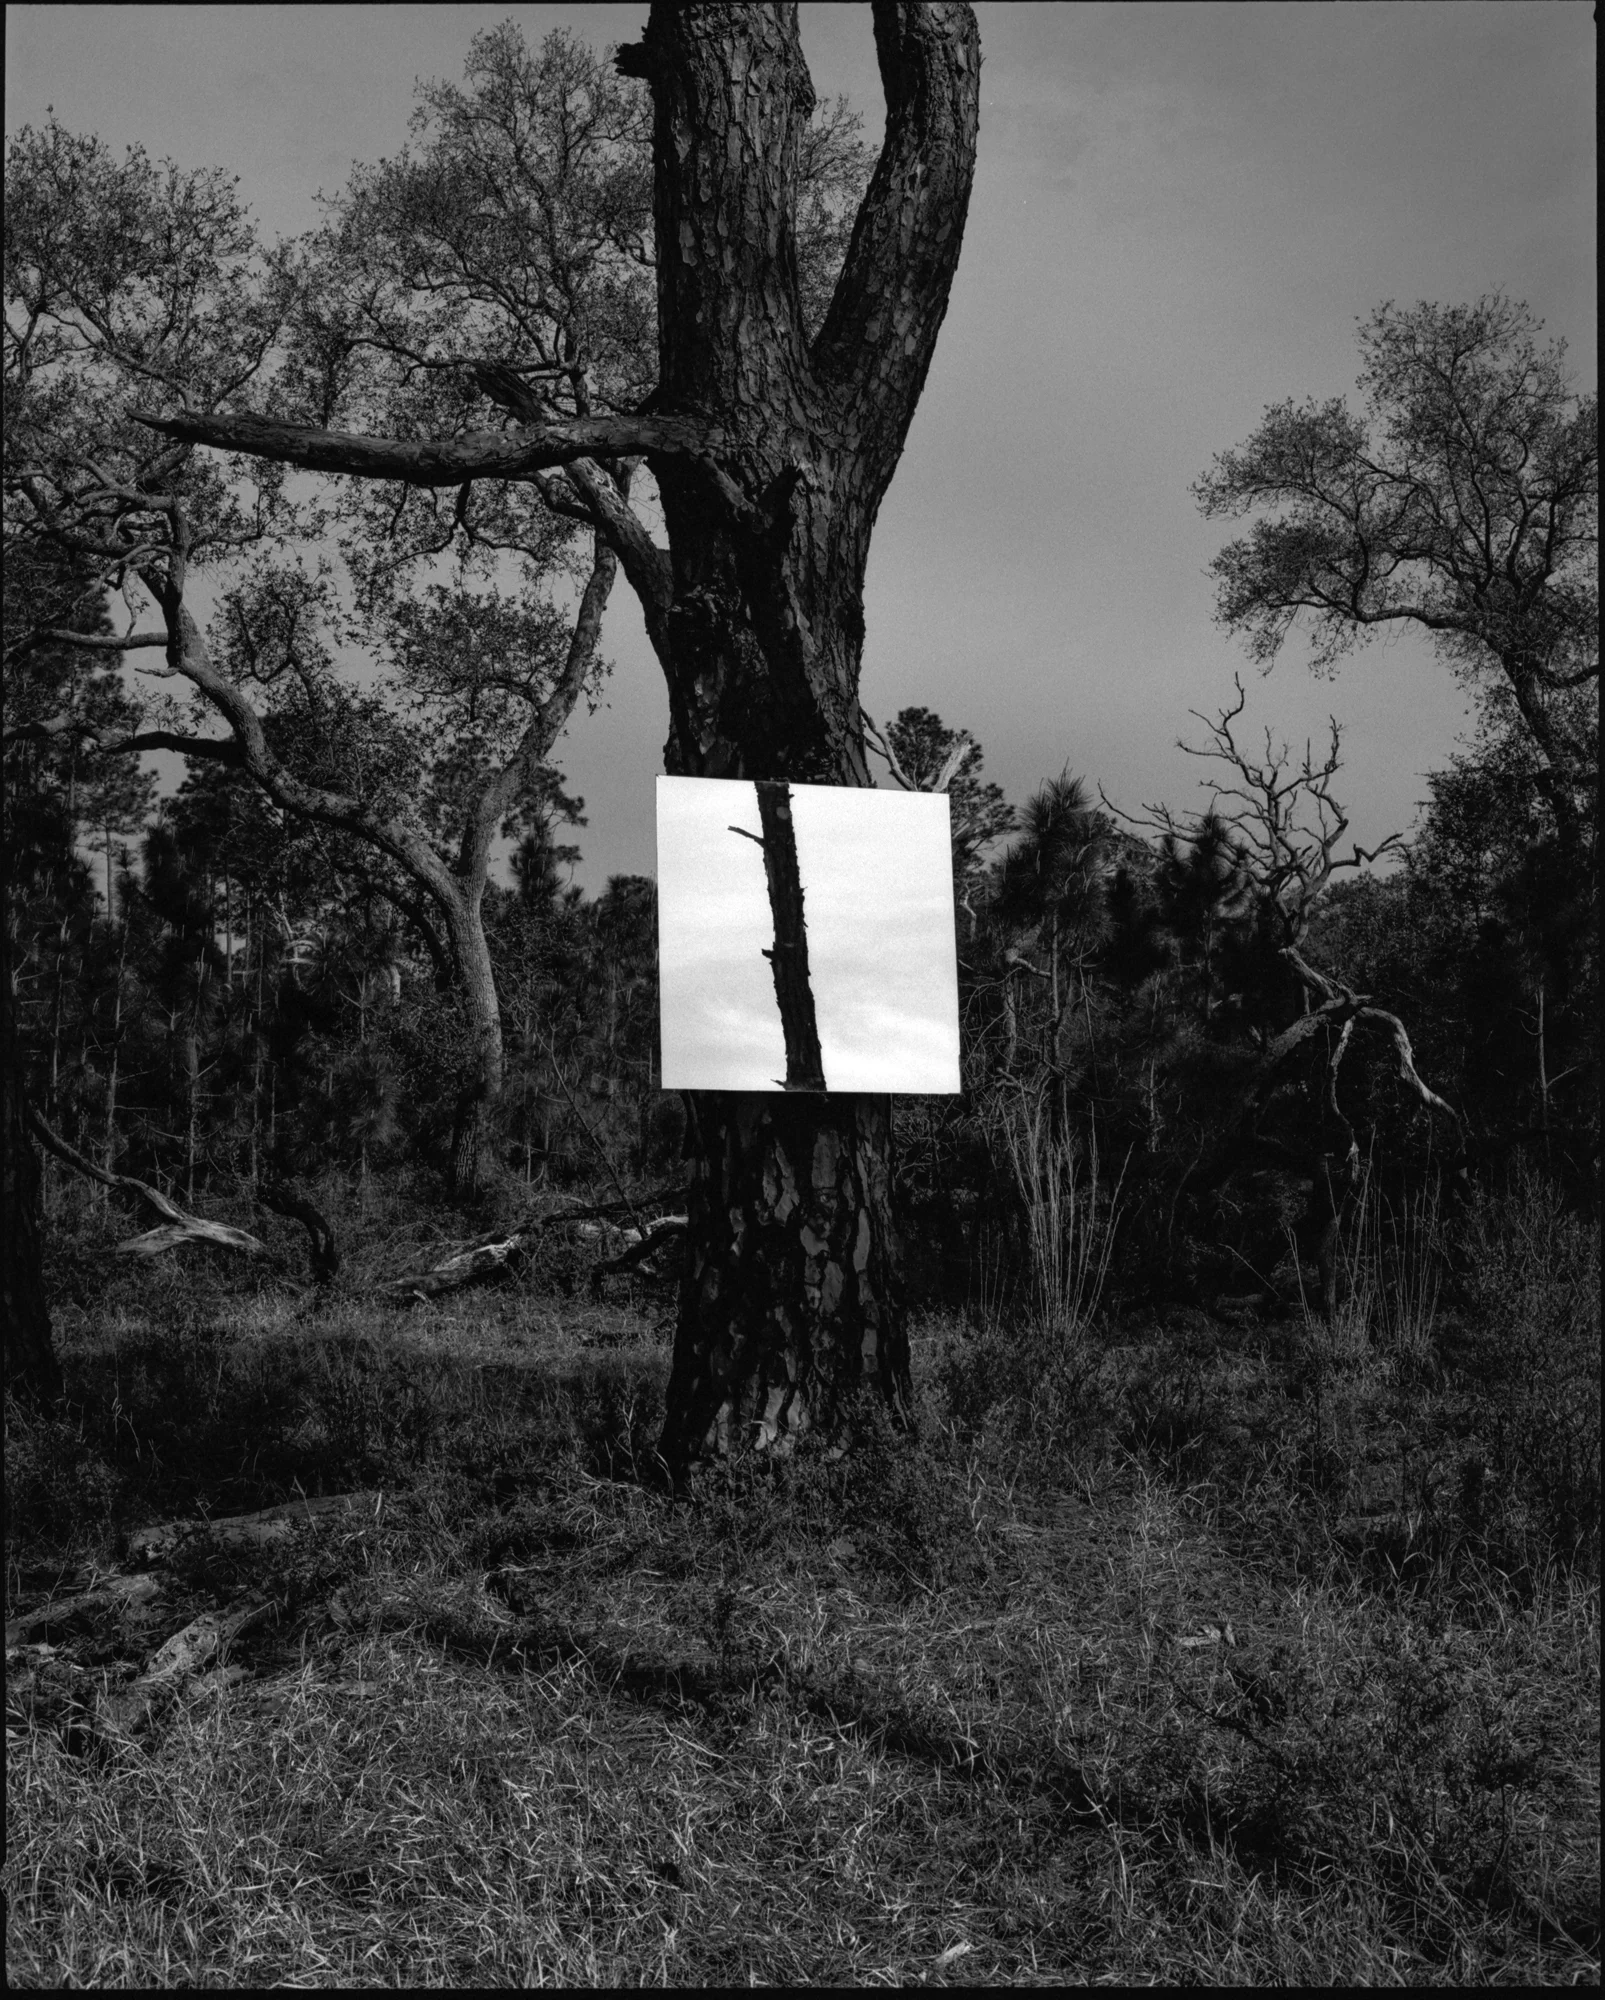
My goal was to capture the dichotomy of a single place, to explore the idea that everything is constructed of coinciding, yet entirely different, realities. And like a wormhole that connects distant dimensions, the mirror had the potential to help illustrate this relationship.
There is nothing original about a mirror photo. The concept alone conjures visions of community college class projects where dozens of images plaster the walls of a student critique and the only things people know how to say are, “I like it,” and, “I don’t like it.”
But there was something special about this mirror that made me look past all that. The large size, the geometrically perfect proportions. Maybe it was the fact that it was free. I couldn’t resist carrying it into the woods.
Alex disappearing behind the mirror in between photos at the Juniper Prairie Wilderness. Mamiya 7ii, 80mm, Kodak Tri-X 400 pushed to 1600.
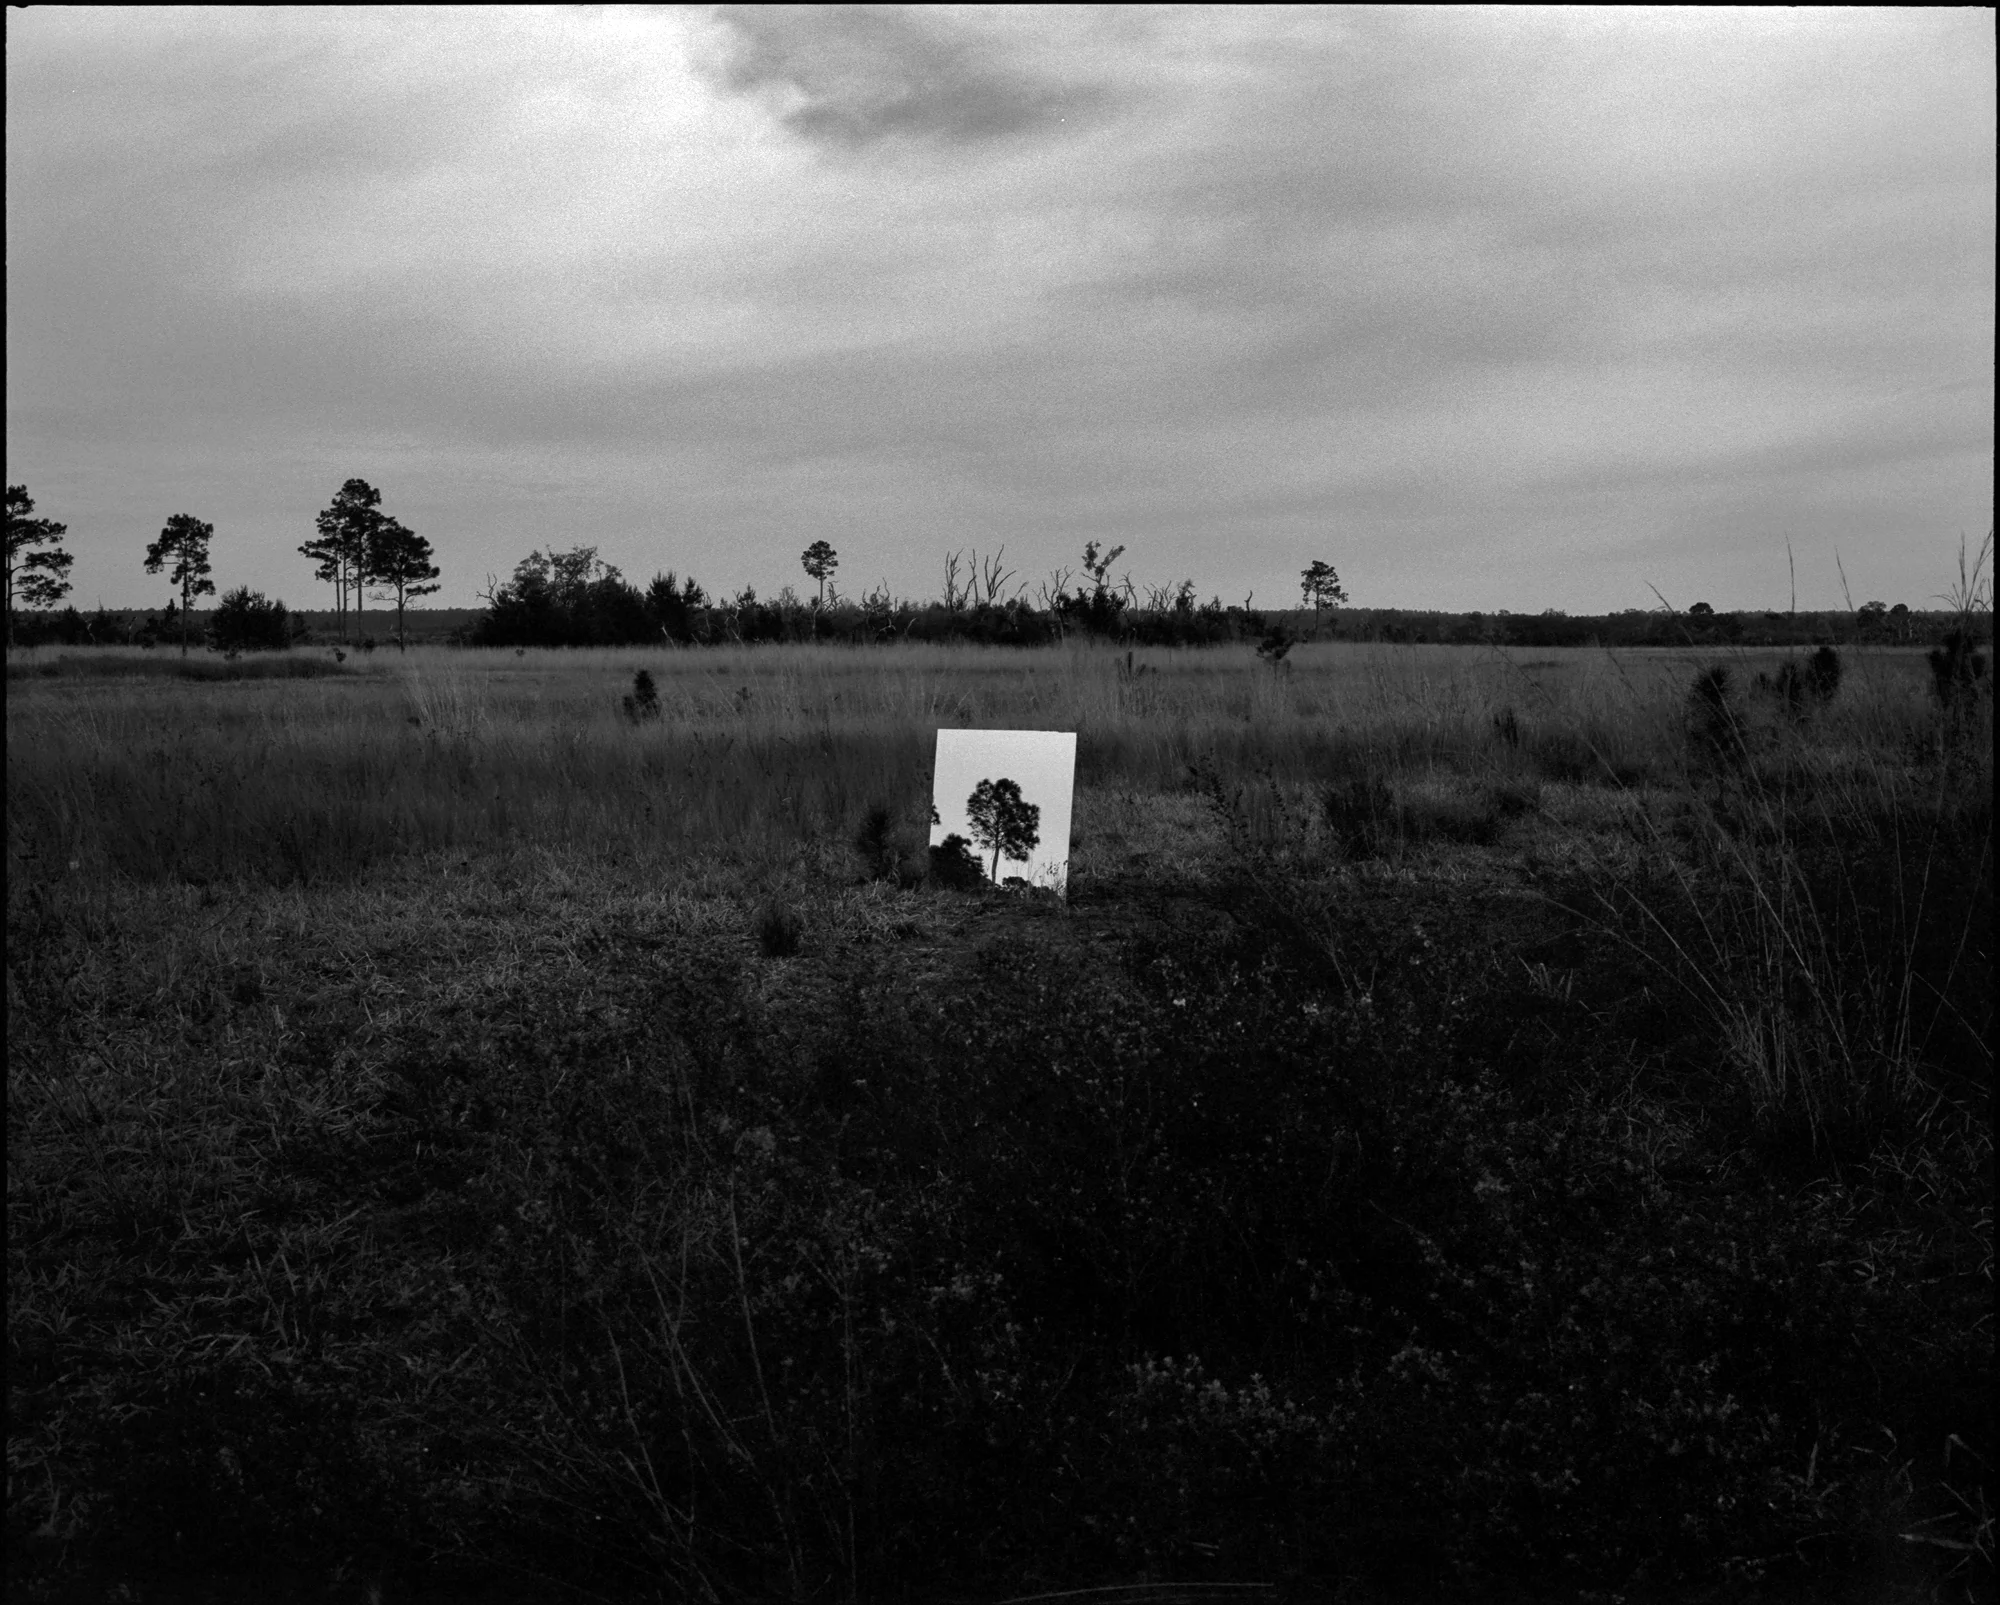
The mirror sits in the middle of the prairie reflecting a far-off pine tree. Mamiya 7ii, 80mm, Kodak Tri-X 400 pushed to 1600.
Mamiya 7ii, 80mm, Kodak Tri-X 400 pushed to 1600.
The mirror sits in the middle of F.R. 33. Mamiya 7ii, 80mm, Kodak Tri-X 400 pushed to 1600.
The Mamiya 7ii hangs from my shoulder as I meter the scene. Photo by Alex Catalano.
2. The camera
I recently sold my RZ67 Pro II and bought a Mamiya 7ii. It’s a camera I’ve been wanting since plunging into the medium format world; and while I originally opted for the RZ due to price, I quickly realized it wasn’t built for carrying miles around the woods.
This trip was the first time the Mamiya 7ii and the Juniper Prairie Wilderness met. I think it’s the beginning of a great relationship.
I’ve been using a combination of Kodak Tri-X 400 pushed to 1600 and a red filter for my current project. It gives the images a gritty and grainy mood that I think compliments the atmosphere of the woods. Photo by Alex Catalano.
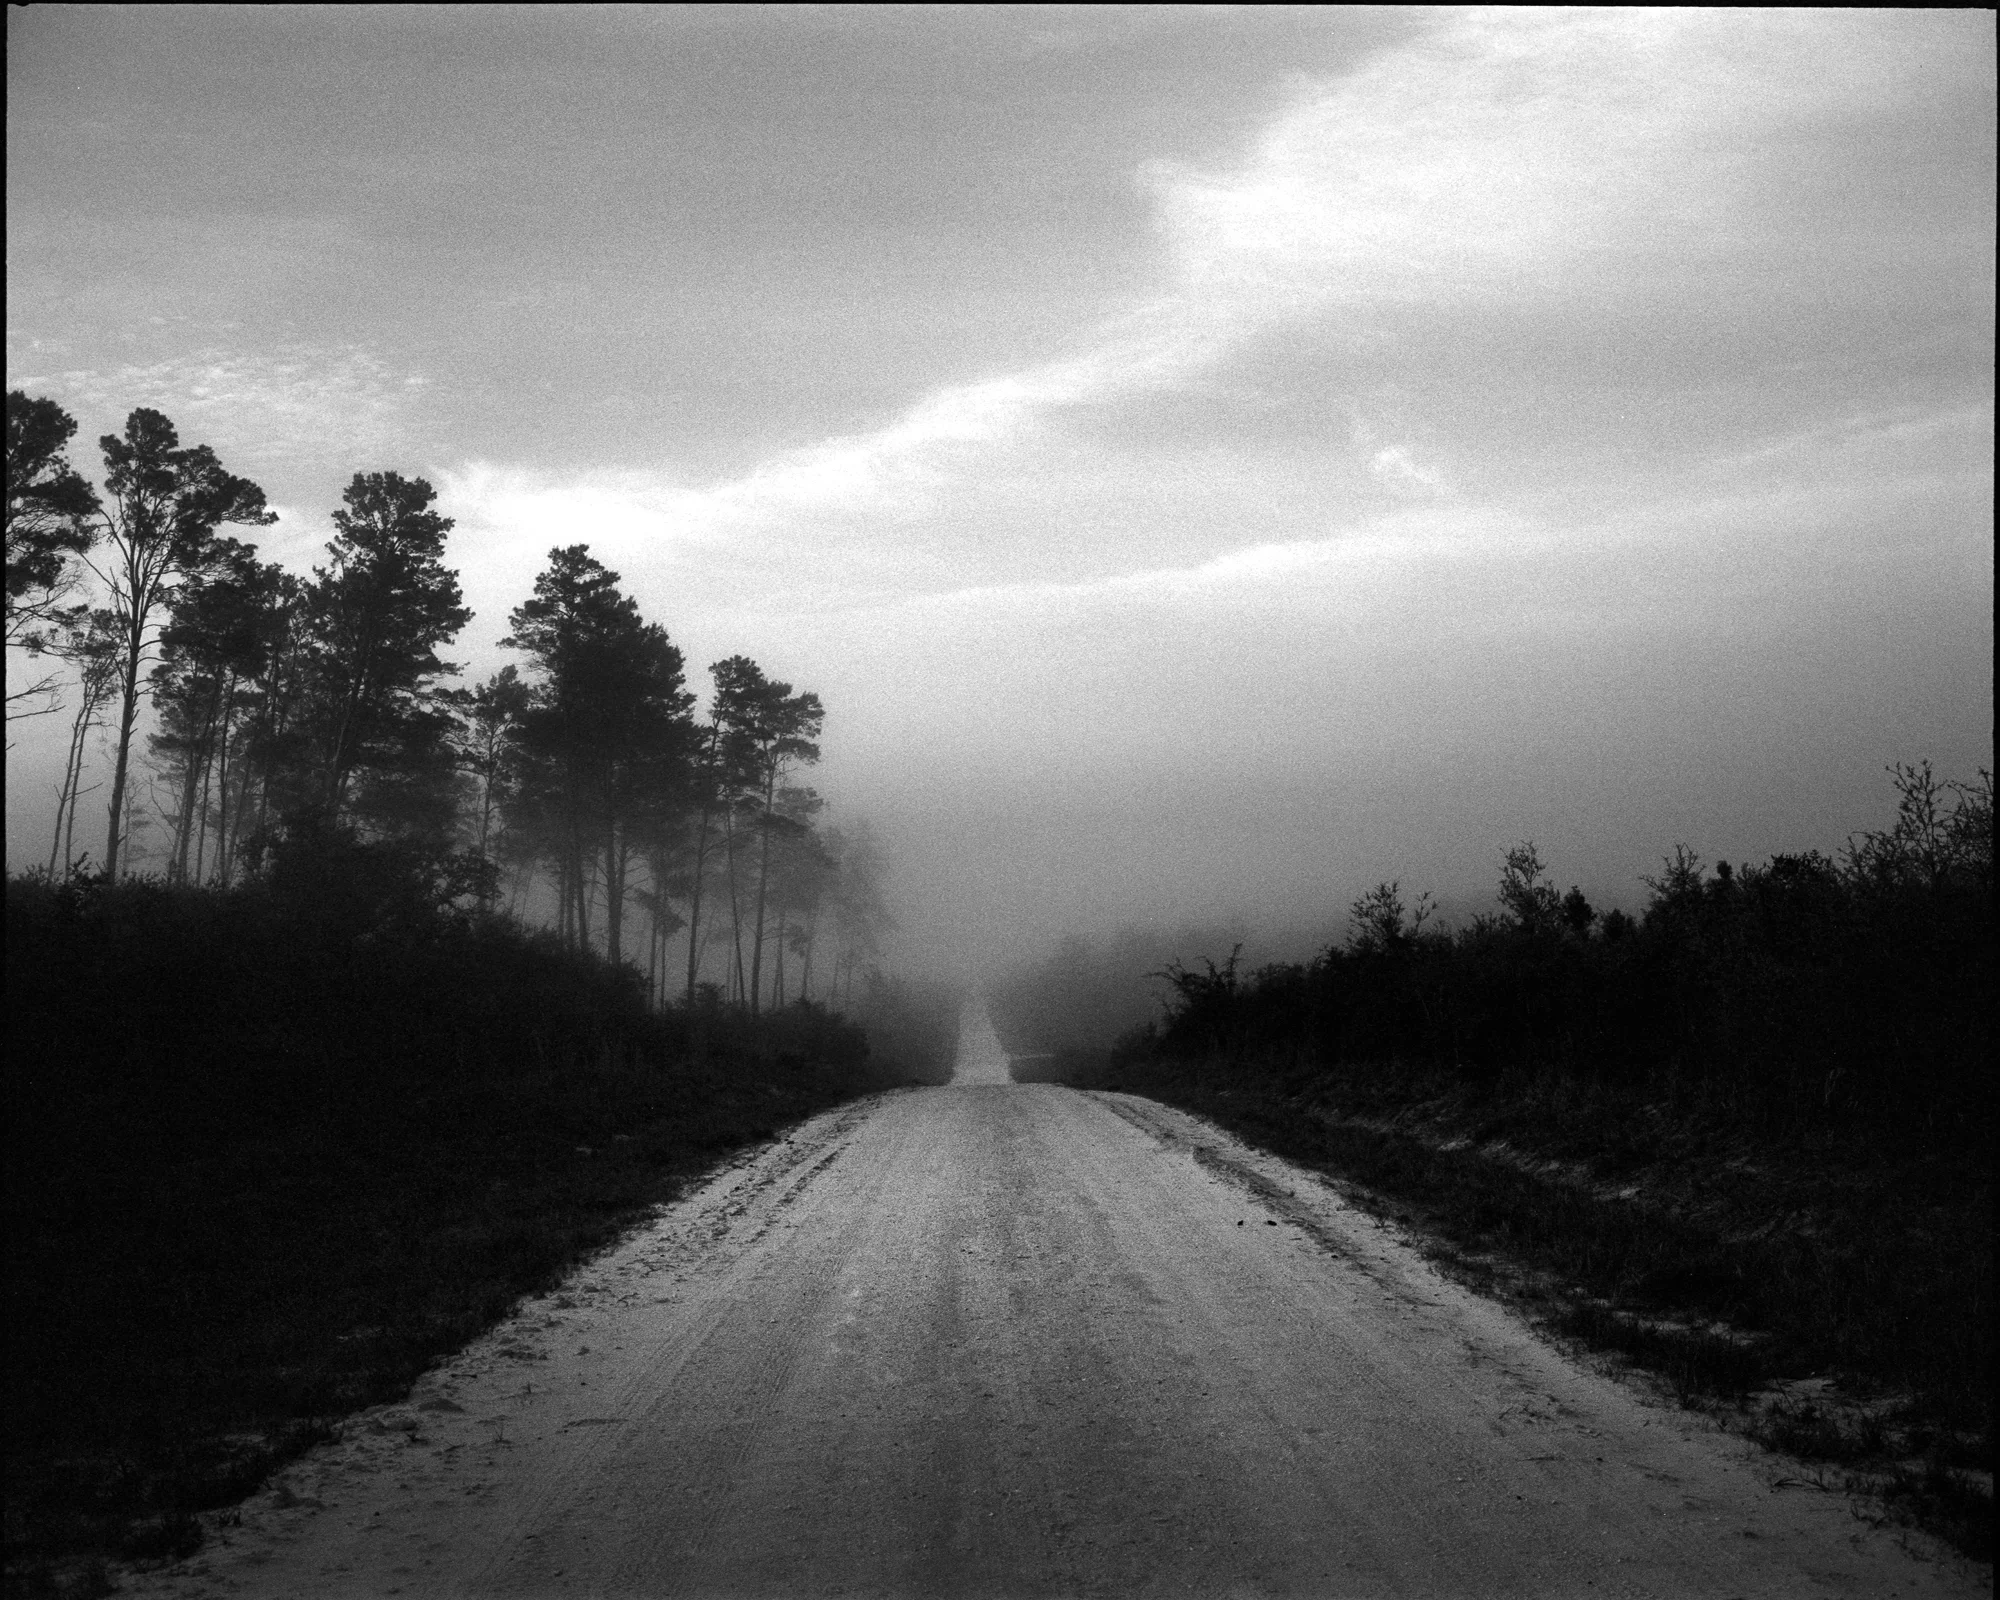
My 2006 Ford Econoline, Howl, sits with the doors wide open on the side of the road after Alex and I jumped out to photograph the morning fog. Mamiya 7ii, 80mm, Kodak Tri-X 400 pushed to 1600.
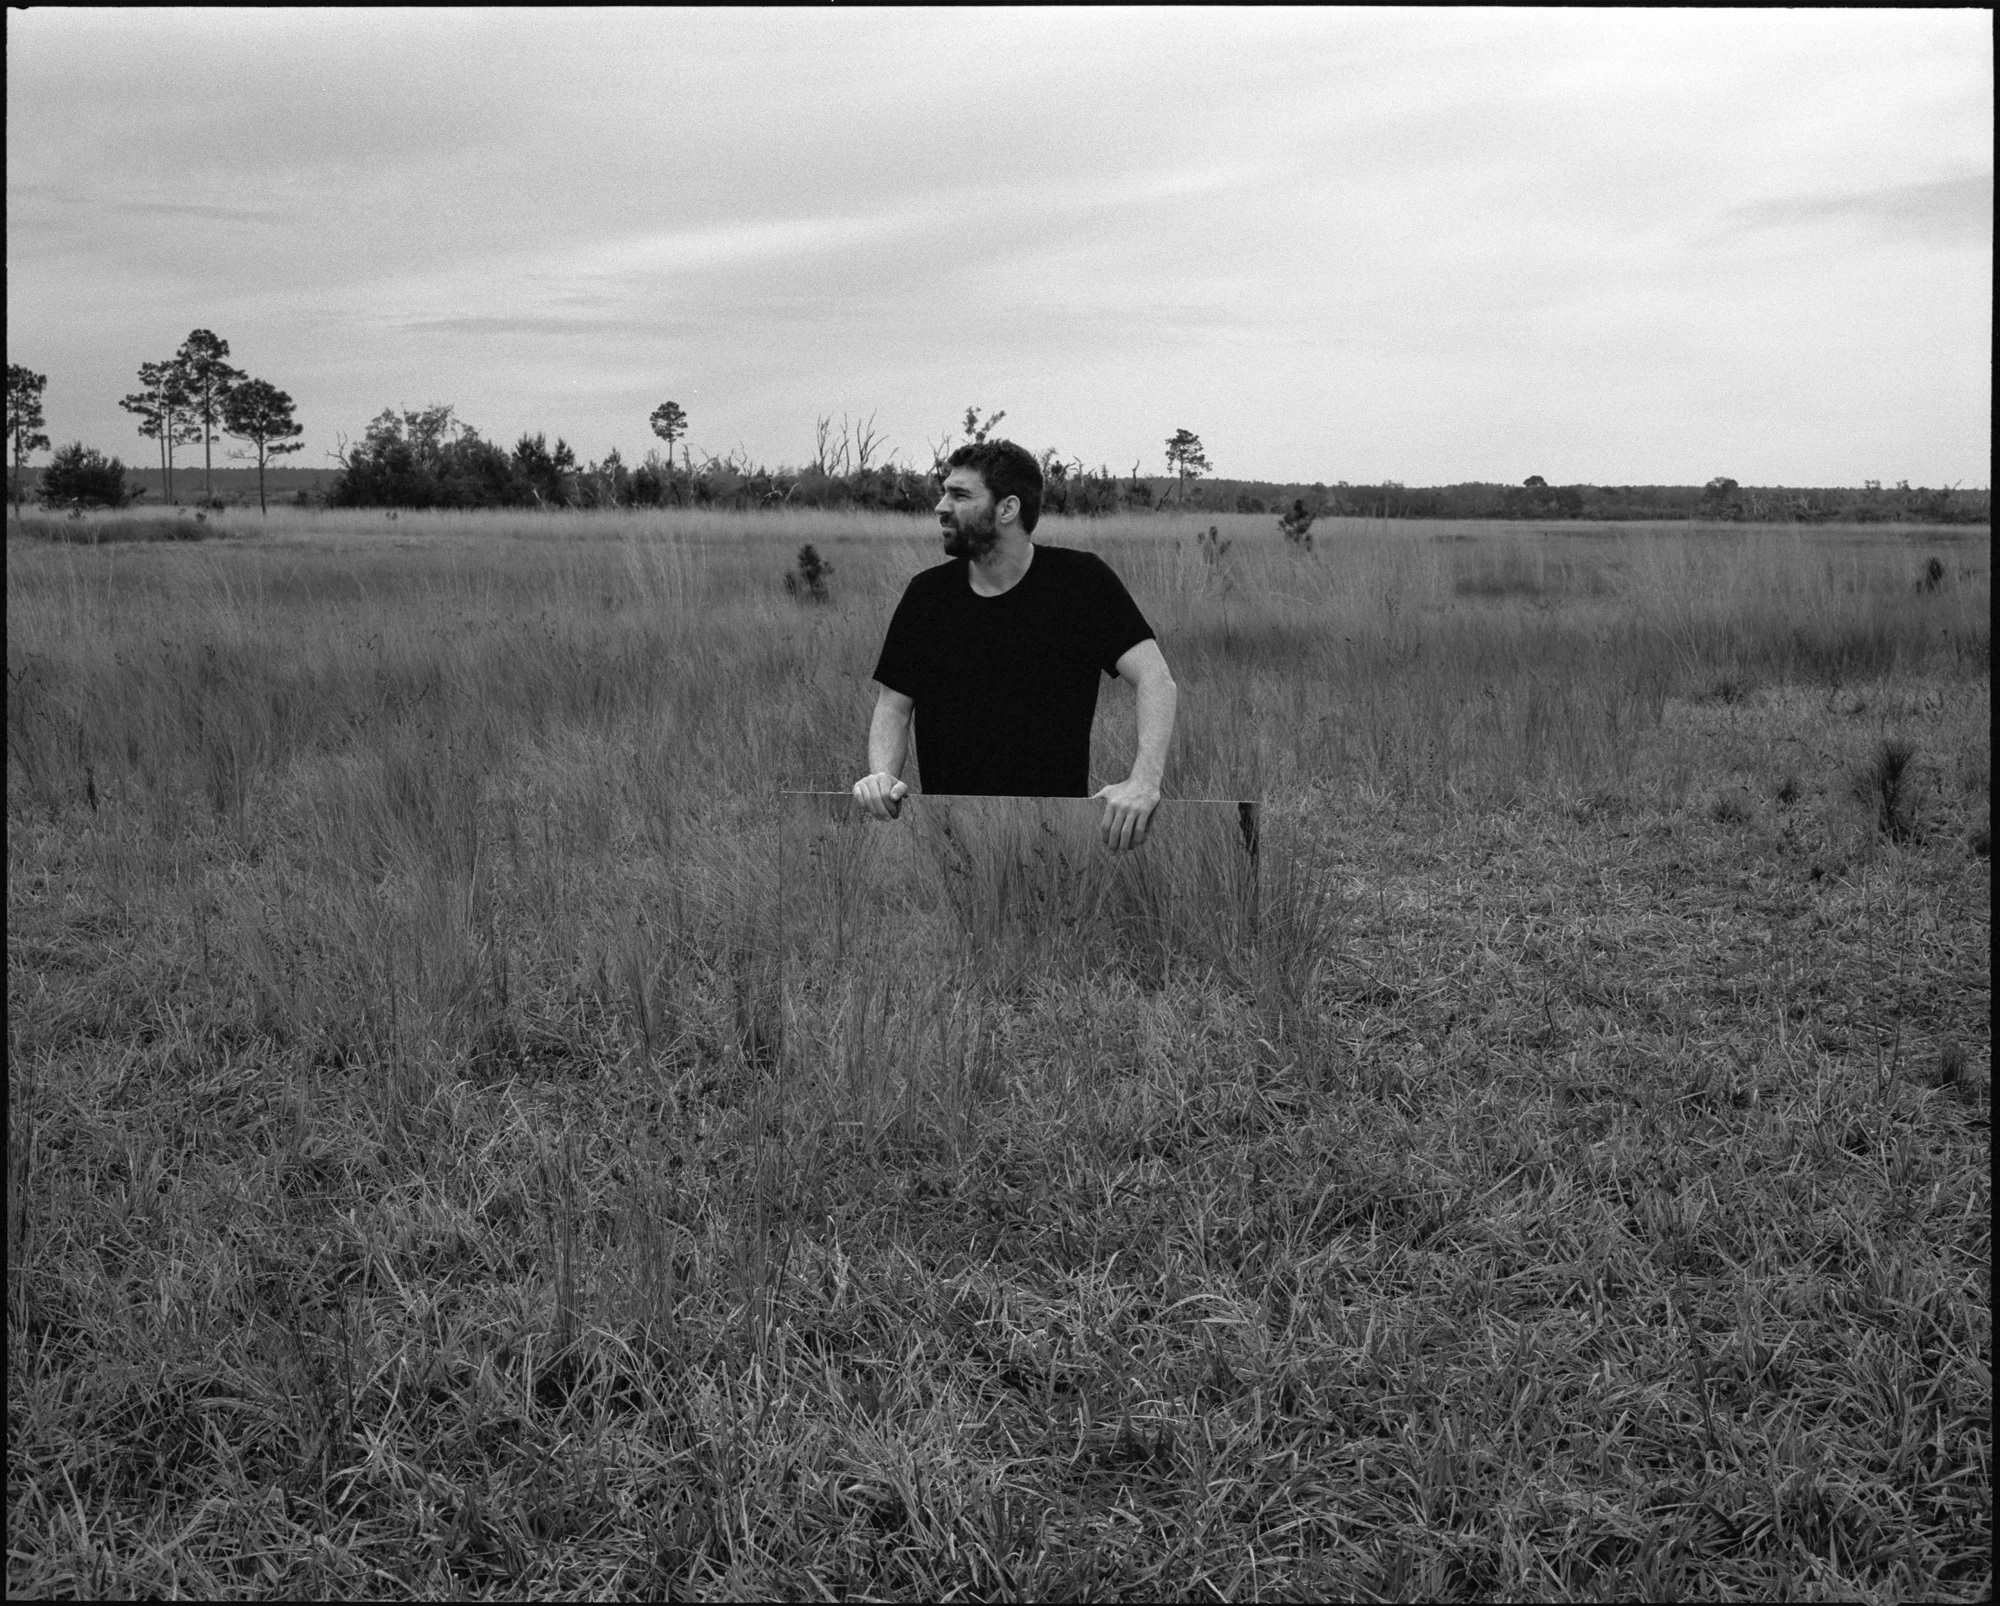
Alex stands for a portrait in front of the reflected mirror light in the Juniper Prairie Wilderness. Mamiya 7ii, 80mm, Kodak Tri-X 400 pushed to 1600.
3. The potential
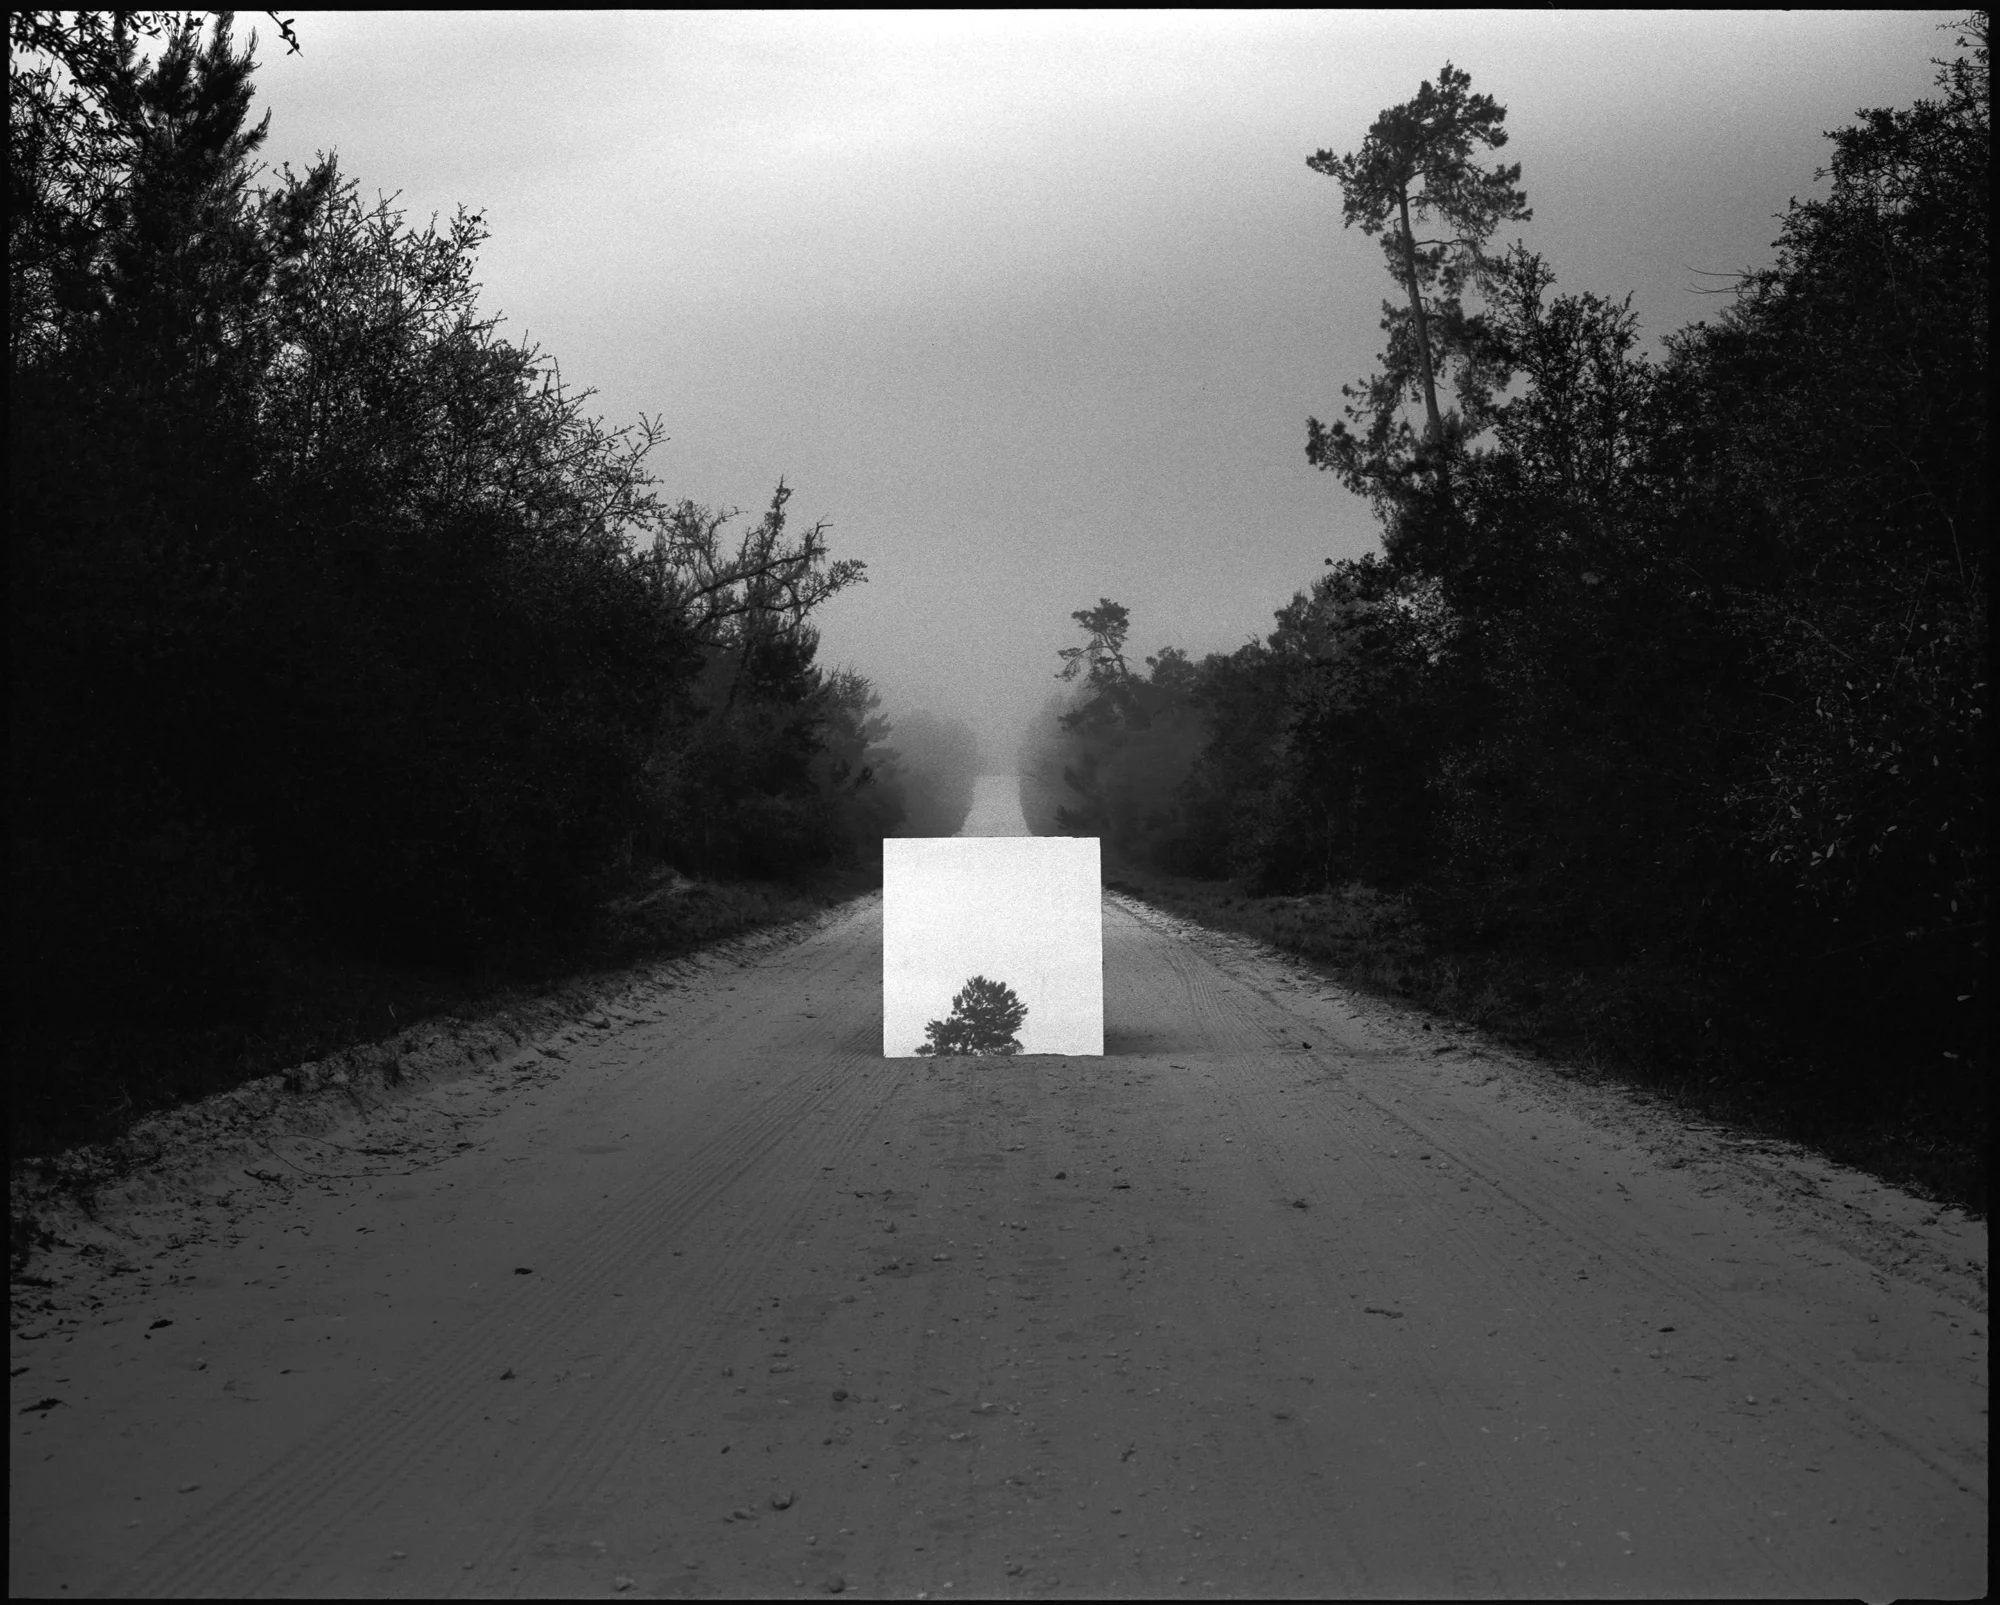
I wasn’t able to capture the image I had in my mind - the mirror broke only a couple hours into the trip. Let’s face it, a giant piece of glass dragged across the prairie and hung in trees is not long for this world. But there was a hidden potential we carried in the mirror that we didn’t discover until it broke.
When Alex walked by the broken mirror laying on the ground, I noticed the intense light reflecting up at him. It was so intense, that as we were leaving and carrying the pieces of mirror back to the van, we realized we could essentially use it as a hyper-powered flashlight, beaming a 3-foot by 4-foot rectangle of light hundreds of yards across the prairie. I’ve never seen such a focused beam of light.
While it was laying on the ground, I took some portraits of Alex standing in this cancer-inducing beam of light. It’s not a flattering light, but the combination of the noon sun shining downward, the mirror reflecting upward, and the red filter drawing out the contrast in the sky created a really intense, gritty look that I enjoy.
It’s always a good day when you learn something new, and I’m excited to use this technique in the future.
Another portrait of Alex standing in the reflected light in the Juniper Prairie Wilderness. Mamiya 7ii, 80mm, Kodak Tri-X 400 pushed to 1600.

Tick Talk
It was the 4:15 a.m. alarm that finally succeeded in yanking me from the silence. I rolled out of bed and onto my feet.

It was the 4:15 a.m. alarm that finally succeeded in yanking me from the silence.
It’s March. Somehow, someway, somewhere, two months have gone by, and now it’s March. I still feel strange saying “2019,” and yet the year is already one sixth over. I’m suspicious that even time sets New Years fitness resolutions, because it feels like each January it’s off to a sprint, and I’m struggling to keep up.
I rolled out of bed and onto my feet. This was part two in a three-part adventure to scout, navigate and photograph Juniper Creek.

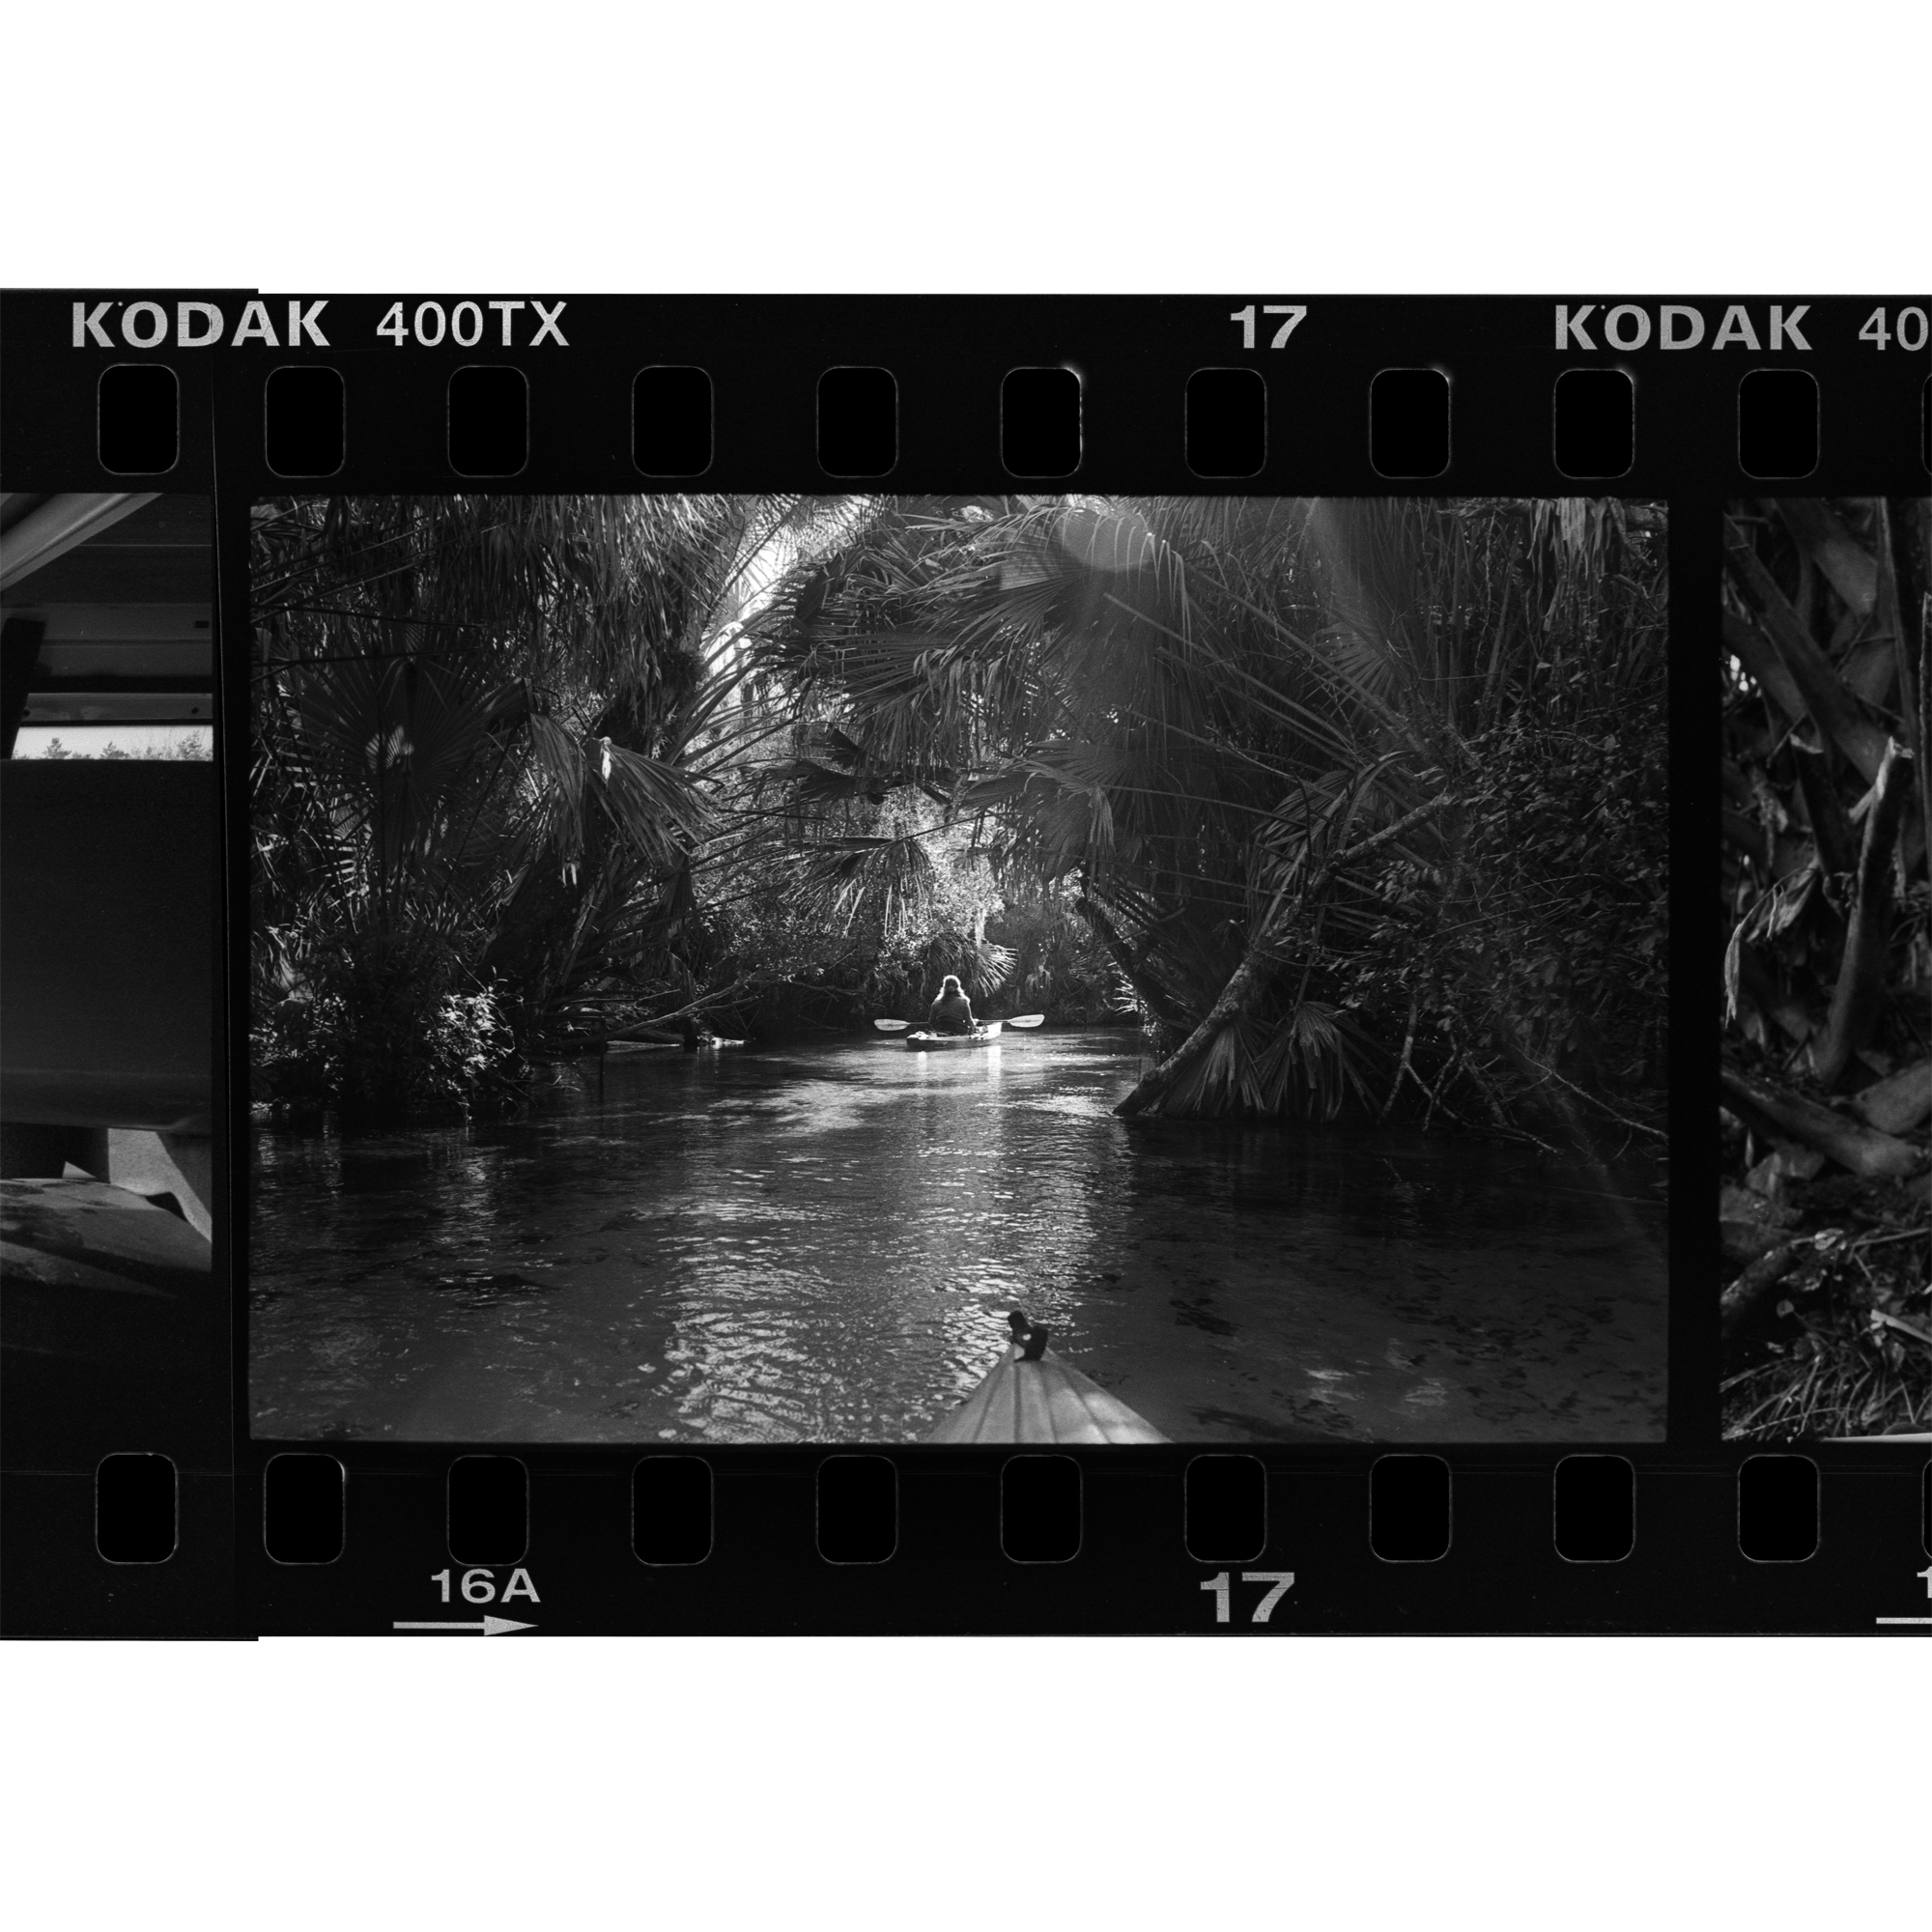

Above: Some photos I took with my Leica M6 during the kayaking/scouting stage of this three-part adventure.
Alex, Jenny and I kayaked the creek about a month ago. It sits in the southeast quadrant of the Juniper Prairie Wilderness and flows northeast from Juniper Springs into Lake George. Due to limited accessibility, it’s the only quadrant Alex and I have yet to spend significant time exploring. Aside from a fun afternoon activity, the purpose of the kayaking trip was to mark interesting points along the shore, to which Alex and I would then return from land at a later date.
Here is an awesome video Alex made of that trip:
We returned last weekend to navigate to a couple interesting points we marked along the river. We entered the woods at the South Fire Trail and headed east.
It was a beautiful foggy morning, and it felt good to be back in the woods after a month-long hiatus.

Here is a Google Earth screenshot of our two trips, which I recorded with my Garmin. The blue path is from our kayaking scouting trip. The yellow path is from mine and Alex’s most recent trip where we navigated to the river via land.
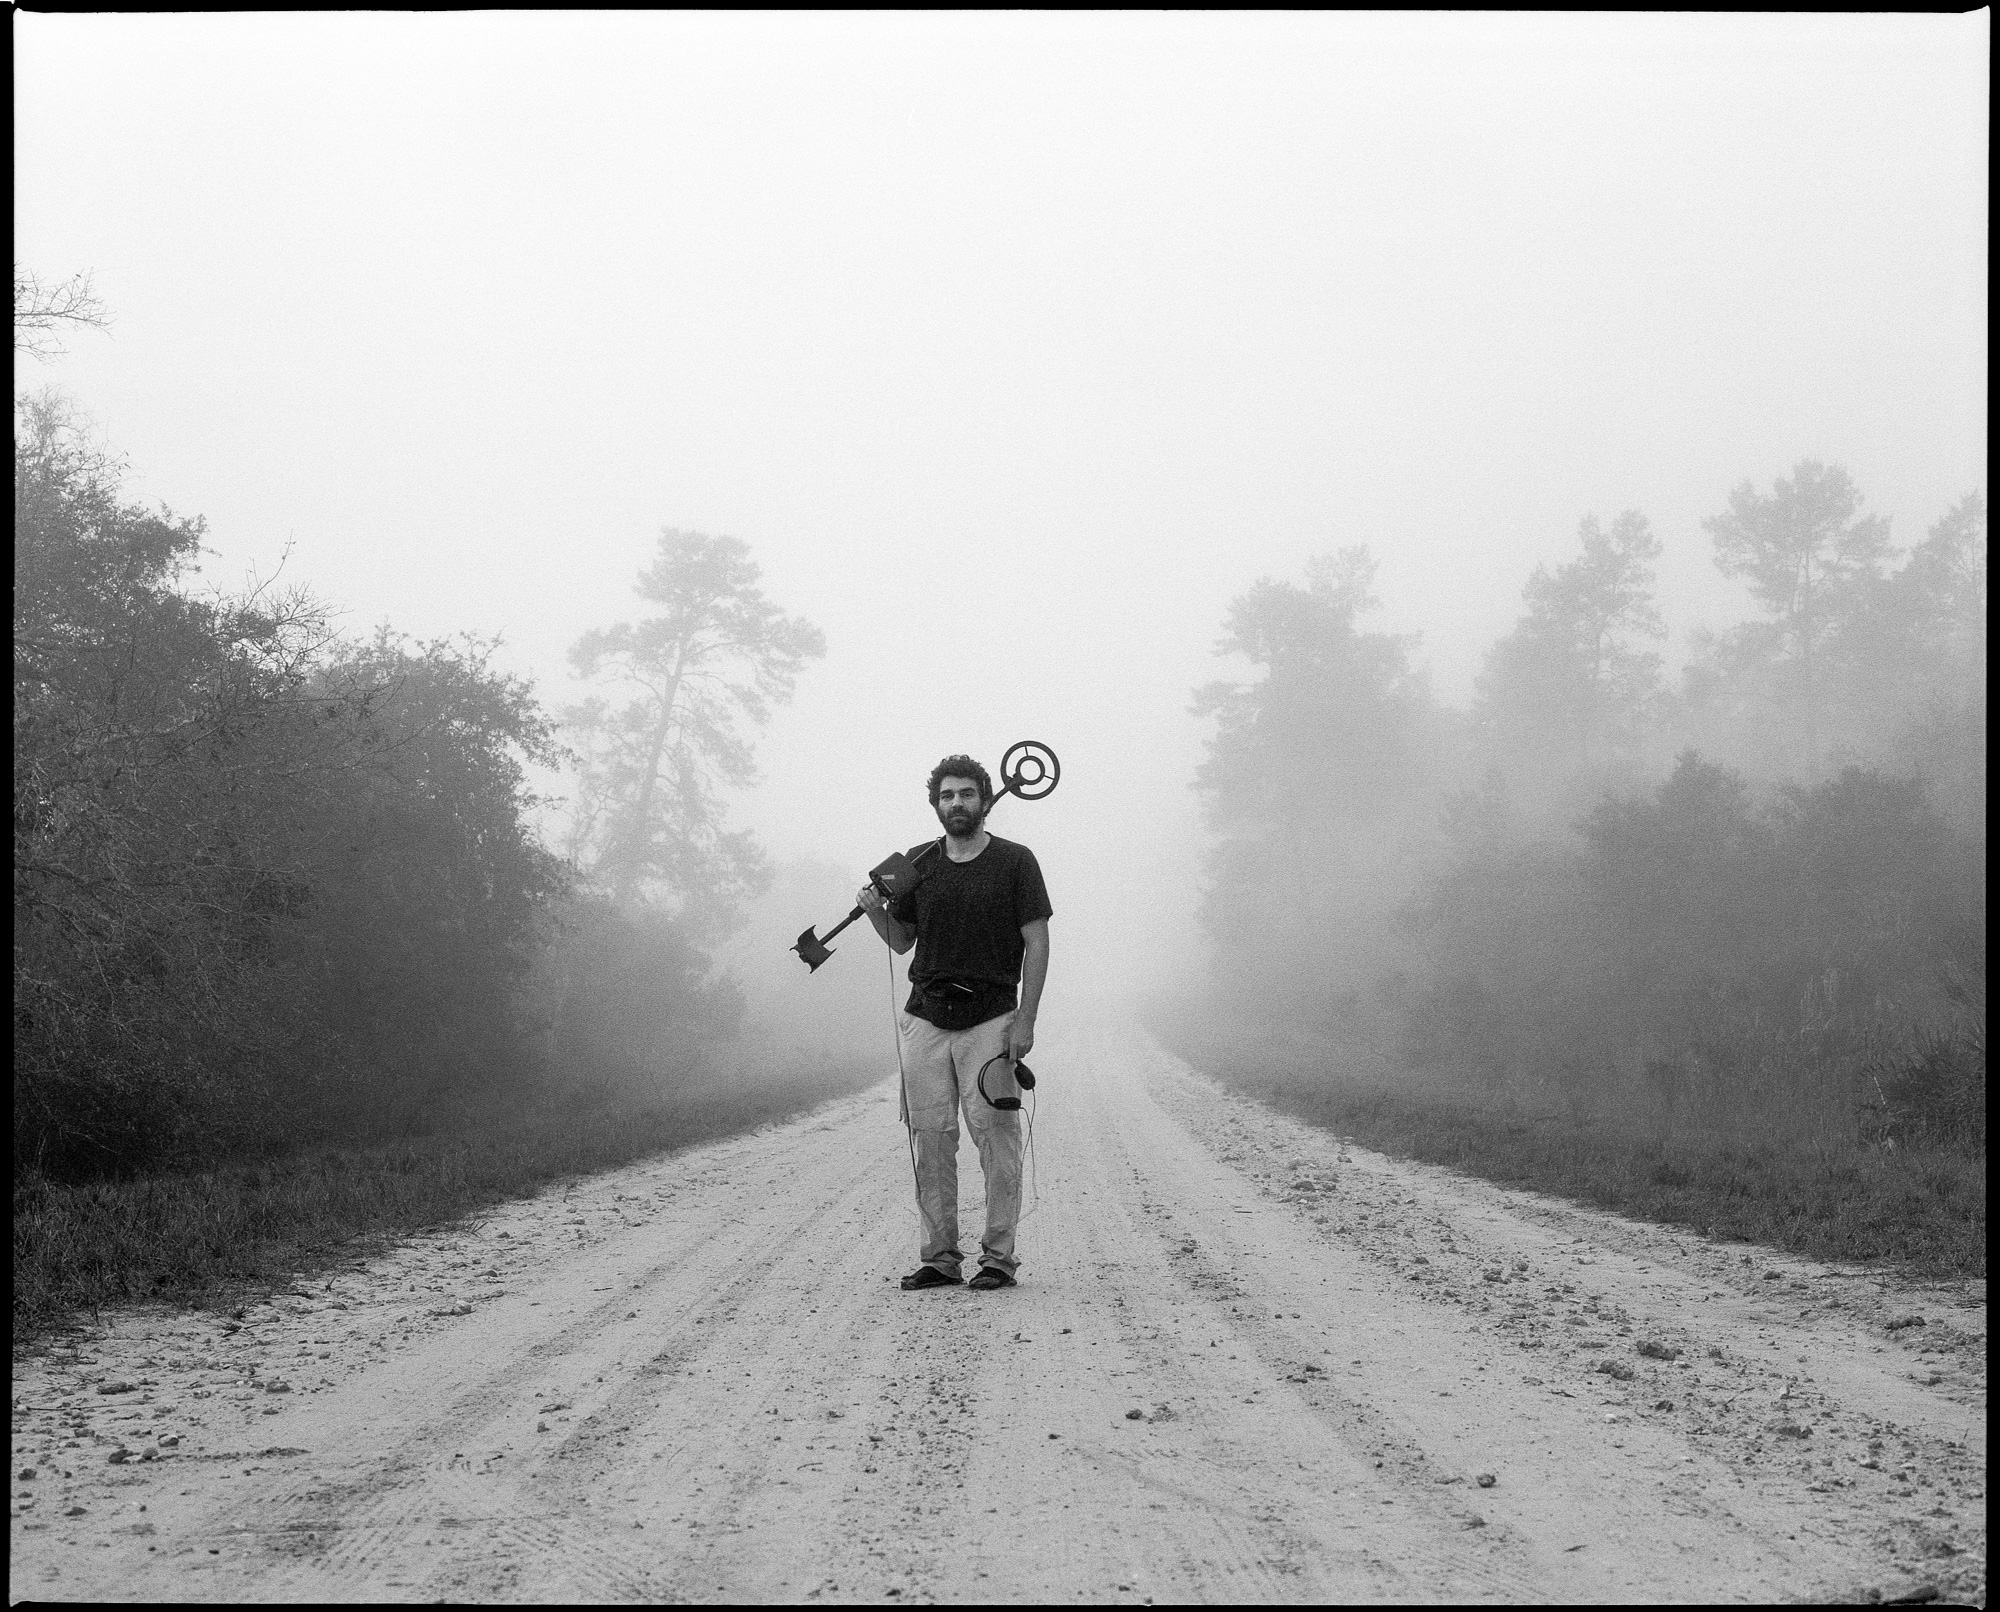
A portrait of Alex on Forest Road 33 right before entering the woods. Alex brought his metal detector to locate artifacts during our route. Aluminum foil seemed to be the life of the party this time around. Shot with the Mamiya RZ67 Pro II and 110mm, f/2.8.

A view of our hike in. I recently upgraded to the iPhone XR, and let me tell you what a difference it has made! The dynamic range is incredible. This image is straight out of camera.

Another shot of sunrise taken with the iPhone XR.
After about 30 minutes of hiking, we arrived at a pair of lakes Alex and I call the Bahamas and rested. I waded out with the RZ67 to grab an image of these two pine trees reflected in the water.
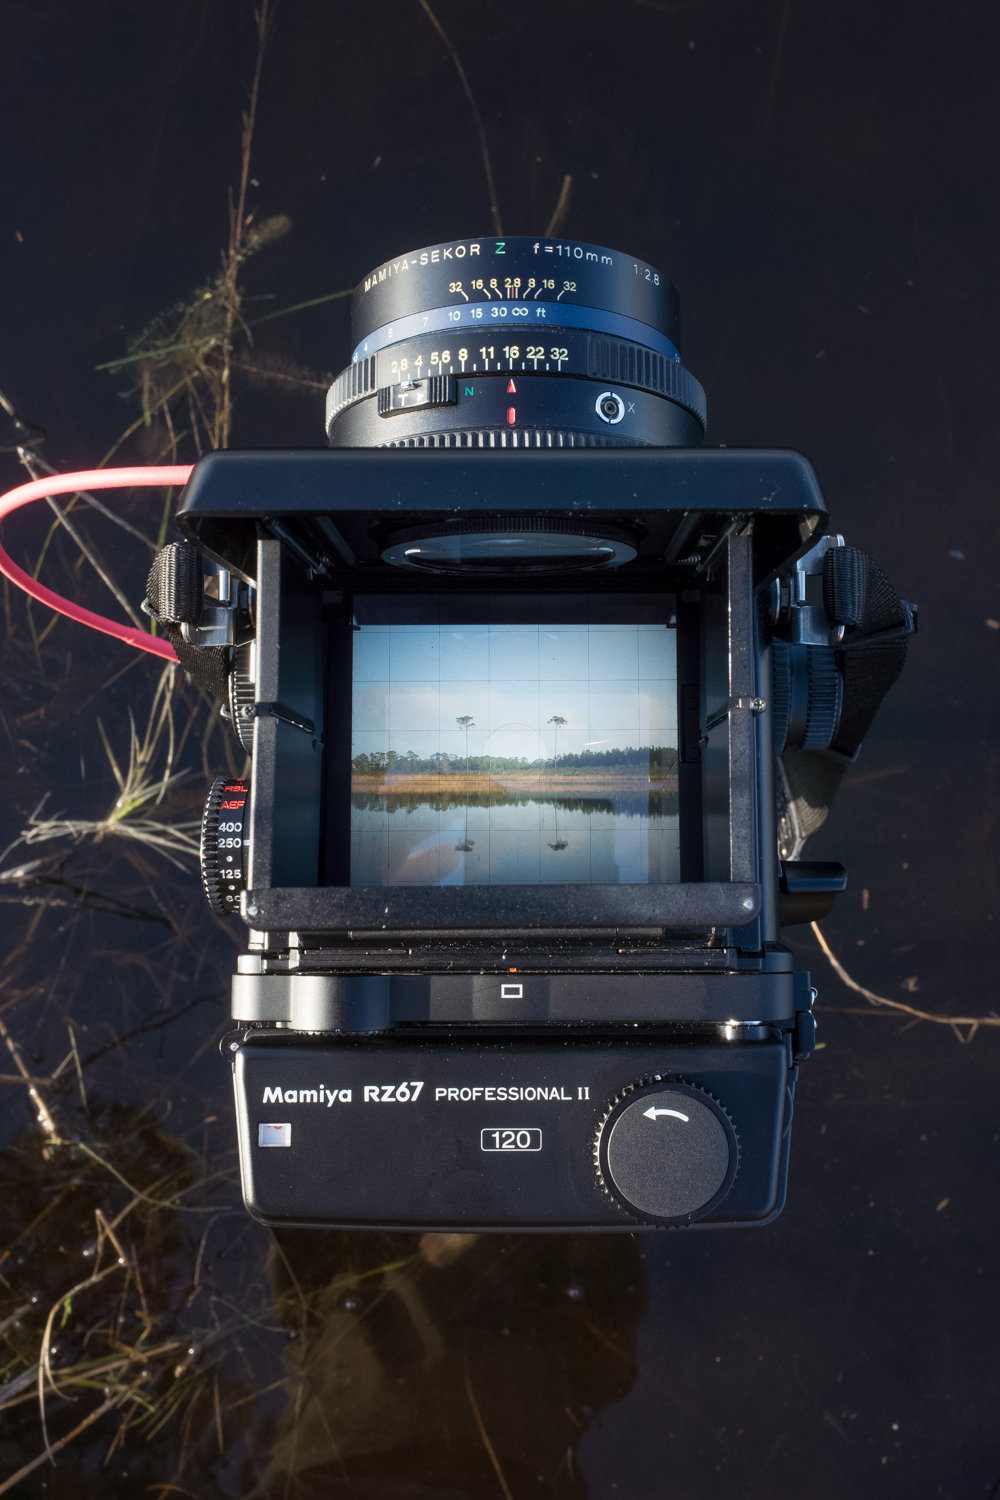
A shot through the viewfinder of the Mamiya RZ67. This image was taken with my Ricoh GRII, which I normally use for documenting the in-between moments. However, after that last trip, I think I will be selling the Ricoh and using my iPhone XR exclusively for this type of work.

Twin pines shot with the Mamiya RZ67 Pro II and 110mm f/2.8. I used a red filter and pushed my Kodak Tri-X 400 to 1600, which I’ve been doing for all my images for this project. About five minutes after taking the image, the wind picked up and completely erased the reflection.
After a lot of bushwhacking and a couple interesting discoveries, we eventually reached Juniper Creek. Like I mentioned earlier, we’re treating this trip as part two in a three-part adventure. We’re planning some specific photographs for part three, but we first had to navigate and prepare. As Abraham Lincoln once said, “Give me six hours to chop down a tree and I will spend the first four sharpening the axe.”
When I got home from this trip, I pulled 36 ticks off my body. Florida is transitioning back into summer, which means more ticks, spiders, alligators, snakes and bears. Like time, nature continues its endless cycle.
Maybe next time I’ll wear bug spray.

A corn snake we found sun bathing in the middle of the trail on the hike out. Shot with the iPhone XR.

Sunset on the drive home. Shot with the iPhone XR.

Life and Death in The Prairie
I grew up in Florida. My family moved here from Cape Cod when I was seven. But I’ve always seen Florida as an unfortunate circumstance, a stain left in the carpet of my parents’ old dreams. This is the second post of my Contact Sheets series.
Mamiya RZ67 Pro II with 110mm f/2.8 and #25 red filter
Home
The story is becoming more and more about home - what home means, how home feels, how it changes. I grew up in Florida. My family moved here from Cape Cod when I was seven. But I’ve always seen Florida as an unfortunate circumstance, a stain left in the carpet of my parents’ old dreams. It’s always felt like a temporary living space, one from which I’d eventually move and settle into a real home, one with hills and mountains and actual seasons.
But the heart has a weird way of setting roots where the brain doesn’t suspect. And over the last several years, the Juniper Prairie Wilderness has changed my perception of Florida. It has become my 14-thousand acre refuge out in the middle of the Ocala National Forest. And while I spend my week living in an apartment complex full of strangers, there’s a comfort in knowing that my home is out there, just an hour and fifteen minutes and a few paved roads followed by a few dirt roads away.
This is the second post in my Contact Sheets series.

Roll 004 - Mamiya RZ67
In my previous blog post, I explained my goal to create a zine about the Juniper Prairie Wilderness area and how it intertwines with my story. I will not be posting contact sheets from the two years I’ve already spent out there. You will have to wait until the zine comes out to see those. But I do plan on posting a contact sheet for every roll of film I shoot from this point on until the project is finished. And so far I’ve been enjoying the focus this project has provided. I’m no longer just looking for anything, but, rather, specific things that help to tell a specific story.
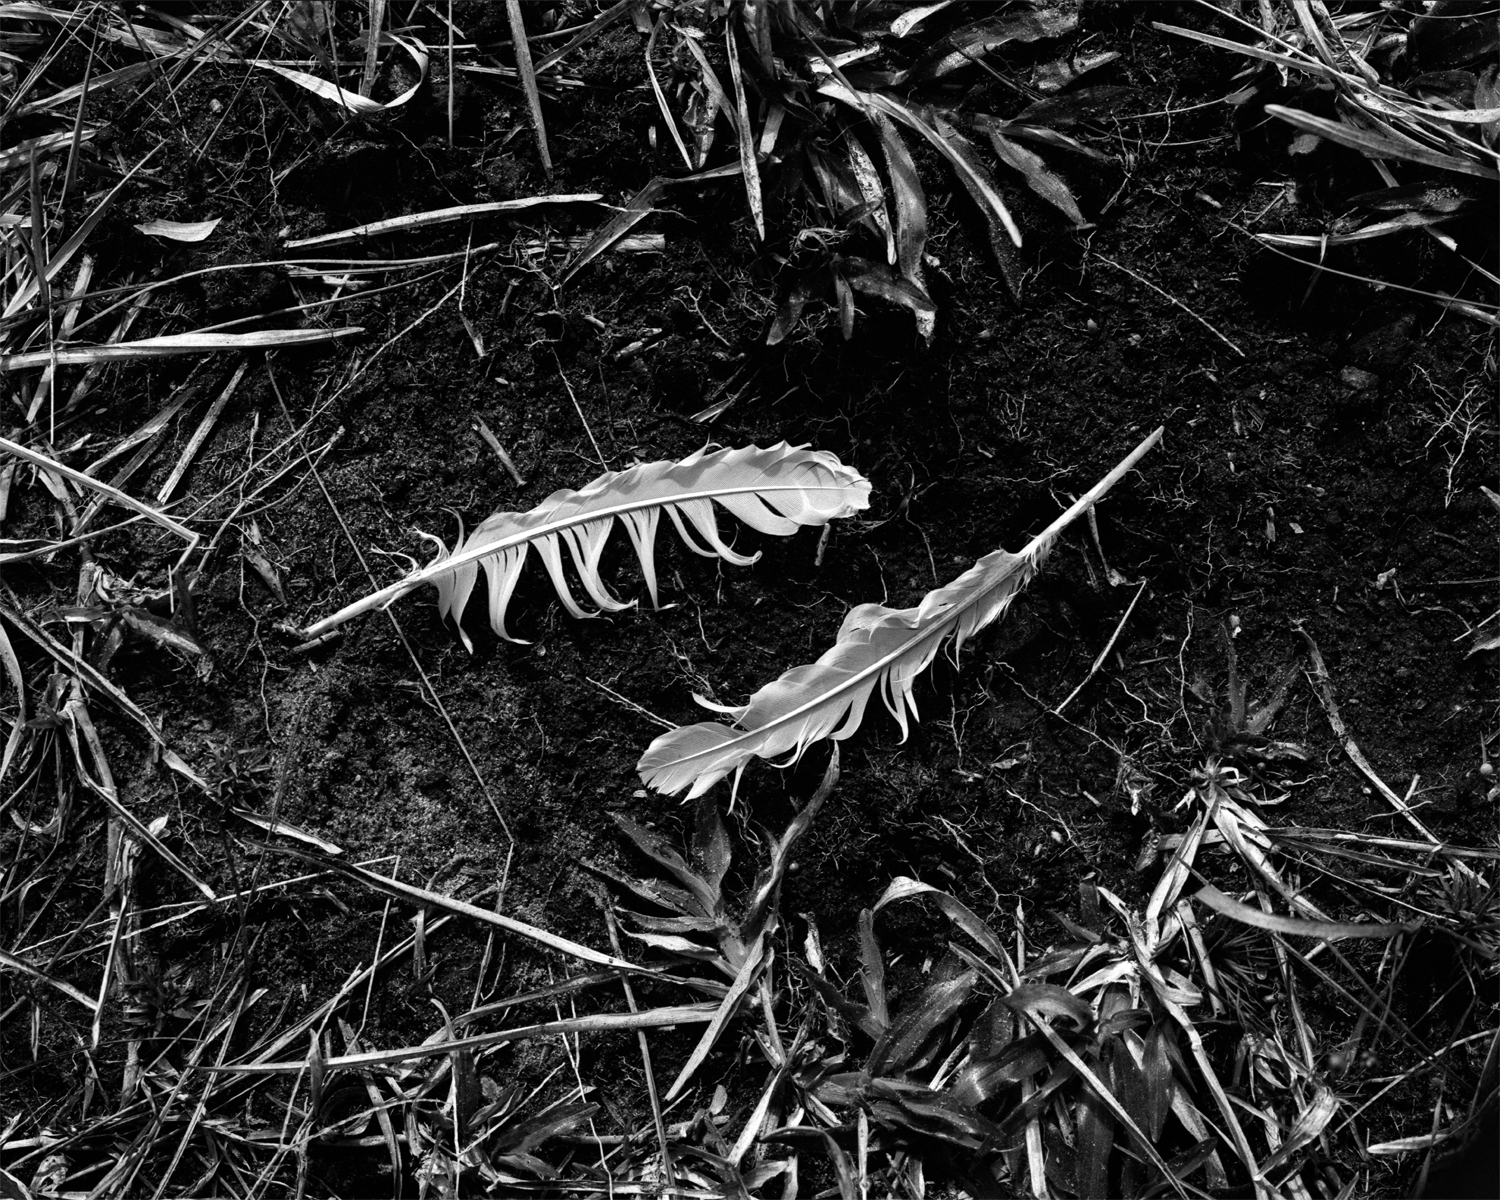
The first six images from this contact sheet play with this concept of home. A bear’s paw print pressed perfectly in the soft sand hints at the life that inhabits this place. Plucked feathers, likely the final remains from a fatal struggle, reveal that nature doesn’t only exist on the weekends. Things are happening all the time whether or not I’m out there. And it’s a sad reminder that no matter how much I love this place, it isn’t really my home after all.
I’m a stranger here, documenting the remnants of last night’s party. And it feels like I’m always just seconds late to the party.

Mamiya RZ67 Pro II with 110mm f/2.8

Mamiya RZ67 Pro II with 110mm f/2.8 and #25 red filter

Roll 005 - Mamiya RZ67
This weekend, I took a trail Alex and I call the South Fire Trail into the prairie. My goal this trip was to photograph a waterscape with my newly acquired 50mm lens, so this trail was perfect for that. It leads east from Forest Road 33 into a water-filled oasis we deemed the Bahamas. From there, you can take a trail north to Crooked Sapling Pond, which is a huge pond/lake/swamp directly in the center of Juniper Prairie Wilderness. I remembered some drowning saplings from a previous camping trip, so I headed there to see if I could grab a nice photo.
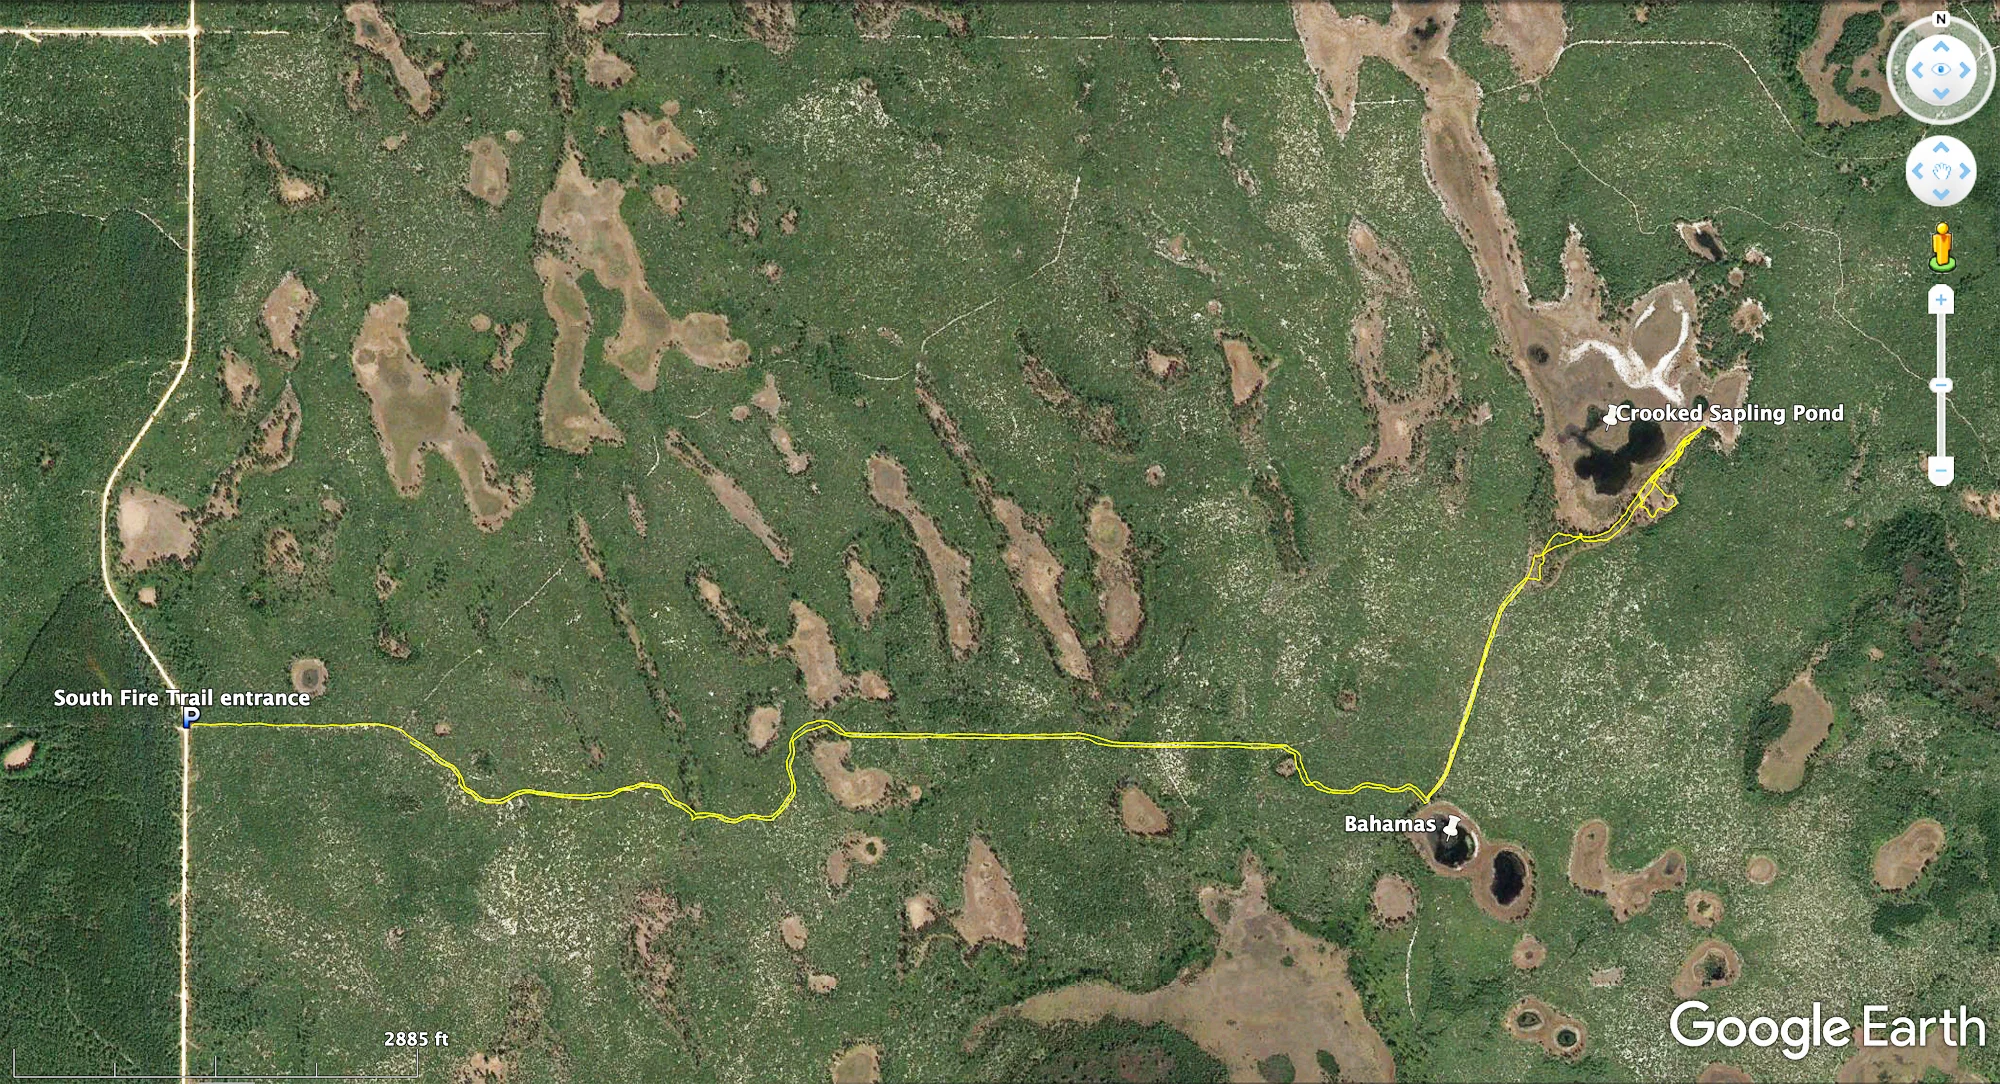
Here is my route recorded by my GPS. It does a great job of demonstrating where things are in relation to each other, but these satellite images are not updated and do not represent the sheer amount of water that currently covers the prairie.
I shot this entire roll at the south end of Crooked Sapling Pond, standing almost waste deep in the swamp waiting for the clouds to change.
You can’t tell in these black and white photos, but these saplings are quickly dying. When I first discovered them a few trips ago, they were still green, up to their branches in the recently risen water. However, the water has not receded, and I don’t think these saplings will be making it past their youth.
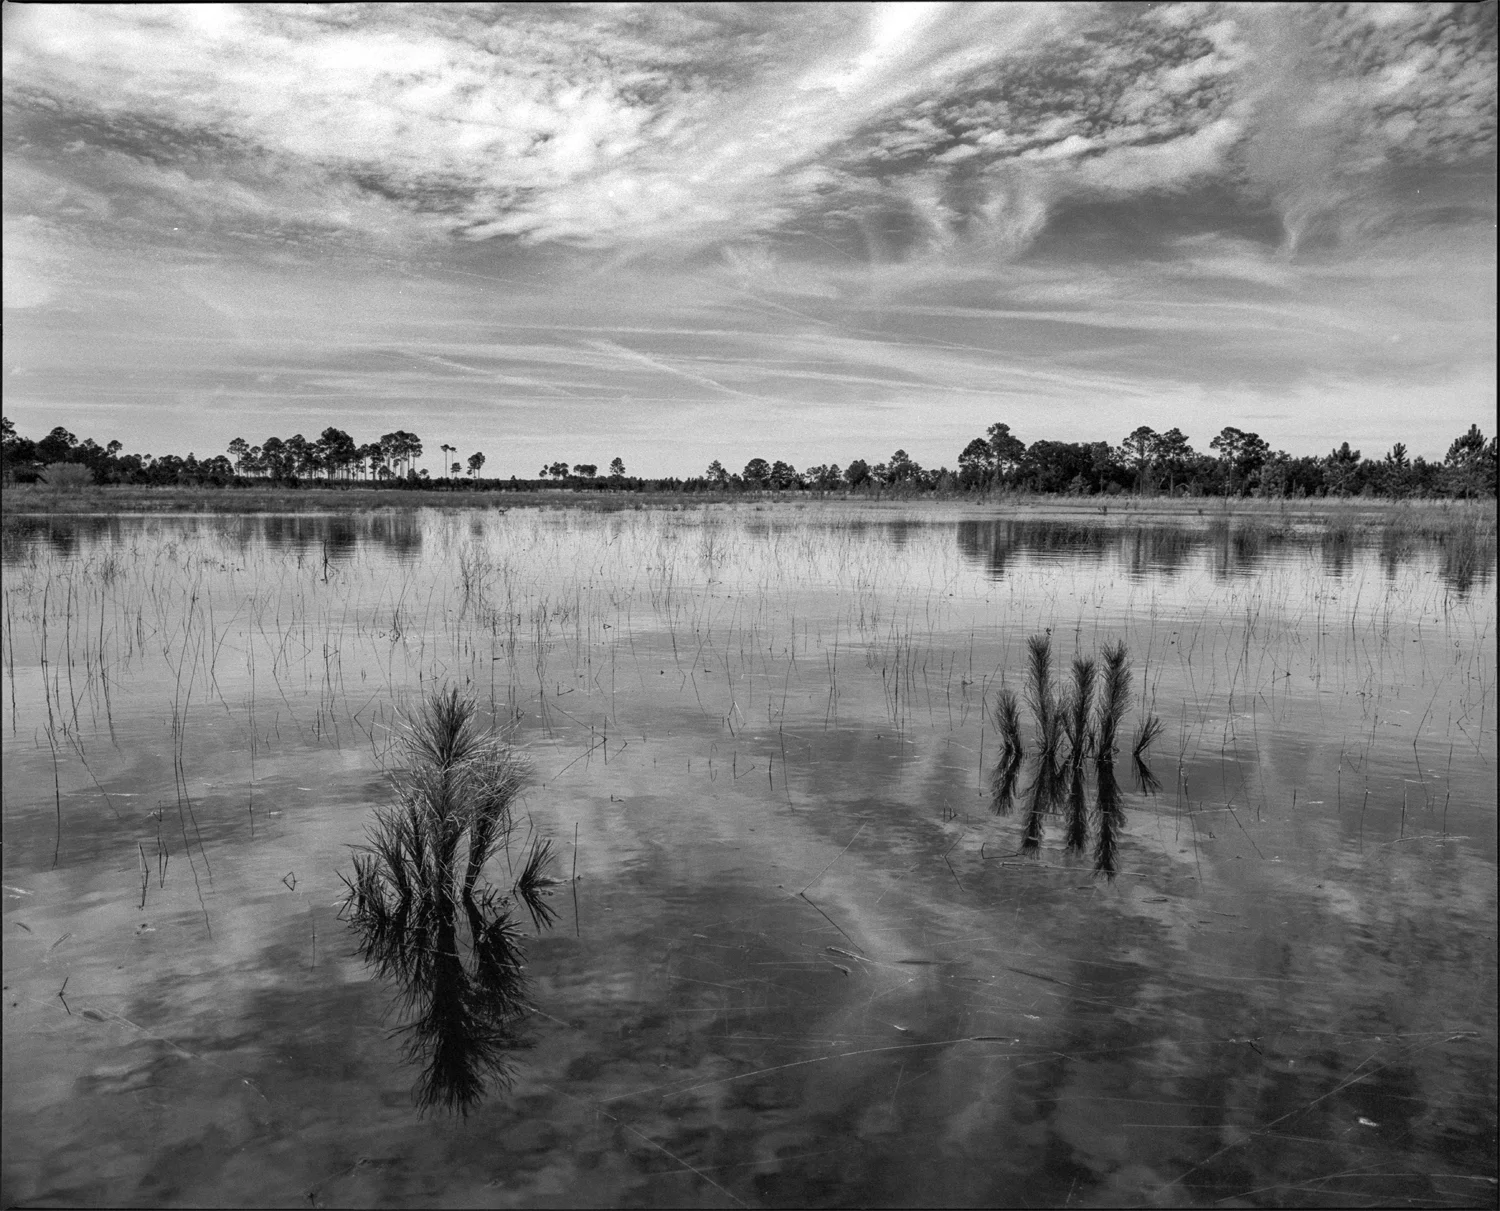
Mamiya RZ67 Pro II with 50mm f/4.5 ULD, #25 red filter and circular polarizer
For the first several images of this roll, I was trying to fill the frame and take what I consider to be a more popular landscape composition with the saplings anchoring the foreground and the clouds creating drama and tension in the sky. But for the last couple shots, I took a step back, and I think I like the results more for the purpose of the zine. The images instantly became more moody, and the isolation of these saplings drowning in this swamp is made more apparent by the extra space surrounding them.

Mamiya RZ67 Pro II with 50mm f/4.5 ULD, #25 red filter and circular polarizer
I made a crucial mistake while I was standing out in the water, and that was stacking my red filter onto the front of my circular polarizer. The combination of the two filters required me to reduce my exposure by about five stops, and it was a fairly windy afternoon. But when I went to remove the polarizer, I realized the two filters were stuck together. And because the circular polarizer has a piece of glass that rotates independently of the main threads, I could not get them separated. In fact, they’re still stuck together as a write this.
So I’m standing in the middle of the swamp, the clouds are quickly changing overhead, and I’m fumbling with these two filters trying to get them separated without dropping them in the water, or worse, knocking over my tripod. It was an awkward procedure, and I’m glad nobody was there to witness it.
I ordered some filter wrenches from B&H that seem to be engineered for this purpose, so I’m not too worried about it. However, I was forced to use both the red filter and polarizer while shooting this entire roll, which consumed a lot of light. And even though my camera was on a tripod, the combination of the wind and my 1/15 second exposure meant I had to wait in between gusts to ensure the saplings were standing still enough to not be rendered blurry.
I am not sure whether any of these images will make it into the final zine. Even with the two to three years I’ve already spent on this project, I think it’s still too early to begin the photo editing stage. However, I am enjoying sharing each contact sheet I make on this blog, and I think just the process of creating these posts allows me to think more deeply about the direction and the mood of the story I’m trying to tell. And I think this will ultimately develop the story into something it couldn’t otherwise become.
Thanks for following along.

Contact Sheets
One of my goals for 2019 is to create a zine about the Juniper Prairie Wilderness area of the Ocala National Forest. In conjunction with this zine, I’m creating a blog series called Contact Sheets, where I post the entire contact sheet for each roll of film I shoot for this project. I spent yesterday developing and scanning three rolls from a recent Juniper Prairie Wilderness trip, so what better day to kick off this project than January 1?

Mamiya RZ67 Pro II with 110mm f/2.8
A Zine
One of my goals for 2019 is to create a zine about the Juniper Prairie Wilderness area of the Ocala National Forest. My friend Alex and I have spent the last two years working on a much larger project about this area, but I wanted to create something a little more tangible and short-term that could ultimately become a small section of the larger project.
In conjunction with this zine, I’m creating a blog series called Contact Sheets, where I post the entire contact sheet for each roll of film I shoot for this project. I spent yesterday developing and scanning three rolls from a Juniper Prairie Wilderness trip I took on December 30, so what better day to publish the first post than January 1?
So without further ado, this Contact Sheets post features rolls one, two and three, all taken with the Mamiya RZ67 Pro II and shot on Kodak Tri-X 400 pushed to 1600.

Roll 001 - Mamiya RZ67
Roll one was photographed on three separate days. The first frame was taken two weeks ago as Alex and I were driving home from a Juniper Prairie Wilderness trip. Frames two and three were taken in my living room to test out my newly acquired 50mm lens. The rest of the roll was used during my last Juniper Prairie Wilderness trip two days ago.
Roll 01, frame 01 - I took the image of this tire during my last trip to the Juniper Prairie Wilderness on December 16. Alex and I were driving home when we saw this tire just standing on its own on the side of the road. We thought it was a curious thing, so we pulled over and grabbed a shot. It will not make it into the zine, but I liked it and wanted to write about it anyway.

Mamiya RZ67 Pro II with 110mm f/2.8
Roll 01, frame 05 - I won’t be able to articulate this the way it exists in my mind, but I’m really drawn toward trees that are standing alone beneath a canopy of other different trees. It’s not uncommon in Pat’s Island to find completely different variety of trees living together, such as this lone palm tree. This palm tree is probably around 20 feet tall, yet it looks miniature standing in the canopy of these long leaf pines. I like the exaggerated sense of scale it creates.

Mamiya RZ67 Pro II with 110mm f/2.8
Roll 01, frame 07 - I scouted this location about three months ago during my first trip to the woods with my RZ67. Again, I love this little cluster of oaks standing amidst all the pine trees. I didn’t photograph it at the time, because I had a specific image in my mind, and I knew I needed to come back on a foggy morning in order to create the image I was visualizing. I visited this spot about six times over the last three months before the conditions were right to make the image you see below.

Mamiya RZ67 Pro II with 110mm f/2.8
The next image is not part of this same roll, but I wanted to post it here, because it’s a good example of how the weather conditions can drastically affect the end result. This is the exact same location as the image above, but photographed about a month ago on a clear morning. You can see how the fog really helps to create that moody atmosphere and sense of depth I was visualizing the first time I scouted this location.

Mamiya RZ67 Pro II with 110mm f/2.8
Roll 01, frame 09 - I’ve photographed the following oak tree too many times to count. I’ve shot it in color, I’ve shot it in black and white. I’ve shot it from several different angles, I’ve shot it with multiple different cameras. But since this particular morning was so unusually foggy, I wanted to take a couple more pictures to ensure I capture this tree exactly how I envisioned the first time I saw it.

Mamiya RZ67 Pro II with 110mm f/2.8

Roll 002 - Mamiya RZ67
Roll two didn’t produce any keepers. I continued wandering around the Yearling Trail area visiting familiar places, trying to take advantage of the fog. But by this point, both the fog and my energy were burning off.
Between frames four and five, I decided to head back to my car, eat some food, drink some coffee and prepare for the next part of my plan, which was to test out my new 50mm lens at the Capitol. I hadn’t been to the Capitol in at least six months, so I was looking forward to it. I used this opportunity to explore a new trail that leads south to the Capitol from Forest Road 46.

A rare selfie of me at the Capitol.
I’m trying to make an effort to do a better job documenting the in between moments. The Ricoh GRII is the perfect camera for this purpose. It’s the only camera, other than the Mamiya, of course, that has accompanied me to the woods over the last several months.
Below: The Mamiya RZ67 Pro II and 50mm f/4.5 ULD with #25 red filter locked and loaded with some Kodak Tri-X 400. While this camera was engineered to live in the studio, there’s something beautiful about seeing it out in the wilderness.

Ricoh GRII

Roll 003 - Mamiya RZ67
I spent the first six frames of roll three on the Capitol. Since I was testing out my new 50mm lens, and since the clouds were changing pretty drastically, it was a good opportunity to take a little rest and snap some shots whenever the composition changed.
Roll 03, frame 05 - The image below was my favorite of the bunch. I definitely don’t think it’s a keeper for the zine (I plan to photograph this same location under different conditions), but I liked the shape of the clouds and how the sun came out to illuminate the trees and the saw grass in the foreground.

Mamiya RZ67 Pro II with 50mm f/4.5 ULD and #25 red filter
Roll 03, frame 08 - This next image is of a pine tree I call Medusa. I realize it’s not a fantastic image, but I love the dome canopy of this tree and figured I’d shoot it while I was there.

Mamiya RZ67 Pro II with 110mm f/2.8 and #25 red filter
The last photo of this post is of some craggy oak scrub near the Capitol. I’ve seen this area a thousand times before, but never really thought to photograph it. There’s something about lugging a giant 6x7 medium format camera into the woods that encourages inspiration.
I used my 110mm to compress the image a little more and put on my #25 red filter to create some more contrast in the clouds.

Ricoh GRII

Ricoh GRII
Roll 03, frame 09 - Here’s the final image. I’ll probably go back to this location in the future to try and capture some birds or something in the frame. That extra little element would go a long way.

Mamiya RZ67 Pro II with 110mm f/2.8 and #25 red filter
This was a photo-heavy day. I think the combination of the ground work I’ve put in over the last several months and the perfect weather conditions this past trip helped me to finally create some images I have been visualizing for a while.

Why I Shoot Film
In this post I reveal a little sneak peak of my new camera and dive into why I still shoot film in an almost exclusively digital world.
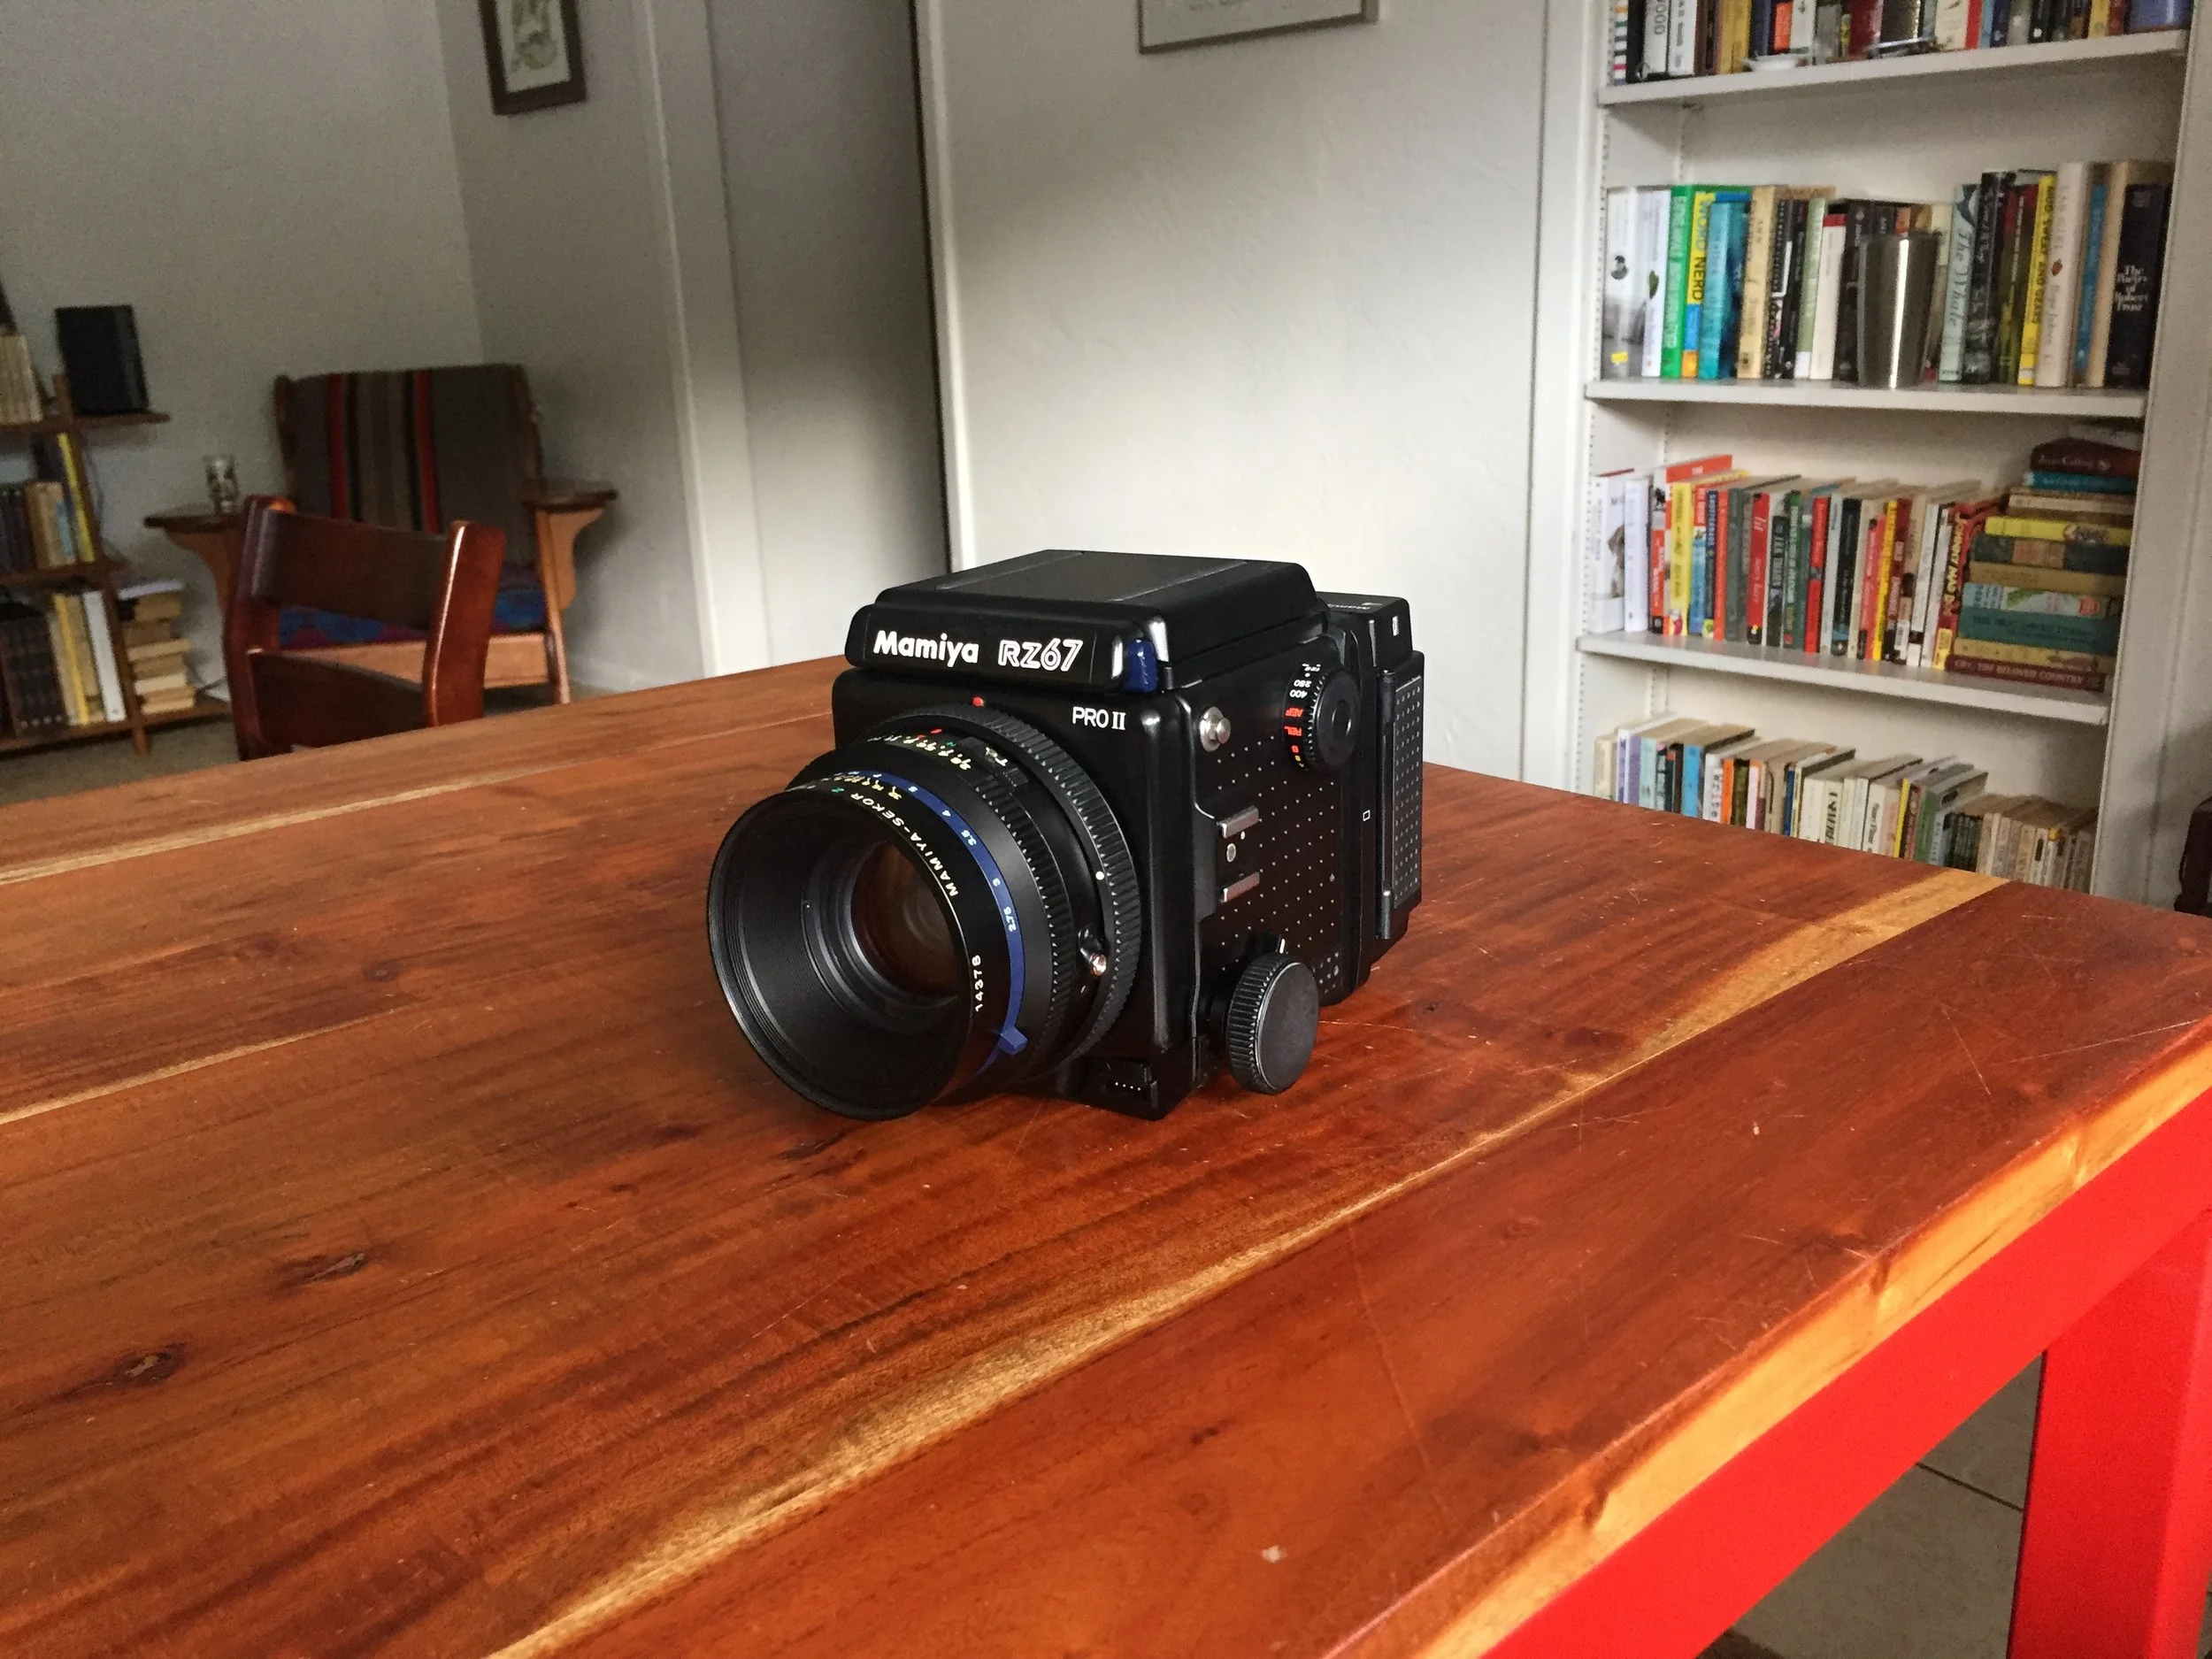
I recently decided to plunge into the world of medium format. I’ve owned both a Holga and a Yashica Mat 124G previously, but that was a long time ago. And honestly, I’ve never loved composing squares. This time I opted for 6x7 format and debated for longer than I’d like to admit between the Mamiya 7, Mamiya 7ii, Pentax 67ii and the Mamiya RZ67 Pro ii.
I shiver at the idea of becoming one of those photographers who is interested solely in gear. Of course I like gear. Who doesn’t? But at the end of the day, it all comes down to the experience of making images. Since I already own and love and am not willing to part with my Leica m6, I ultimately decided on the Mamiya RZ67. It’s the best compliment to the Leica, in my opinion.
Disclaimer: The rest of this post has absolutely nothing to do with my new Mamiya RZ67.

Leica m6, Kodak Ektar 100
I’ve been thinking lately about the debate of film vs digital. It’s a tired subject, I know, and pretty much every photographer at this point has something to say about it. Some people are fearlessly loyal to film, and others can’t understand why anybody would bother. And while Im sick and tired of the arguments, they do make me question why I still shoot film.
The majority of film vs digital debates seem to focus on the end result. And I sometimes find myself getting stuck here, too. I take an image on my m6 that I absolutely love, and then I question whether I would love that image as much if it had been recorded on digital. Do I like it because it’s a good image, or do I like the novelty of having shot it with film? Or maybe I like it because it took a little more work to achieve than if I had shot it with a digital camera. These are questions I am constantly asking myself.
It’s the same reason I don’t love iPhone images. I have taken some really nice photos with my iPhone - photos that, if taken with my DSLR, would probably be in my portfolio. But because they were taken on an iPhone, they’re somehow automatically inferior. But at the end of the day, an image has to stand on its own. Its value cannot be determined by what tool was used to capture it. It’s either a good image, or it isn’t.
So why do I constantly devalue images shot on my iPhone, and maybe overvalue images shot on film? I’ve come to the conclusion that, for me, the joy of photography has almost nothing to do with the end result, and almost everything to do with the experience of capturing the image.

Leica m6, Kodak Portra 400
It feels like in our culture, there is more emphasis on the end result than the process. Everything is simply a means to an end, and the end contains almost 100 percent of the value. Life itself is treated this way. People want to be rich and retire and travel around the world, and they spend their entire lives achieving this end result, never realizing that the process of getting there is where life actually is.
Take restoring a car, for example. A father and his daughter spend countless days, months and even years restoring an old car in the garage. They wrench on rusted bolts and make hundreds of trips to the local auto parts store. They mess up and break things that they then have to replace a second or third or fourth time. They might even have limited knowledge of certain processes that they then have to spend time researching and learning before they can proceed.
Why not just go to the auto shop and pay somebody to restore the car? It would certainly be a much more efficient way of achieving the end result. Why continue to endure all the cuts and scrapes and stinging sweat in the eyes and smelling like gasoline for days on end?
Well, because of the experience.
People don’t restore a car to have a restored car. They restore a car out of enjoyment for the process. You can’t buy the feeling of building something with your own two hands. It has to be earned. This is exactly how I feel about the film vs digital debate.
Digital has its merits. I use it all the time. There is no denying the importance of speed, especially in a competitive business market. It’s cost effective (as long as you don’t upgrade your gear every time something new comes out), it’s fast, and most of the time it requires very little thinking and actual knowledge of photography. Just turn your camera to an automatic setting and let it do all the work. If it doesn’t look right on the LCD screen, make adjustments and keep shooting. If it still doesn’t look good, fix it in post. As long as the end result looks good, it doesn’t really matter how the image was made. And digital produces amazing results! And it’s convenient.
But for me, there is something fundamentally lacking with this approach.
Likewise, many die hard film photographers argue for the quality of the end result. They claim film photography has a “look” that you just can’t achieve with digital. And while I agree with this for certain things - medium and large format cameras, for example, do produce a look that is hard to match with the smaller sensor sizes of 35mm and DSLRs - I don’t think it’s as legitimate of an argument as they make it out to be. Most people who make this claim are referring to film stocks and how certain films give different colors and characteristics that you can’t achieve with digital. But I have seen presets on Lightroom and VSCO that come pretty darn close. And I doubt most people would be able to tell the difference, especially on telephone screens where most of these images are being viewed and displayed.
Again, I’m not trying to talk bad about any particular way of photography. If you are enjoying what you’re doing, then you are doing it right!
I shoot both digital and film. I think each approach has its own strengths and weaknesses, and I couldn’t see myself taking an either-or approach. Cameras are tools, and different jobs require different tools. That has always been the case. But why do I continue to shoot film?
My argument is that shooting film is fun. I wish I had deeper revelation than that. But honestly, it’s just that simple. I have way more fun shooting with my film cameras than I do with my digital cameras.
Every time I pull out my m6, load a roll of film and press the shutter, something inside of me lights up. The anticipation of not being able to see my images immediately, of not knowing whether or not they came out like I intended, the smell of developer and fixer as I process the rolls in my kitchen - all these things contribute to an enjoyable and sometimes frustrating process that ultimately makes me feel something. It brings a different level of intimacy with my craft. It makes me love those moments that, if shot with digital, I probably wouldn’t love quite as much. It makes me work for something. And almost anything worth doing is worth working for.
I’m not saying that end results have no value. They are certainly always the goal. But if they become our sole focus, then what’s the point of doing anything at all? If we don’t actually love doing what we are doing, then why even do it?

Leica m6, Kodak Portra 400

Color Matters
When it comes to shooting film, I’ve always preferred black and white. But I recently shot eight rolls of Portra 400 over the last three weeks and wanted to share with you some of the images I made as well as my thoughts on shooting color film in general.

When it comes to shooting film, I’ve always preferred black and white to color. But lately I’ve been really inspired by the works of Greg Miller and my friend Holly Kerchner, both of whom shoot primarily Kodak Portra 800. So I decided to give it a go and shot eight rolls of Portra 400 over the last three weeks. It was my first time using this film, and I took it everywhere from the city of Orlando to the wilderness of the Ocala National Forest and to the pristine beaches of Florida’s gulf coast. I want to share with you some of the images I made as well as my initial impressions of Portra 400 and some thoughts I have regarding shooting color film in general. Enjoy!
A teeny bit of background info
When I was 15 years old, my mom enrolled me in a basic film photography class. It was my first real experience with both film photography and photography in general.
When I was 18, I needed to take one more class to fill up my first semester of college. So I signed up for a film photography class. This is when I became serious about film photography. Most of what I shot at the time was black and white, but I did shoot a bit of color with my Holga 120N. I was really into the super saturated effects of cross-processing E6 slide film in C-41.
So my experiences with film have always been predominantly black and white. And even when I did shoot color, it was only to achieve weird effects.
My thoughts on black and white VS color
I feel that a lot of people see black and white film as an “artsy” film. Like everything that is shot with black and white is instantly cooler or something. I couldn’t disagree more.
I like black and white because it captures the raw essence of the moment. When you remove color from the equation, there are no distractions. The moment becomes the subject of the image, and it’s either a good one or it isn’t.
Now obviously most of us experience the world in color. So it makes sense to shoot in color. However, I don’t think people put enough thought into shooting in color. My belief is that when you’re shooting color, then color matters. It can't just be an afterthought. Color adds another layer of information to the image. So when you use it, you need to be even more careful of how you are organizing that information. It can quickly turn a simple moment into a busy and difficult-to-digest image.
During these past three weeks, I found that my entire approach to photography changed. Sure, I still looked for those candid little slices of life (my background is in photojournalism, after all). But I found myself looking more for colors and shooting scenes that I wouldn’t otherwise notice when shooting black and white. It’s like an entirely new world opened up.
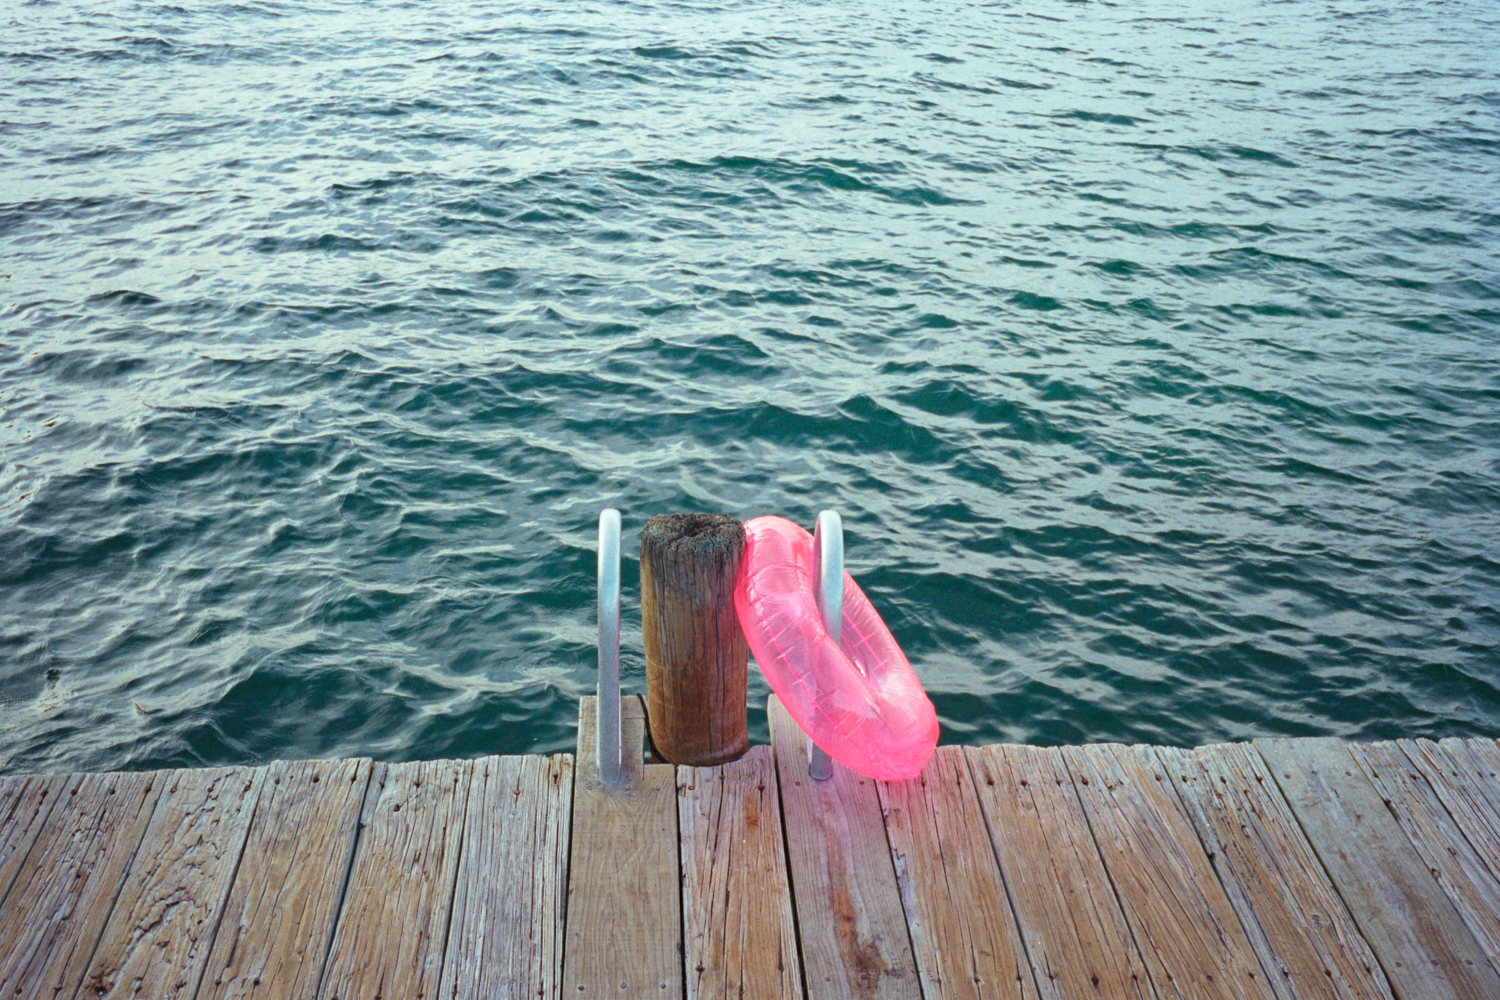
For example, this image of a red car with a man in a red shirt riding his bicycle in the background is admittedly a boring scene. There’s not really a whole lot going on, and I would never have taken this picture if I had been shooting black and white. However, the repetition of the red car and the red shirt adds a little bit of interesting information to this image. And then the contrast of the red with the little bit of green palm in the upper right corner of the frame adds even a little more interesting information. I still don’t think it’s a great shot, but it’s a good example of the power color plays in photography. It has the ability to take an otherwise boring scene and give it a little bit of interest.

One thing that’s always held me back from shooting color film is the lack of control. With black and white, I control everything from the shooting to the processing to the scanning. I can control how much contrast the negatives will have based on what developer I am using and how many times I agitate the film during processing. Black and white film is also very forgiving when it comes to chemical temperatures.
But with color film, I don’t have that sense of control. Now don’t get me wrong, there are kits out there that would allow me to process my own color film. And I completely intend on trying these out in the near future and posting my results. But I still don’t feel they offer the same level of control. But again, I've never tried these methods, so I can't really back this up.
Images
I shot all these images with a Leica M6 paired with a Zeiss 35mm f/2.8 Biogon. I had the negatives processed at Colonial Photo & Hobby here in Orlando and scanned them myself using a Plustek OpticFilm 8100. All post work was done in Adobe Lightroom and is very minimal. It primarily consists of cropping out the border and removing any remaining color cast from the scans.
So without further ado, here are some of the images from those eight rolls. Obviously this is only a small selection, but I wanted to just post a few that work well together and demonstrate a broad range of the situations I photographed with this film. If you wish to see more of the street work, I’ll be posting some things to my Instagram as well.


Final thoughts
Overall, I am very pleased with the results. Portra 400 does a really nice job rendering skin tones (hence the name). I found my best color results were in images taken when the lighting was very soft, such as during an overcast sky or just after the sun had set. But I guess that’s true across all photography.
I hope you enjoyed this post and hopefully it inspires you to go load up some Kodak Portra. If you have any suggestions or comments regarding best practices for shooting, processing and scanning color film, I’d love to hear them in the comments below!
Happy shooting as always,
Matt

11 Tips for Photographing Strangers
Everyone has a different approach to taking pictures of strangers. And the more you shoot, the faster you will discover what works and doesn’t work for you. It’s a skill like anything else, and it needs to be practiced as often as possible. Here are 11 tips I use when I’m out photographing strangers in the street.

1. Photograph the first person you see
Going out with the intention of photographing strangers is a lot like going to the swimming pool for a swim. You can either jump straight in the pool, which is a little aggressive but will ultimately warm up your body as quickly as possible; or, you can wade in step by step, which somehow feels safer but will only prolong the warming up process.
When I go out to photograph strangers, I prefer the jump-straight-in-the-pool method. I walk up to the first person I see and take their picture, even if I know it’s not going to be a good image. The point here isn’t to take a good picture, but if you get one, even better! Once I get that first one out of my system, my adrenaline kicks in and I get into the zone much quicker than if I spend the first 30 minutes walking around looking for an interesting subject.
Once I establish that momentum, I maintain it by taking pictures regularly. I find that if I wait too long in between pictures, I just cool back down and start to think too much. The goal is to get out of your head and to react on instinct, so I periodically take pictures of people - even if they aren’t that interesting - to stay warm and ready for when I do see a photo-worthy moment. For me, this is the most important point on this list.

2. Wear headphones
This is something I recently started practicing, and I can’t believe I didn’t figure it out sooner. Listening to music as I walk around the streets taking pictures helps me stay out of my head and in the zone. Plus, it makes me look like I have somewhere to be, and I think people pay me less attention because of it. I just use the Apple headphones that came with my phone. I probably wouldn’t use anything much bulkier than these as I like to draw as little attention to myself as possible.

3. Know the difference between discreet and creepy
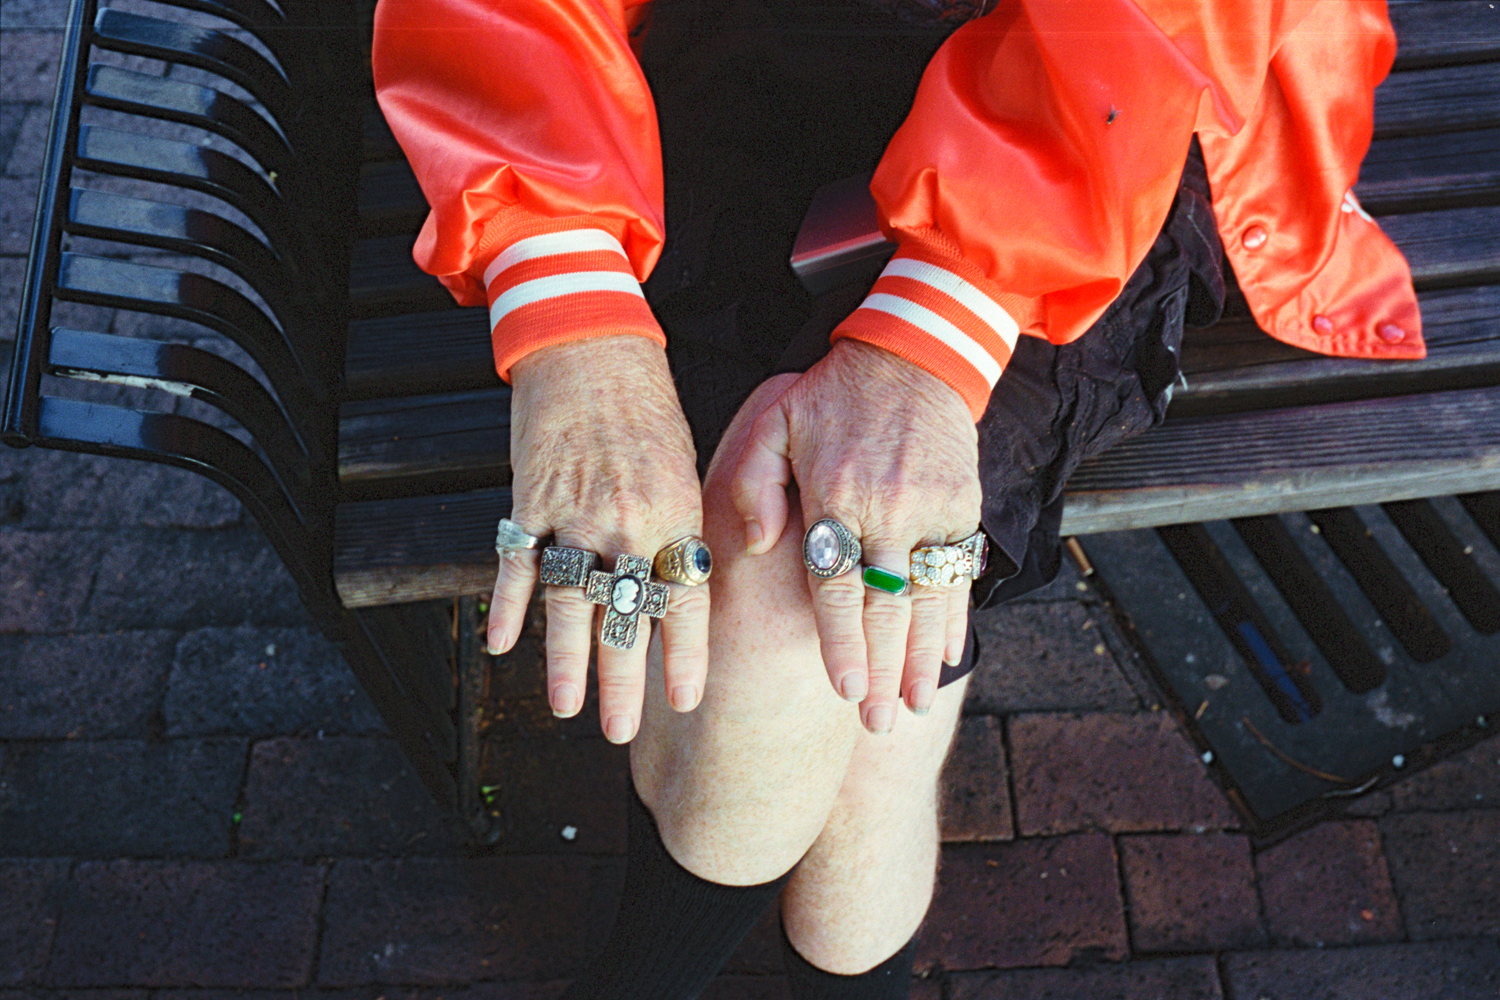
The last thing you want to do when taking pictures of strangers is act creepy. The creepier you act, the more suspicious of your intensions people will be. For example, If you see somebody interesting sitting on a bench, don’t peek through the bushes and photograph them. This just makes it look like you are up to no good; and if they notice you peeking at them, you probably won’t get a great reaction.
That being said, I think it’s OK to be discreet. For example, if you have your camera around your neck and you walk by somebody and “shoot from the hip,” so to speak, I think that is perfectly fine. Or if you point your camera in somebody’s direction and act like you are photographing something else when really you are taking a picture of them, I think that’s fine, too. It’s hard to define where being discreet ends and being creepy begins, but I think a good rule of thumb is to just act on your intuition. If you feel like you are being creepy, you probably are.
My advice is to just carry your camera out in the open so people know what you are doing. Don’t hide behind things or disguise your camera, because then you just look like you are doing something wrong. People are friendlier than you think, and if they recognize you as a photographer, they will more than likely just ignore you. People aren’t that interested in you anyway.

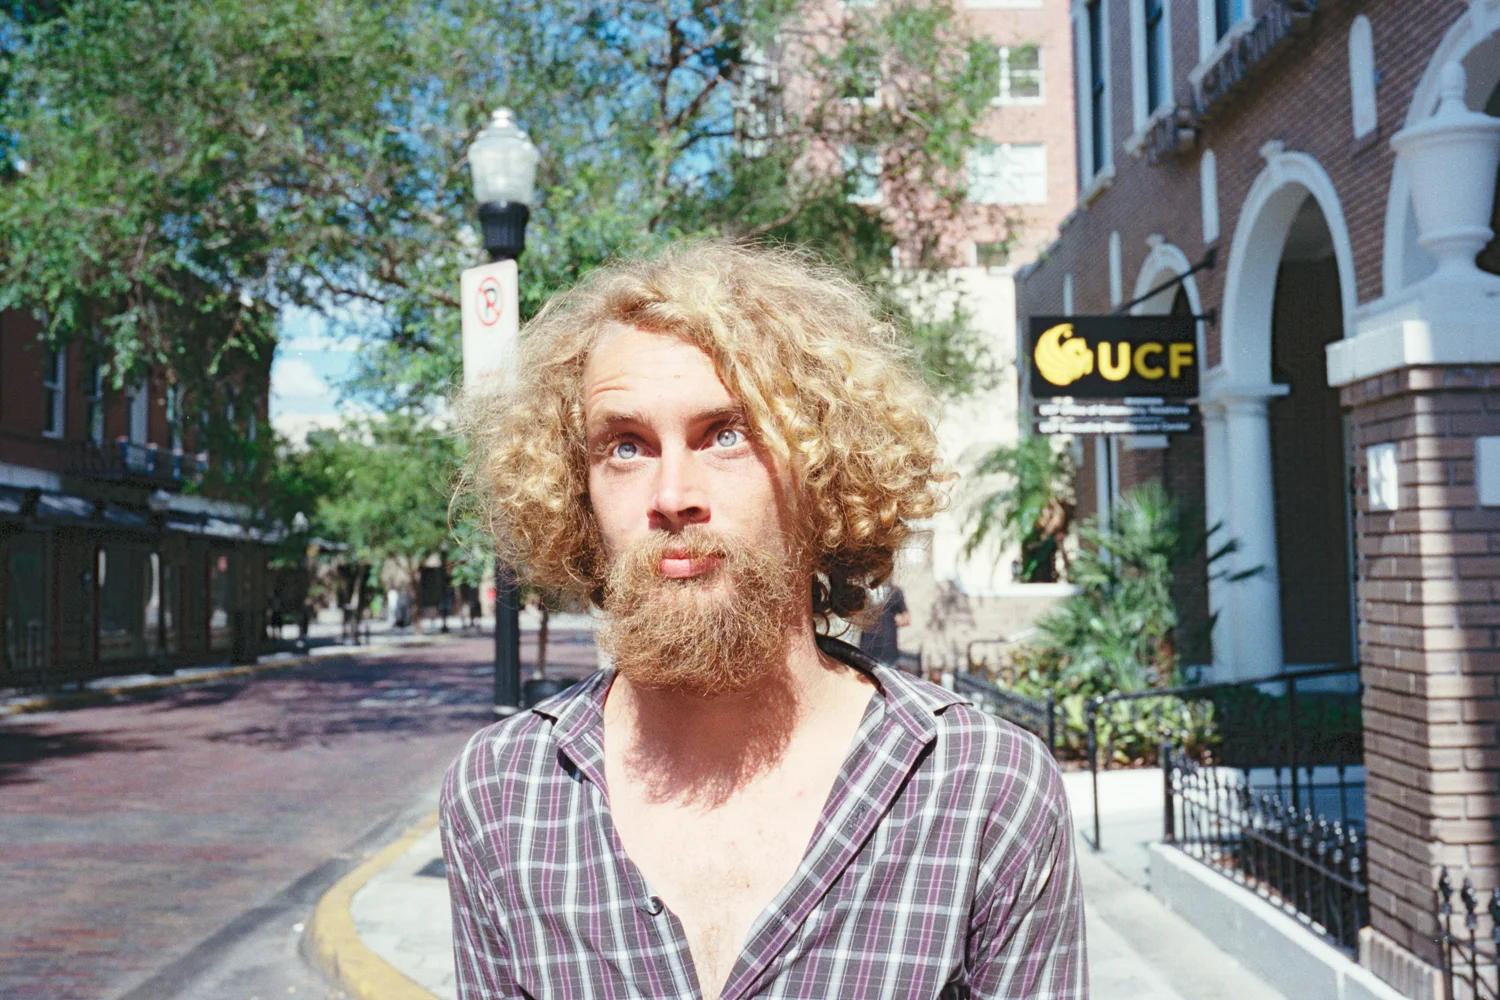
4. Compliment people often
This is something I do all the time. People love to be complimented. If you take a picture of somebody and then tell them why you find them interesting (for example, maybe you liked the shoes they were wearing. Or maybe they have a cool haircut) they’ll probably be flattered. And if they aren’t flattered, they’ll probably just ignore you. Either way, complimenting somebody will rarely cause a violent reaction. It just can’t hurt.

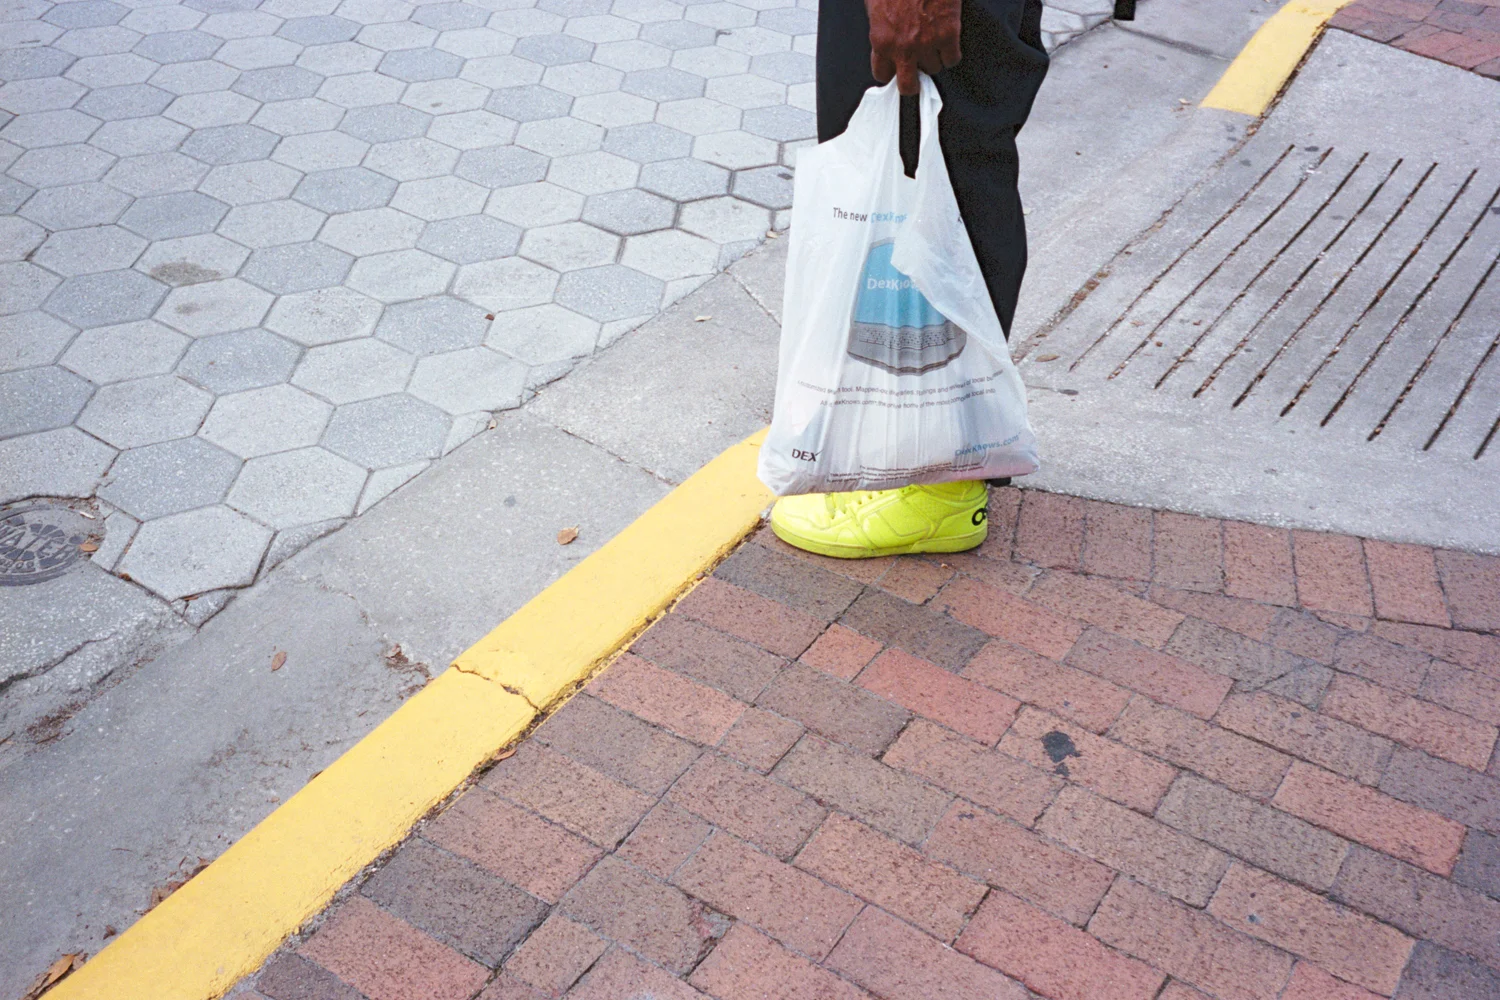
5. Blend in
This one should speak for itself. Leave your neon orange and yellow jogging shirts at home. When you are out photographing people, you want to draw as little attention to yourself as possible. It helps you remain discreet and can be the difference between capturing that candid moment and alerting the whole world of your presence.

6. Use your best judgment when photographing children
Taking pictures of children is always a touchy subject, especially for male photographers. But you can’t just avoid taking pictures of children altogether, because kids are always doing funny things. And that often leads to great images.
When taking pictures of children, I usually just feel out the situation. This last weekend I was walking around Lake Eola here in Orlando, and I saw this little girl feeding a swan that was as tall, if not taller, than her. It was just a nice little moment. Her father was standing right behind her, so I just walked up to where they both could see me, knelt down and took the picture. I made sure the father saw me. He seemed OK with it, as he just continued watching his daughter and smiling, so I took a couple more images and moved on.
Since I like to capture candid moments, I don’t usually ask for permission. By the time you walk up to the parent and ask permission, the moment is long gone. However, I try to make sure the parents see me and I try to judge their reactions. If they seem OK, I keep shooting. If they don’t (you will usually know pretty quickly) just move on. Even though you have the right to take pictures in a public space, it doesn’t always mean it’s a good decision.
If you are trying to photograph portraits of children, then it’s almost always a good idea to first ask the parent.

7. Make conversation
There’s no rule that says you can’t talk to people. If you want to take someone’s portrait but you are afraid of just walking up and taking it, then go up to them, explain who you are and what you are doing, and ask for permission. They’ll most likely let you. If you are after candid moments, then you probably don’t want to do this, as the moment will be gone. It really all just depends on your style of shooting and what you are after. But regardless of whether you are asking for permission for a portrait, explaining to somebody what you are doing or even just complimenting somebody after taking a picture, keep in mind that it is OK to talk to people. Sometimes talking to somebody will get you in the door to an even more photo-worthy opportunity. You never know.

8. Practice zone focusing
This mainly applies to film photographers and people who are using manual focus lenses. Zone focusing, which I won’t get into in great detail for the sake of staying on track, is basically a method of pre-focusing your lens to a certain distance so that when you see a moment, you can just react to it without hesitation. It’s a great way to keep you in the moment rather than worrying about your camera settings. And the more reactive you can become in street photography, the fewer shots you will miss.
OK, so this is more of a general street photography tip than an overcoming-your-fear-of-photographing-strangers tip. But I think it can also help with photographing strangers, because when you are quick with your camera, most people won’t even notice you. Zone focusing essentially helps you become more discreet.

9. Never engage in violent confrontations
I have never encountered a violent or dangerous situation while photographing strangers, but the slight possibility is always there. If this does happen, do not engage. Simply walk away if you can, or do whatever is necessary to defuse the situation. Keep in mind that just because you have the right to photograph people on public property does not mean somebody won’t attack you if they are having a bad day. The consequences of our actions are independent of our rights as photographers, so just keep that in mind. That being said, the probability of a situation actually turning violent is very low. If you are kind to people and treat them with respect, then you will most likely never run into a situation like this.

10. Just do it
Not to rip off Nike, but there’s no better way to put it. No matter how much you read up on photographing people, there is no substitute for just going out there and doing it. The more you practice pointing your camera at strangers, the better you will get and the easier it will become. Trust your judgement, know your rights as a photographer, be kind to people and treat them with respect, and you’ll find out pretty quickly that people are nicer than you think. Taking pictures of strangers is not as hard as it sounds.
All right everyone, I hope these tips help. Just remember that everyone has a different approach to taking pictures of strangers, and while these tips work for me, they might not work for you. But it's important to keep shooting and keep practicing so you can find your own approach. I promise you that the more you overcome that fear of pointing your camera at people, the easier it will become. You just have to do it!
If you have any techniques you'd like to share, please post them in the comments below. I'm always trying to learn, and I'd love to hear your suggestions.
Thanks for reading and happy shooting!
Matt

Two Free Videos to Get You Motivated
Let's be honest: We all need a little motivation once in a while. As much as we love going out and taking pictures, sometimes the going out part can be a bit difficult. So I'd like to share with you two free film photography videos in hopes they will inspire you to get off the couch and go shoot some film!

Let's be honest: We all need a little motivation once in a while. As much as we love going out and taking pictures, sometimes the going out part can be a bit difficult. So I'd like to share with you two free analog photography videos in hopes they will inspire you to get off the couch and go shoot some film! So without further ado...
1. Into the Belly of the Beast by Rob Norton
The first video to get you off the couch (after you finish the video, of course) is Into the Belly of the Beast by director Rob Norton. This 15-minute video follows street photographer Markus Andersen through the streets of Sydney, Australia and gives you behind the scenes footage of how Andersen makes his beautiful light-popping, feast-for-the-eyes, can't-stop-wishing-I-lived-in-Australia images.
While Andersen's methods of shooting in this video focus primarily around analog photography, this video is sure to give even the most anti-film photographers a nice kick of inspiration. And if you aren't inspired by Andersen's work, then there's still a good chance you'll be inspired by Norton's beautifully executed cinematography. It is a must-watch for any photographer, but especially for street photographers and even more especially for analog street photographers.
2. One Roll of Film by 120 Love
The second video I want to share with you today is a video appropriately titled One Roll of Film. This video follows four Tokyo-based photographers - Mattias Westfalk, Paul Del Rosario, Bahagski, and Yoshiki Suzuki - around (you guessed it) Tokyo. However, the catch is that each photographer has one day to shoot only one roll of 120 film (12 exposures) with a Hasselblad medium format camera.
You get to watch each photographer come up with a story or plan for their one roll of film. And because they only have 12 frames, they are forced to really slow down and think about each image they make. Plus the competition of four photographers going head to head adds another interesting dynamic to the situation. Overall, this 18-minute video is really fun and entertaining to watch, and I wish there were more like it somewhere out there.
All right everybody, I hope these two videos were fun to watch and I hope they motivated you to get out there and shoot. They only comprise roughly 30 minutes combined, but I guarantee you'll watch at least one of them more than once. If you've already seen them, I recommend watching them again. I watched each video for the first time about a year ago, and I still find them so entertaining that I wanted to share them with you. If you know of any others, please share the wealth! I'd love to hear them!
Happy shooting,
Matt

Style Points
One of the biggest compliments you can receive as a photographer is somebody telling you that you have a unique style. It's a holy grail we all seek. But what do I mean by "style," and how can finding it help us connect with ourselves on a deeper level?

One of the biggest compliments you can receive as a photographer is somebody telling you that you have a unique style. It's a holy grail we all seek. But what do I mean by "style," and how can finding it help us connect with ourselves on a deeper level?
When talking about someone’s style as a photographer, it’s easy to throw out words like “landscape,” or “street,” or “lifestyle.” But while all these words can be used to describe a style of photography, I think they’re a little vague and are really just used to give people a general sense of the kind of work we do.
When I think about style, I think of something a little deeper, something a little more intangible, something that describes the connection between who we are as human beings and how that affects the work we produce as photographers. I think of style as a voice rather than a language.
I believe everything we produce is a direct reflection of who we are. And if we study this body of work, and if we listen to what it is trying to say (this is usually something we weren't even conscious of at the time of creation), then I think we will find a little piece of ourselves somewhere in there. This is where we start.

If it were possible to completely disconnect from yourself, take a step back and view your work from the point of view of a complete stranger, what would you say about that person? What does the work say, and what does that tell you about the person who created it? What do you think drives that person to produce?
When I study my own work as objectively as I possibly can (which admittedly is hard to do), I find it to be kind of lonely. It's not really something I'm conscious of while shooting, but I find my work as a whole to be kind of quiet and contemplative, like these isolated moments taken from the viewpoint of just another passerby.
And I find it really interesting, because this isn't something I've thought about before now. I usually just shoot what I'm drawn toward in a way I like to shoot. But I think I can dive a lot deeper than that. I think there is something to be learned of my personality here. Maybe it's something I already knew and am just now consciously realizing, or maybe it's something new entirely.
But regardless of my intentions, my work does have a voice. And that voice speaks to me as a person. And I won't go too far into psychoanalyzing myself in this post, but I think that dismissing my style as shooting "what I'm drawn toward in a way I like to shoot" is an injustice to both my work and myself.

I don't think understanding style is something you do and then you’re done with. It's an ongoing process, and as we change and evolve, so too does our work and our style. But I think it’s important to actively contemplate these things, because taking a moment today to analyze your work and seek an honest connection with yourself and what you are trying to say will help you stay focused on what’s meaningful to you not only as a photographer but as a human being.
As creators, we are driven to express through our work emotions we can't articulate with our thoughts. Our work is how we express ourselves, and it's often produced at a subconscious level. Even if you are just snapping images in the street, the underlying style of those images and what you are drawn toward speaks volumes about your interests, your values, and your beliefs. So I think that understanding the "style" of our work is the first step in gaining a deeper understanding of ourselves.
I realize this post might come off as a little strange, but it's just stuff I've been thinking about lately, and I wanted to share it with you in hopes that it will help you with your own work - even if that isn't photography.
Thank you for reading and happy shooting,
Matt

Patience and Restraint
I want to share with you an experiment I’ve been working on for the past eight months in hopes that it will inspire you to do the same.

I want to share with you an experiment I’ve been working on for the past eight months in hopes that it will inspire you to do the same.
Experiment
It began last year in September. I was getting really discouraged with my photography. The endless cycle of shooting, chimping, shooting, going home and loading everything into Lightroom and then onto social media was, to say the least, exhausting. My inspiration was fading, and I was missing that connection with my work that I’d felt in previous years.
So I decided to get back into film photography and treated myself to a Leica M6, a camera I've been lusting over since I found out they existed years ago. At the time, I became inspired by Vivian Maier, whom I’m sure many of you have heard of. If you haven’t, a quick Google search will do the trick.
What inspired me most about Vivian Maier wasn’t her work. Don’t get me wrong - she was an amazing photographer and her work is nothing short of that. But what inspired me most was her approach to photography. She loved taking pictures so much that she never even bothered developing and printing most of her film. She just shot a roll, put it in a box and went out to shoot more.
This sounds absolutely insane, especially in today’s society where immediate results are everything. But it really struck me as something I wanted to try. I wanted to separate myself from the photographs and focus more on the photography. I wanted to rediscover my passion for taking pictures rather than fishing for likes on social media.
So I got my Leica, and my plan was to shoot film and put it away in a drawer for a few months before processing and scanning. I hoped it would help me focus more on taking pictures I wanted to take rather than taking pictures I thought other people wanted to see. I also wanted to break that emotional connection I had with the moment so I could judge my work more objectively when I finally did process and scan.
This isn’t really a unique approach, by the way. Photographers have been doing this for a long time. And you don’t need to shoot film to do this. It’s just harder, at least for me, to keep digital images on a memory card for such a long time without looking at them.
So I did it. I shot roll after roll and just put them in my desk drawer for a later date.
It’s been eight months now, and I finally got around to processing and scanning my film. It turned out to be 16 rolls of Kodak Tri-X 400 (pushed to 800), which equals roughly 576 images, or 72 images per month.
Why did I wait so long? Well, I’ll admit that part of this was due to laziness (I develop my own film at home and had been putting it off). But mostly, I just enjoyed taking pictures without the incessant need to go home and look at what I got. It was liberating.
Images
Here’s a look at some of the images I took last November during a trip to see my sister in New York:


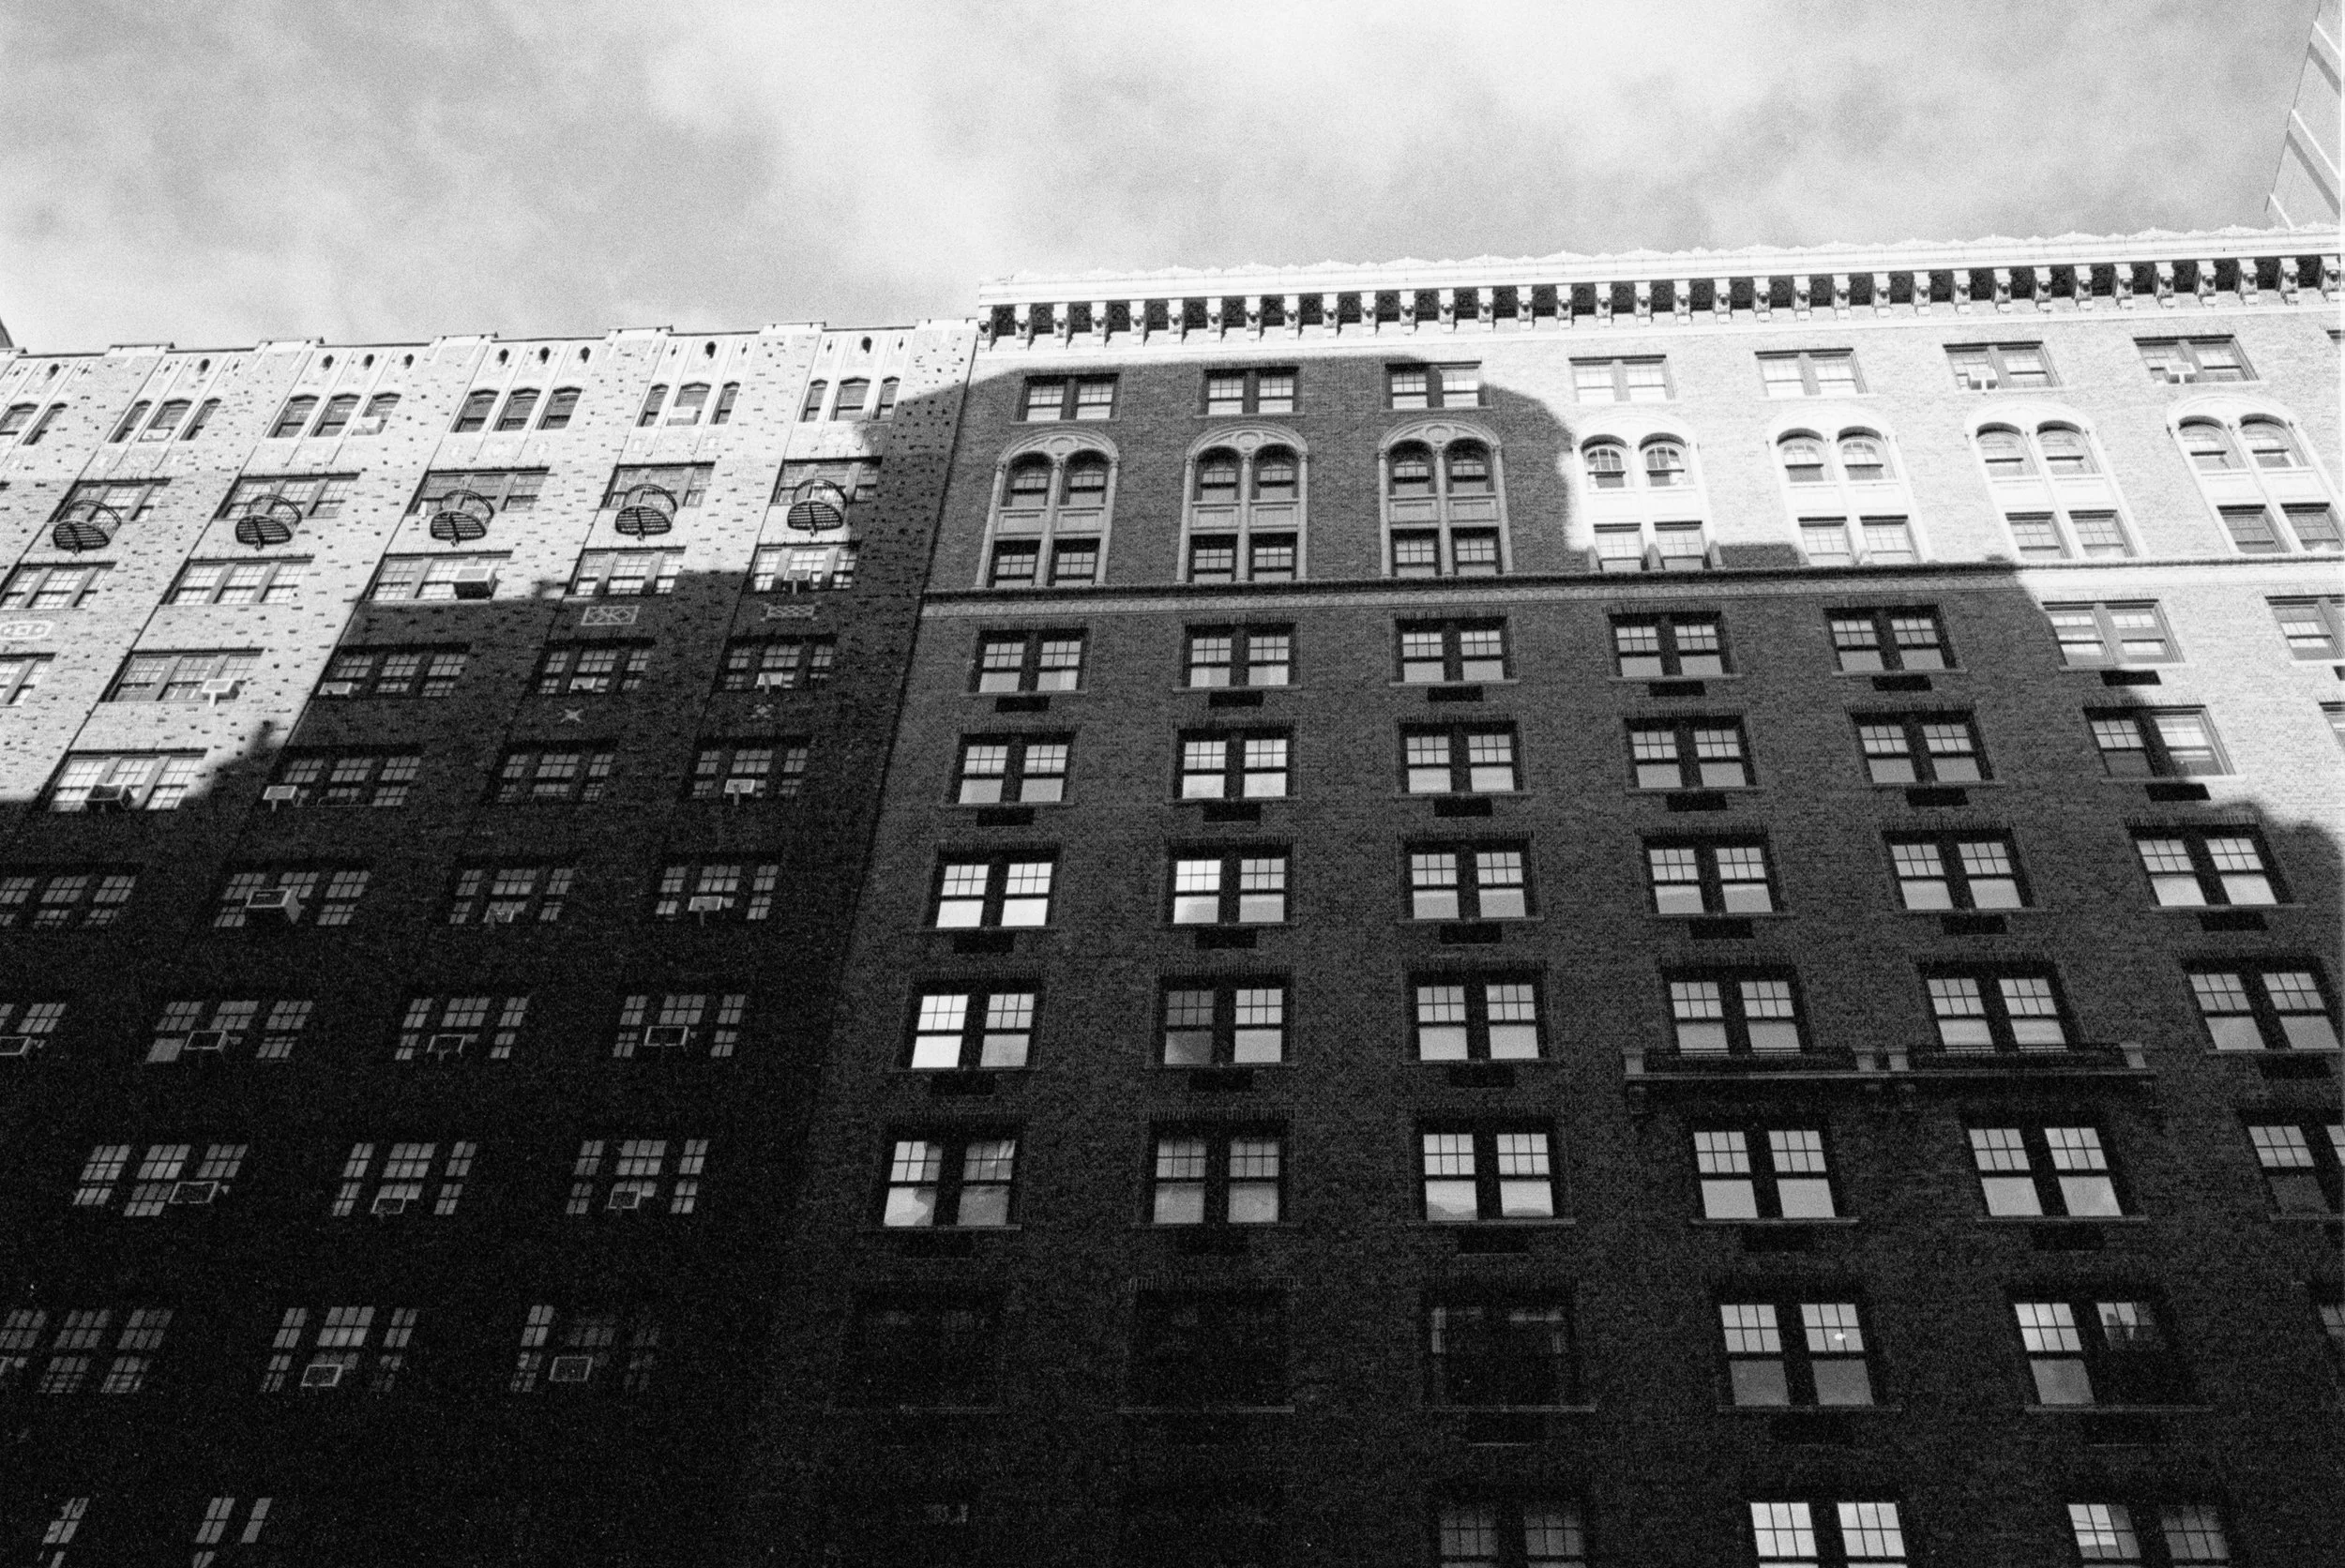


Thoughts
To me, this experiment was a great way to let go of expectations and just have fun. I'll admit I felt an itch at times to see what my images looked like, but then I just loaded up another roll and my focus shifted toward taking more pictures rather than obsessing over the ones I already got. Overall, it was a liberating experience and I plan on continuing with it into the future, although I'll most likely keep it in the two-to-three month range rather than eight months.
Here are some of my Pros and Cons of this approach:
Pros:
This approach kept me in the moment. I didn’t feel the pressure to upload pictures onto social media, so I remained present and just enjoyed myself
I found myself focusing more on my approach to photography rather than the results. It helped me practice interacting with people and staying focused on them rather than the back of my camera (shooting film helped with this)
It forced me to learn patience - something I don’t have enough of
It was really exciting seeing pictures I forgot I took! As I was hanging the negatives in my bathroom to dry, I felt all giddy inside looking at some of the frames. I felt like a five-year-old on Christmas morning
If shooting film, this approach could save you money as it is more cost effective to process multiple rolls at a time
Cons:
For some of the images - not many, but some - I found myself shooting digital versions, too, “just in case.” So when I processed and scanned those images, it wasn’t as exciting as it would have been had I not shot digital versions. I strongly urge against doing this, and you almost need to remind yourself of this rule every time you shoot because it’s just second nature. Trust yourself, trust your camera and don’t worry about taking a digital copy. It’s part of the fun, not to mention the entire point of this experiment
One word of advice for those of you considering doing this experiment with film: If you are buying your first film camera for this, I strongly recommend shooting a couple rolls, processing and scanning first before starting this experiment. This is mainly because you want to make sure your camera is working properly before you spend however many months shooting only to get them back and find there are some crazy light leaks or something going on. Since you won’t be seeing your images for a while, you want to at least have the peace of mind knowing your camera is working properly.
If you are considering trying this experiment with digital, I suggest putting some obstacles in place to prevent you from giving in to the temptation of looking at your pictures. For example, try putting a piece of Gaffer tape on your camera screen and treat it as if it were a film camera. It might also help to put the images on a flash drive after each shoot and then give that flash drive to a close friend or relative with the instructions to not give it back until a predetermined amount of time has passed.
Either way, I really hope this post inspires you to try this experiment yourself. Even if you only do it with some of your images and not all of them, and even if you only wait a couple months before looking, you will learn a lot about yourself and your photography during this process. And I think the act of taking pictures for yourself rather than others will help to re-inspire your creativity and rediscover what made you fall in love with photography in the first place. If you have already been practicing this approach, I’d love to hear your experience in the comments below!
Thanks for reading and happy shooting!
Matt